The "Visited a page" trigger allows you to add a contact to a workflow when they visit a specific page on your website that meets your defined conditions. This guide will help you set up and understand the functionality of this trigger.
Note: This trigger requires the Website Tracking Code to be installed on your website. Without this code, Gist won't be able to track page visits, and the trigger will not function.
Setup
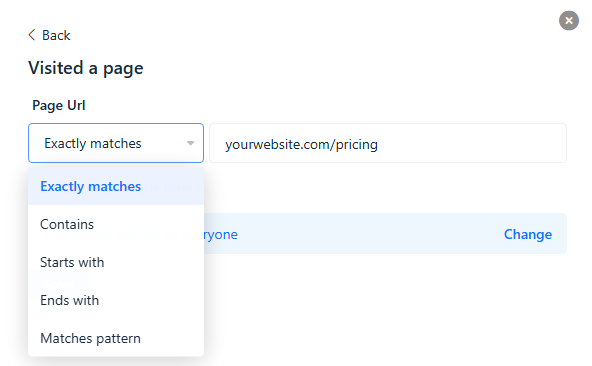
1. Choose from the following conditions to specify the URL condition:
- Exactly matches
- Contains
- Starts with
- Ends with
- Matches pattern (wildcard *)
Notes:
- Trailing slash is ignored in all conditions.
- HTTP protocol, www, subdomains, etc., are compared in all conditions.
- URL parameters are ignored in "exactly matches" and "matches pattern."
2. Enter the specific page that will trigger the workflow step.
3. Click Save.
Examples
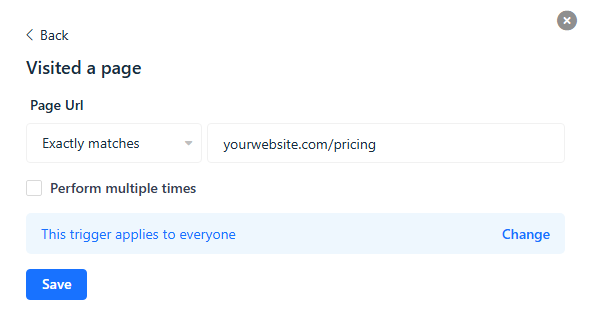
To target contacts who visit your pricing page, select "exactly matches" and enter yourwebsite.com/pricing in the URL box.
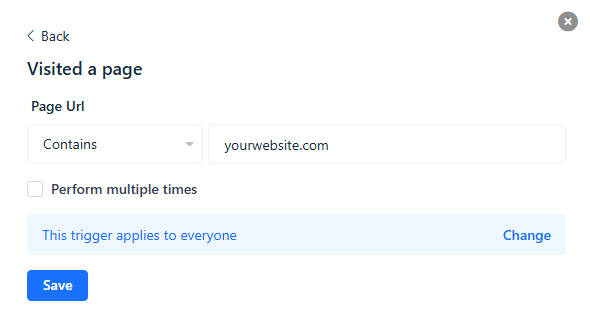
To target contacts who visit any page on your website, select "contains" and enter yourwebsite.com in the URL box.
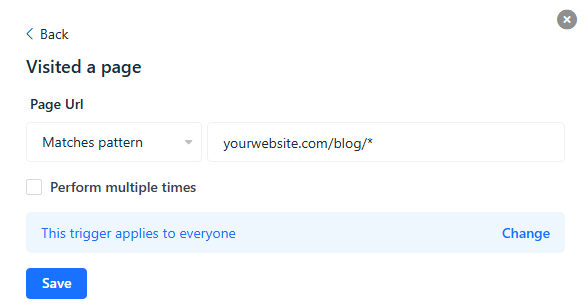
To target contacts who visit any blog post on your website, select "matches pattern" and enter yourwebsite.com/blog/* in the URL box. This will include all URLs that start with yourwebsite.com/blog/, such as:
- yourwebsite.com/blog/post1
- yourwebsite.com/blog/post2
- yourwebsite.com/blog/category/post3
Note: This trigger only applies to contacts who visit the page after you turn on the workflow. It does not apply to contacts who have visited the page in the past. To enroll past contacts, use the "Matched a segment" trigger and filter contacts using event conditions.
Common Questions
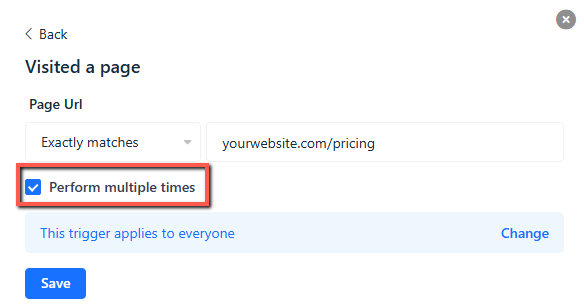
Q: How can I trigger the "Visited a page" step more than once?
A: By default, this step triggers only once when the contact visits the page, and subsequent visits do not re-enroll the contact. However, you can enable the "Perform multiple times" checkbox to enroll the contact whenever they visit the page.