

This trigger allows you to enroll contacts from other apps into a workflow in Gist. For example, you can send leads from a Typeform to Gist through this trigger. Whenever a lead submits the Typeform, they will be automatically enrolled into your Gist workflow.
How it works?
Webhooks are a way that your apps or services can send information to Gist. You can think of webhooks as ways that apps can speak to and notify each other. With a webhook trigger, you can “listen” for these notifications from your other apps or services and enroll contacts into a workflow for every notification.
For example, you can trigger a workflow when the following events happen in other tools:
- An order is paid in Shopify
- A deal is closed in Hubspot
- An invoice is created in a custom accounting application
Note: The app from which you'd like to receive data must also support webhooks. Gist webhooks are flexible and support the majority of the tools available.
Each "Receive a webhook" trigger in Gist has a unique Webhook URL. Other tools can send the contact's email address to that URL. Whenever Gist receives a hit on the URL with the email field, the associated contact is enrolled into the workflow.
Setup
Setting up a webhook trigger may appear complicated at first but it's actually easy and straightforward.
Step 1: Create the trigger in Gist
- Open the workflow in your Gist workspace.
- Add a new trigger.
- Select "Receive a webhook" trigger from the list.
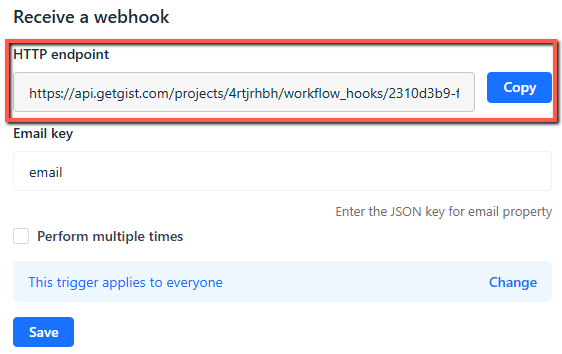
- Copy the HTTP endpoint by clicking the button.
Step 2: Setup webhook in the third-party tool
- Open the third-party tool from which you want to enroll contacts.
- Navigate to its webhooks page. (You'll often find it on your app's main settings page. If you’re unable to find it, check the app's help and support documentation)
- Create a new webhook in the app.
- Paste the webhook URL you copied from Gist in step 1.
- Select any options that app offers - including which data you want to send via the webhook. Make sure "email" field is present.
- Save your changes.
That's it.
Now, whenever the event you choose for the webhook in the third-party tool occurs, the contact matching with the "email" field in Gist will get enrolled into the workflow.
Note: If no matching contact exists, Gist creates a contact with the email address and then enrolls them into the workflow.
Testing the webhook trigger
To test the webhook trigger, you must perform the event tied to the webhook in your third-party app to trigger the webhook. For example, if you're connecting to a CRM tool such as Hubspot, you could add a new contact to Hubspot.
What is the Email key?
By default, the webhook trigger expects an "email" key to be present in the request JSON it receives.
For example:
{
  email: "john@example.com"
}
There can be other keys in this JSON that will be ignored and not stored or processed.
However, in some cases, the third-party tool may have the email property in a nested JSON object, for example:
{
  contact: {
    email: "john@example.com"
  }
}
In such cases, when configuring the webhook trigger, you can update the "Email key" field to let Gist know which key to look for. In the example above, you will need to enter contact.email into the "Email key" field.
Example Use Cases
Lead Generation: Automatically enroll leads from a Typeform or Google Form submission into a Gist workflow for follow-up emails and nurturing.
Event Registrations: Enroll contacts who register for a webinar or event through a third-party tool into a Gist workflow for event reminders and post-event follow-ups.
Customer Feedback: Enroll contacts who submit feedback or survey responses from tools like SurveyMonkey into a Gist workflow to send thank-you messages and request further information.