

The Bot Flow Builder is a powerful tool that allows you to design and build a unique conversation path for your bot, tailoring the user's journey to best suit your business needs.
It can automate a series of questions and responses, enabling your bot to perform tasks like lead qualification, meeting scheduling, or support ticket creation. This guide provides a step-by-step overview of the Bot Flow Builder and how to create a compelling bot from scratch.
Note: You must have the necessary permissions to send messages to multiple recipients and have both Automation permissions to create, edit, and set Bot flows live.
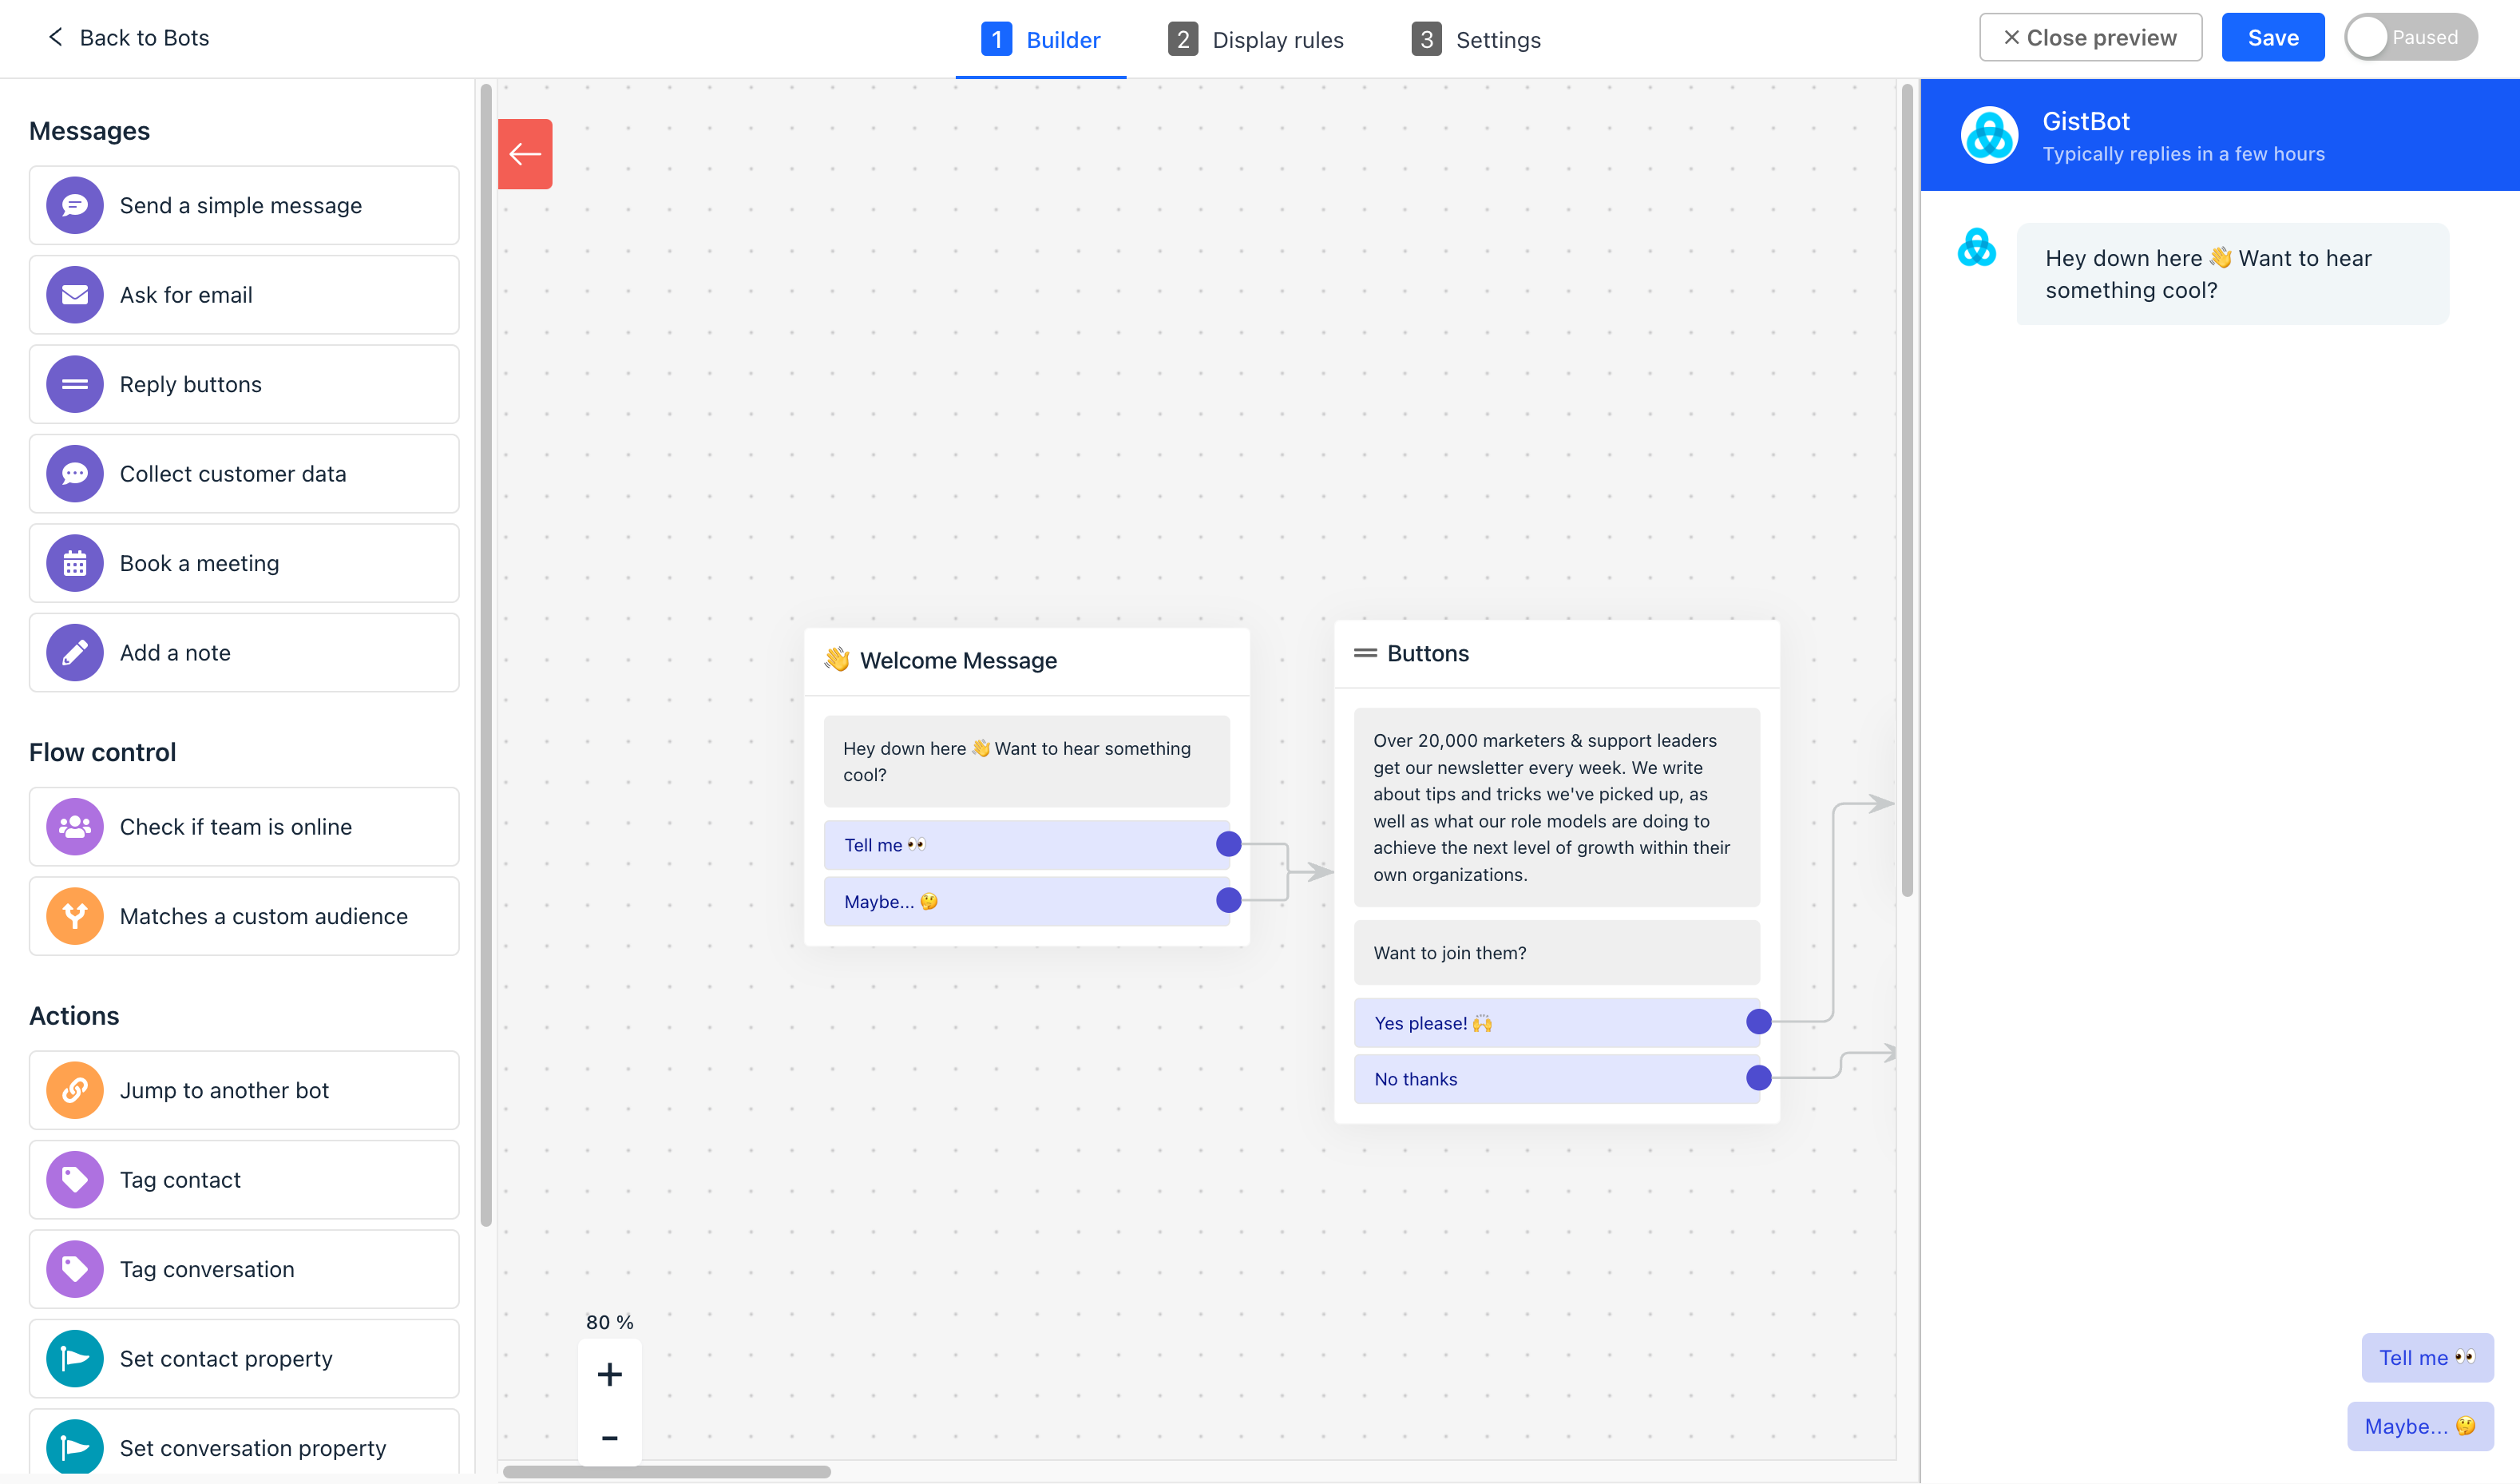
Bot Builder UI
The Bot Flow Builder comprises multiple components, each with a unique role in the bot creation. These components work together to shape a conversational flow that will govern your bot's responses and actions.
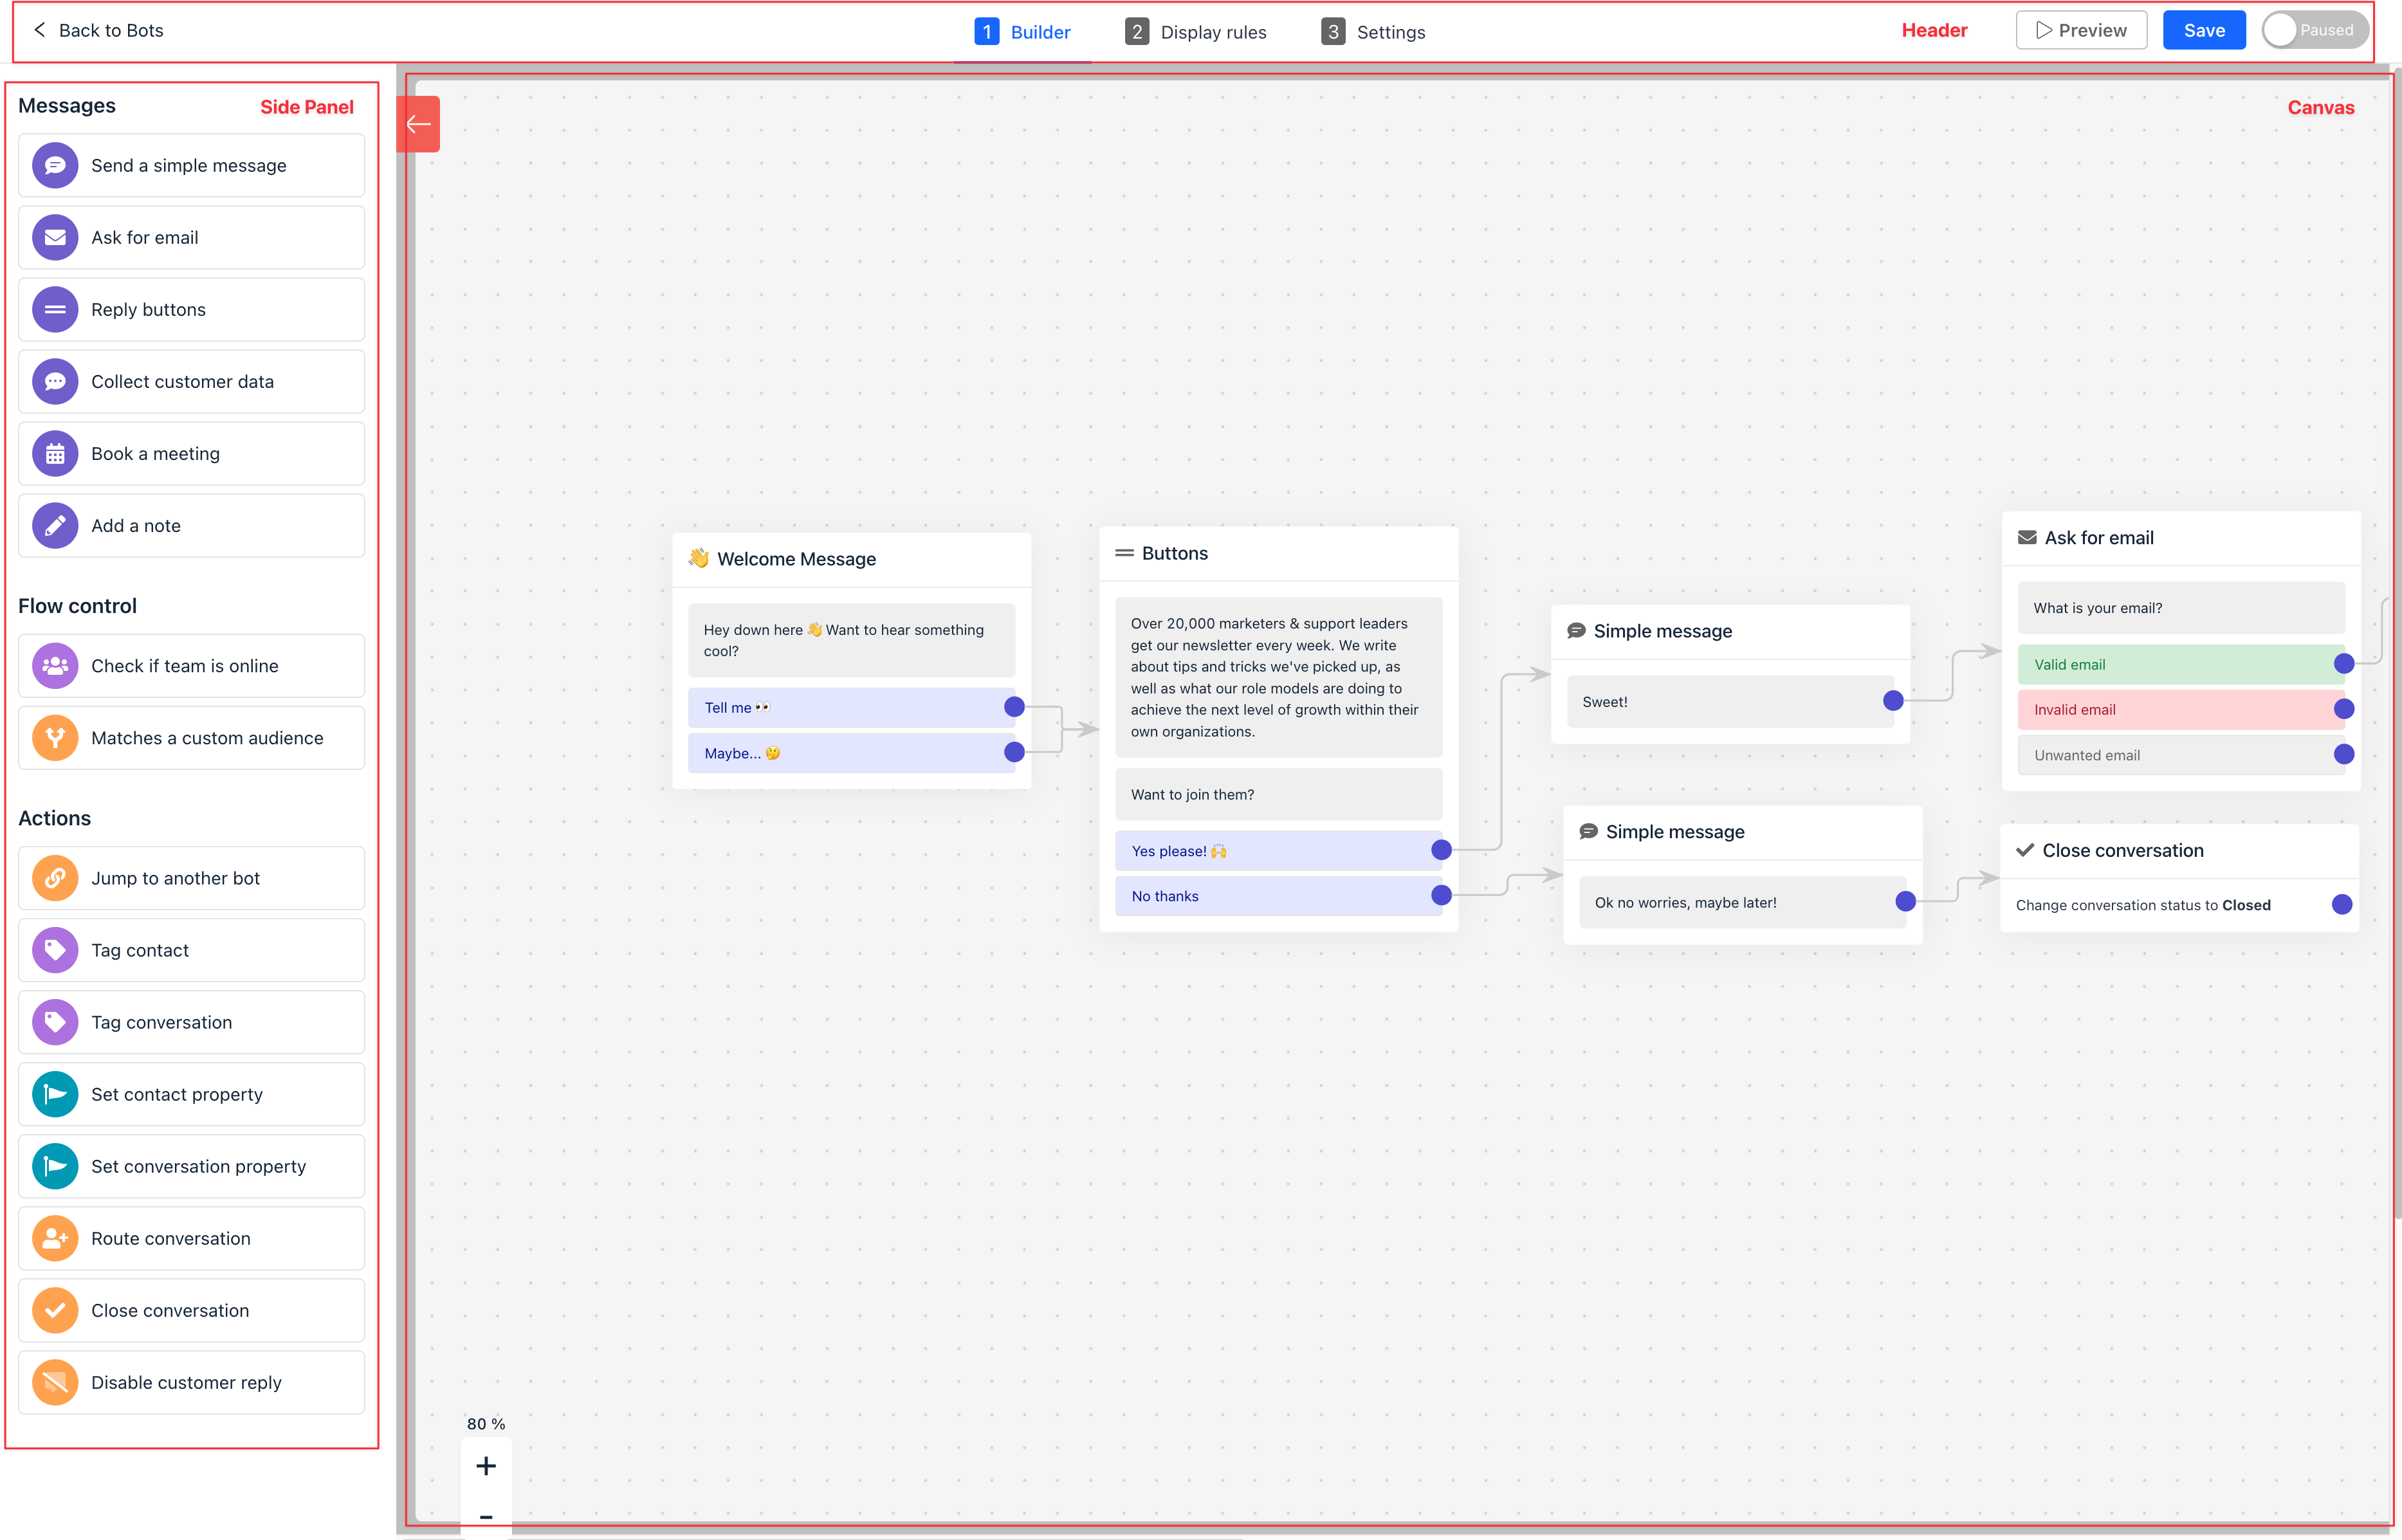
1. Header
The Header sits at the top of the screen and contains key functionalities for managing your bot flow:
- Builder: This tab houses the core functionality for building your bot flow.
- Display Rules: Define where and when your bot will appear.
- Settings: Configure global parameters for your bot.
- Preview, Save, and Set Live Buttons: Test, save, and publish your bot flow, respectively.
2. Canvas
The Canvas is where you will map out the structure of your bot's conversation flow in a visual, decision-tree format. Each step corresponds to a message, action, or condition in your bot's conversation.
Navigation Controls: The bottom-left of the Canvas contains controls for zooming in and out, allowing you to better view and manipulate the flow.
Bottom Menu: This helps you zoom out and navigate your builder when your bot flow becomes expansive.
3. Side Panel
The Side Panel is where each step in your bot flow comes to life. It changes dynamically based on the type of bot step you're working on.
- Blocks Panel: Here, you'll find a list of all available blocks that can be dragged and dropped into your bot flow.
- Configuration Panel: This appears when you select a step or add a new one to the bot flow. It contains the configuration options for each bot step.
4. Preview Tab
Before making your bot flow live, preview the customer experience to ensure it functions as you intended. Click the Preview button in the Header to open an interactive preview in the Messenger widget.
Building a Bot Flow
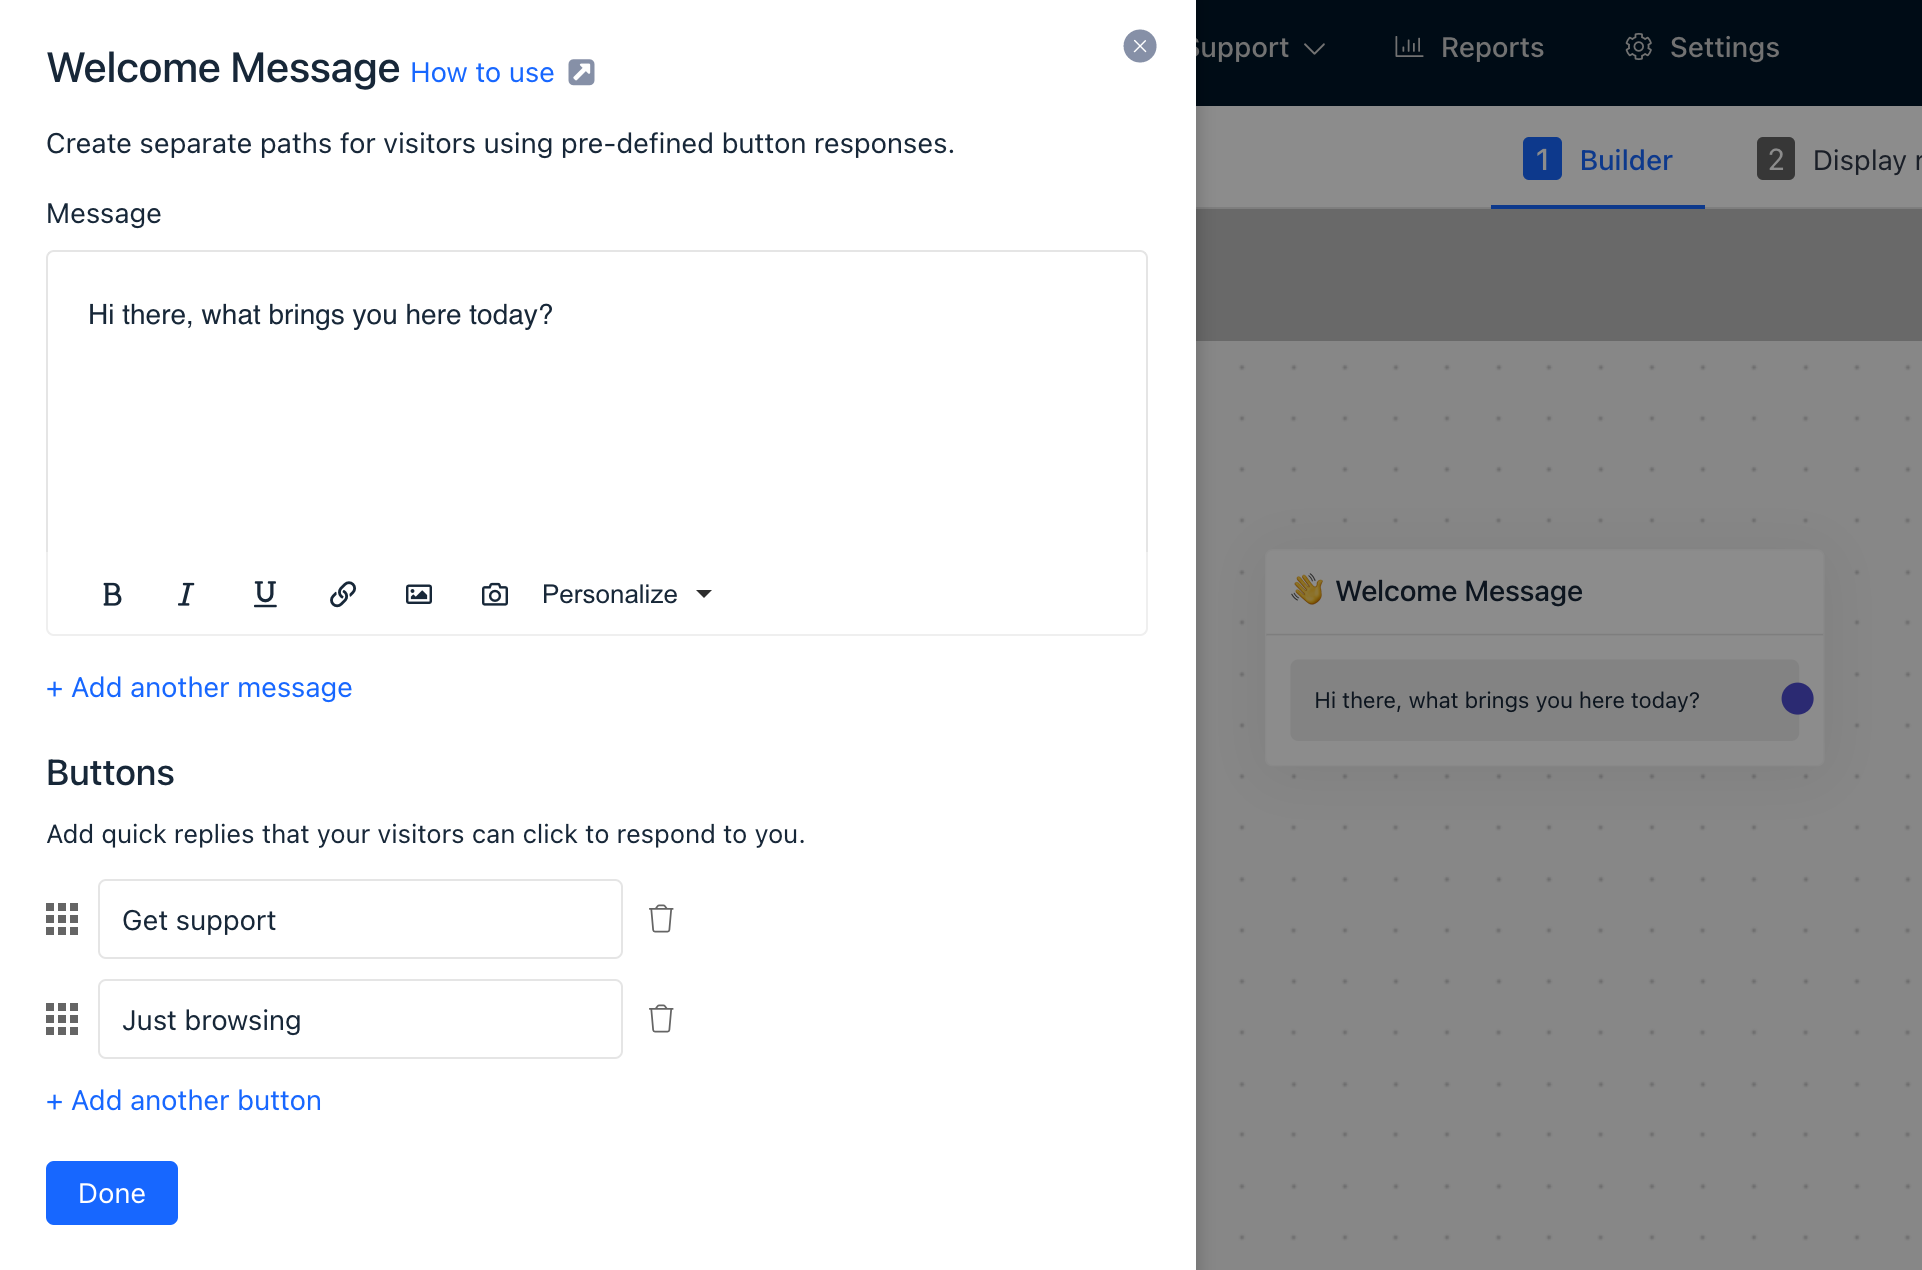
1. Adding a Path from the First Block
Every bot flow begins with a welcome message on Canvas. This is your bot's first impression, so make it count!
Add reply buttons to give customers a way to interact with the bot by offering options to choose from.
Add your first block by dragging it from the Blocks Side Panel onto the Canvas. Connect this block to the welcome message using the blue connector.
2. Adding a Message, Action or Condition within an Existing Path
To add more depth to your bot flow, drag and drop additional blocks from the Blocks Panel to the Canvas.
3. Adding Content to Paths
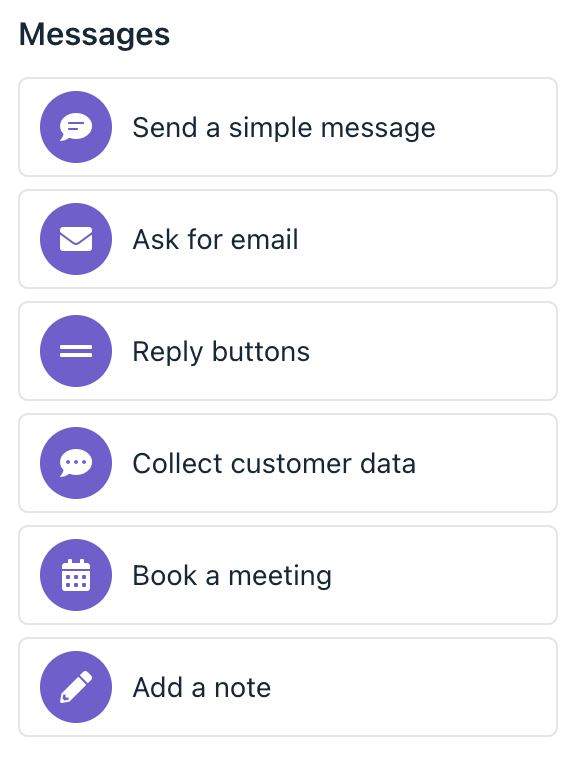
Each path in your bot flow can be populated with various types of content:
- Send a simple message
- Ask for email
- Reply buttons
- Collect customer data
- Collect customer reply
- Show expected reply time
- Book a meeting
- Add a note
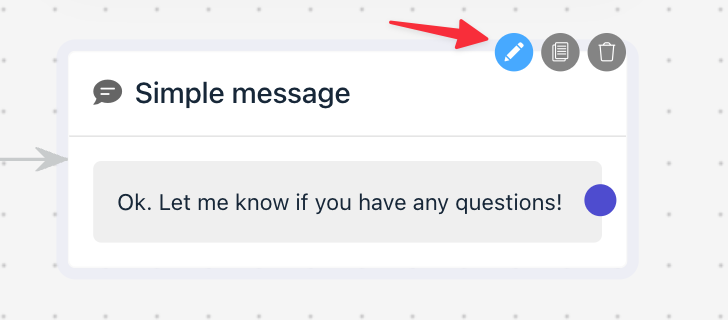
Edit the message by clicking the Edit icon on the step directly on the Canvas. The Side Panel will then provide you with a range of options to customize your message.
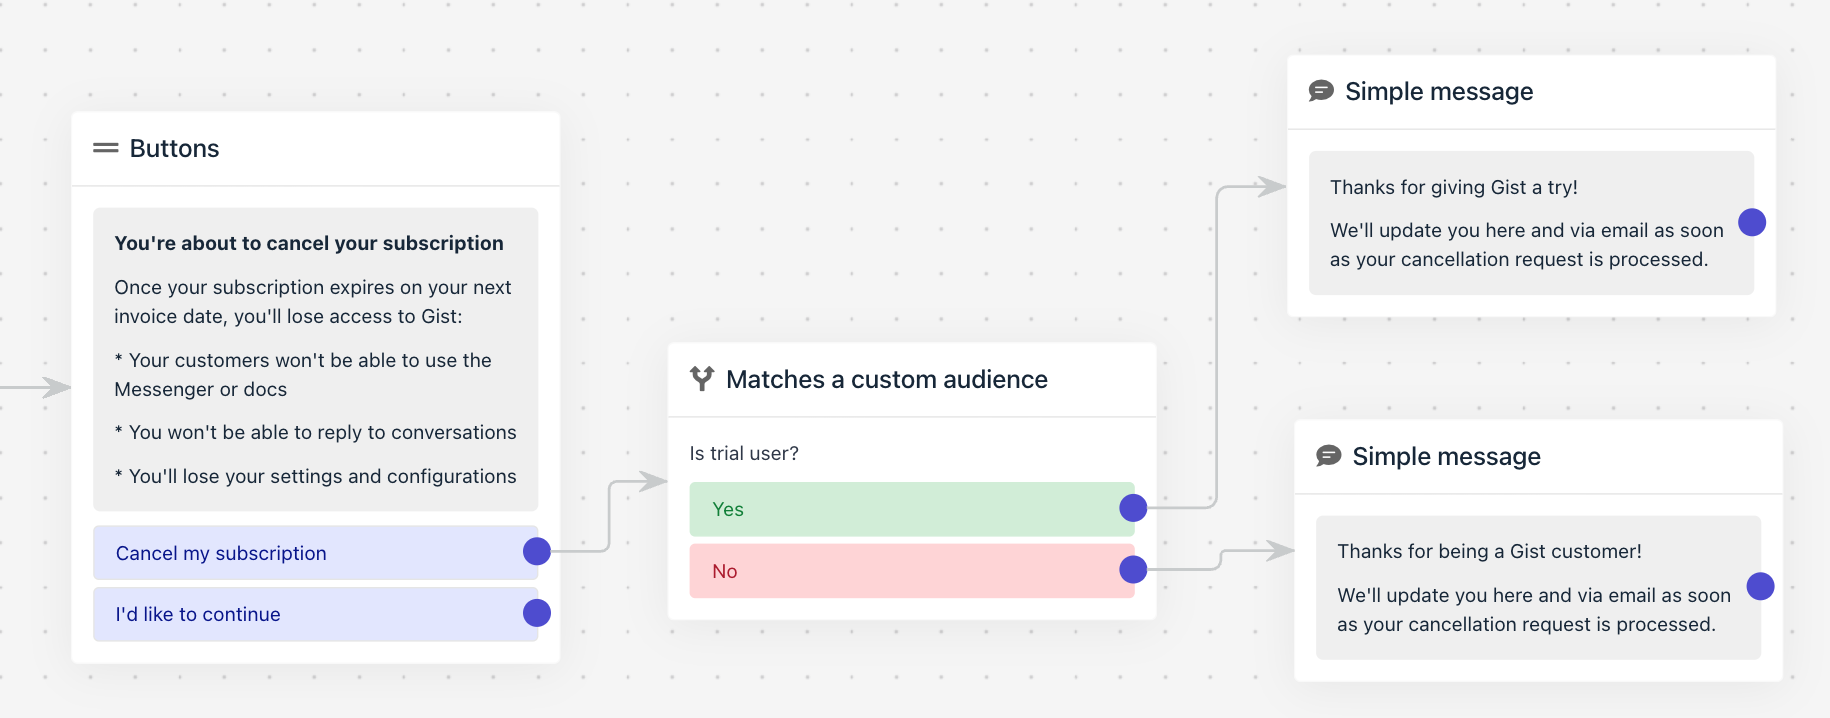
4. Branching Out: Adding Conditional Paths
Branches add complexity and versatility to your bot flow by allowing you to define conditions that determine the next step in the conversation.
You can also proceed to another path using:
- Reply buttons
- Team online
- Branches
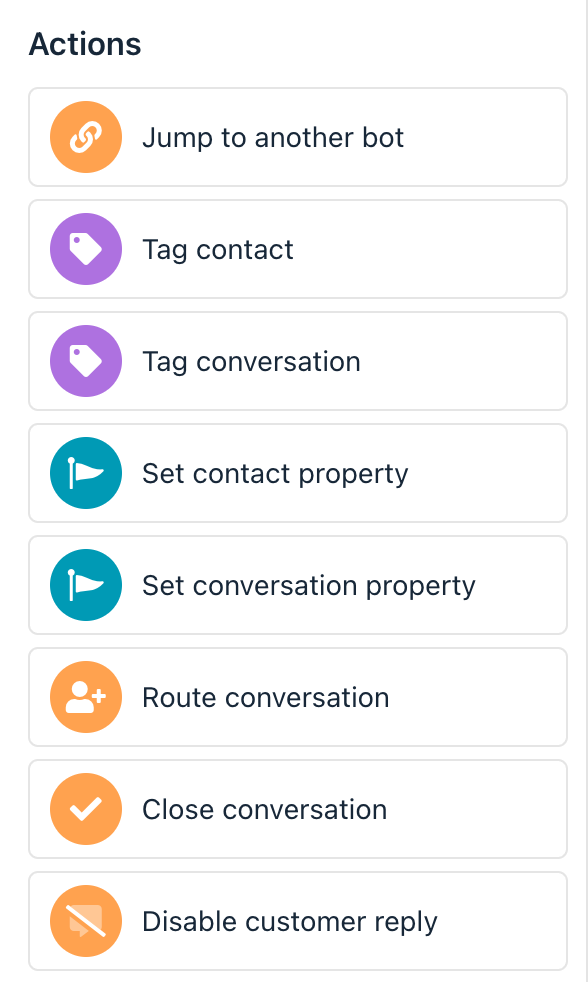
5. Add actions
You’ll have the option to add several conversation actions to your path.
- Jump to another bot
- Pass to Support bot
- Tag contact
- Tag conversation
- Set contact property
- Set conversation property
- Assign conversation
- Snooze conversation
- Close conversation
- Mark as priority
- Disable customer reply
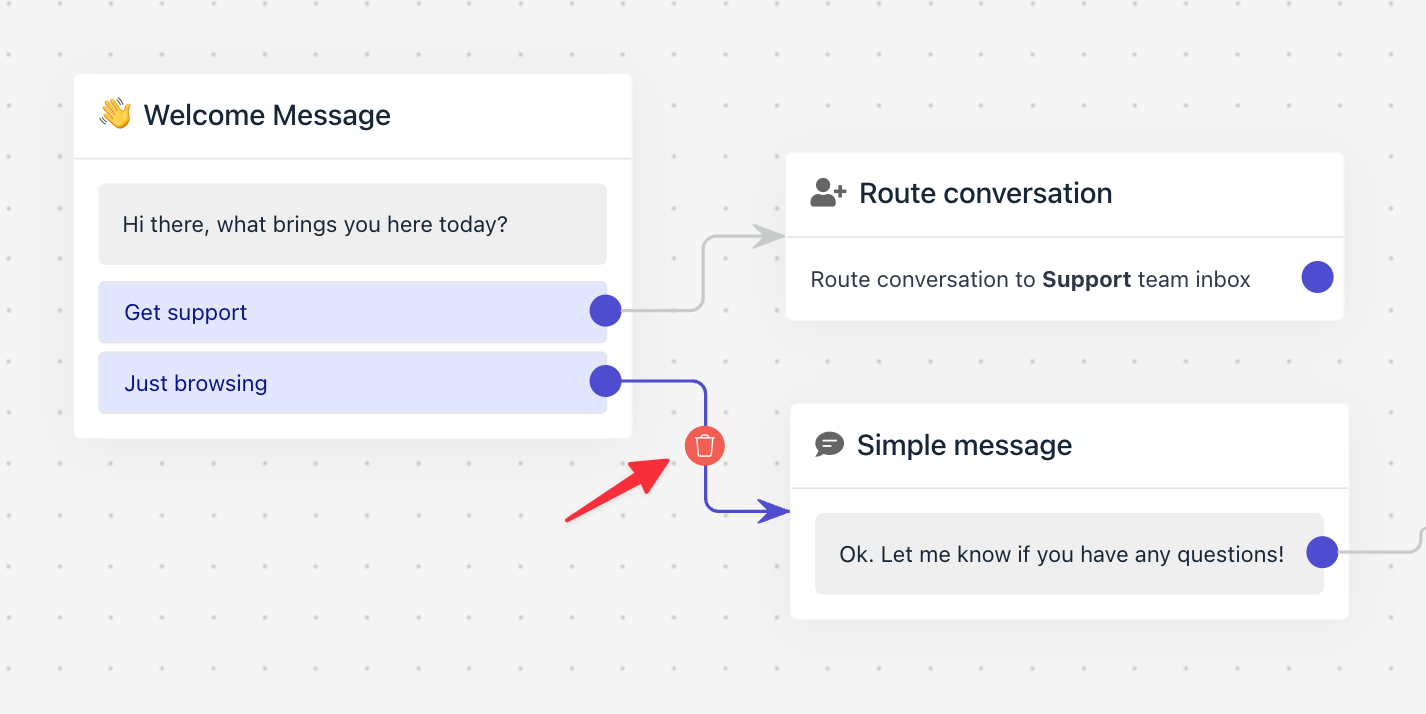
6. Deleting Paths
To delete a path, hover over it, and a red trash can icon will appear. Click this icon to remove the path from your bot flow.
7. Previewing and Publishing Bot Updates
Before you release your bot into the wild, you should preview its flow to ensure it's working as you intended. Click the 'Preview' button to open an interactive preview within the Messenger widget. Make sure you save the bot changes, before you preview it.
Once you're happy with your bot, click 'Save' and then 'Publish' to make your bot live.
Remember: Always click 'Save' before leaving the Bot Flow Builder. Otherwise, your changes won't be saved!
Best Practice: Start with High Traffic Pages
For a head start, we recommend creating a bot flow first for your top three most visited pages on your site. This will help you gain the most value from the bot builder right away. As you become more comfortable with the building process, you can then expand and add more bot flows to further optimize user interactions across your site.