

Today, we’re thrilled to introduce Gist's Visual Email Builder to help you create beautiful, responsive emails in minutes.
With the new email editor, you can now fully customize your emails with simple drag-and-drop editing and preview your emails on desktop and mobile.
Quickly design emails with simple drag-and-drop editing
Gist's Text Editor allows you to create text-based emails or upload HTML email designs. But if you aren’t familiar with HTML, you can create custom emails without coding using the Visual Email Builder.
Every time you go to make a new Broadcast email inside of Gist, you’ll be given the choice between building in the Text Builder or the Visual Builder.
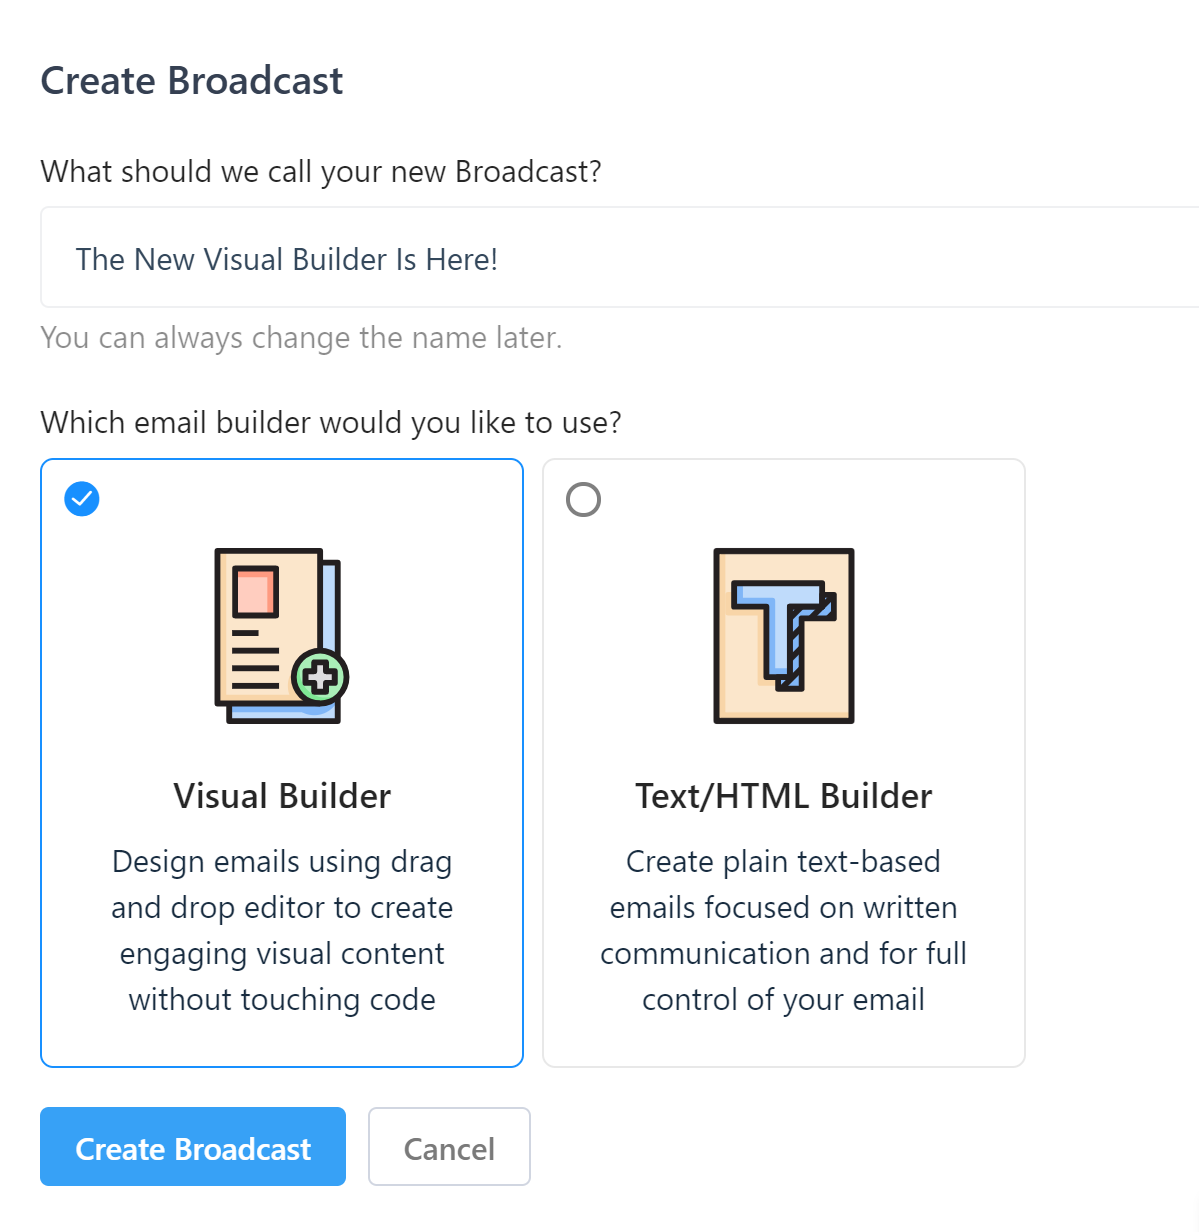
This pop-up lets you easily switch from writing text-based, personal emails to crafting an image-laden product showcase the next without doing anything more than clicking which builder you want to work in.
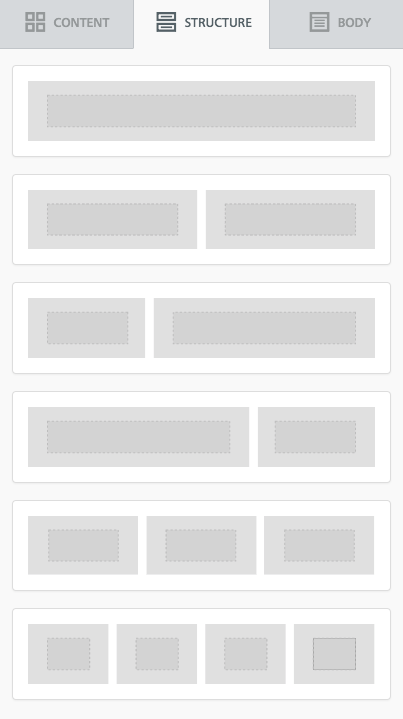
To get a better idea of what the editor looks like, check out the screenshot below: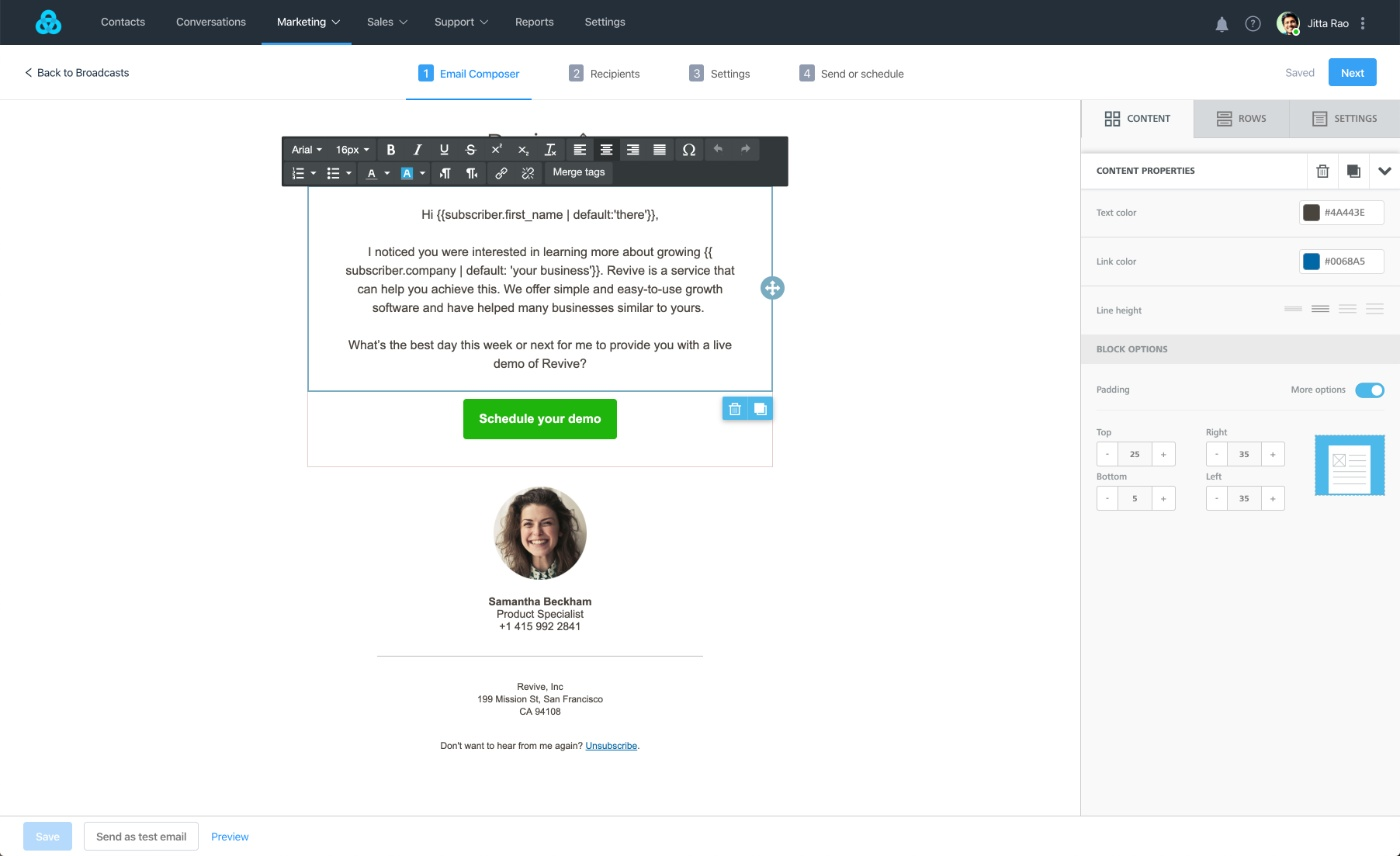
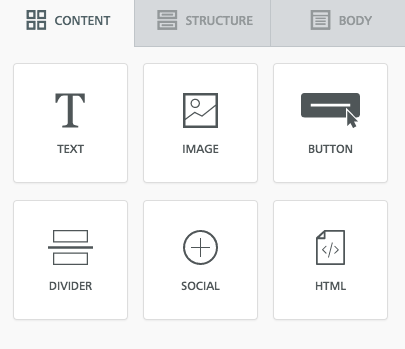
The editor is divided into three tabs: Content, Structure, and Body. The Content tab allows you to insert easy-to-use elements like images, call-to-action buttons, social media links, and text blocks.
By dragging and dropping, you can quickly organize, rearrange, and clone entire rows or individual content elements. Removing sections is easy, too; click the trash can.
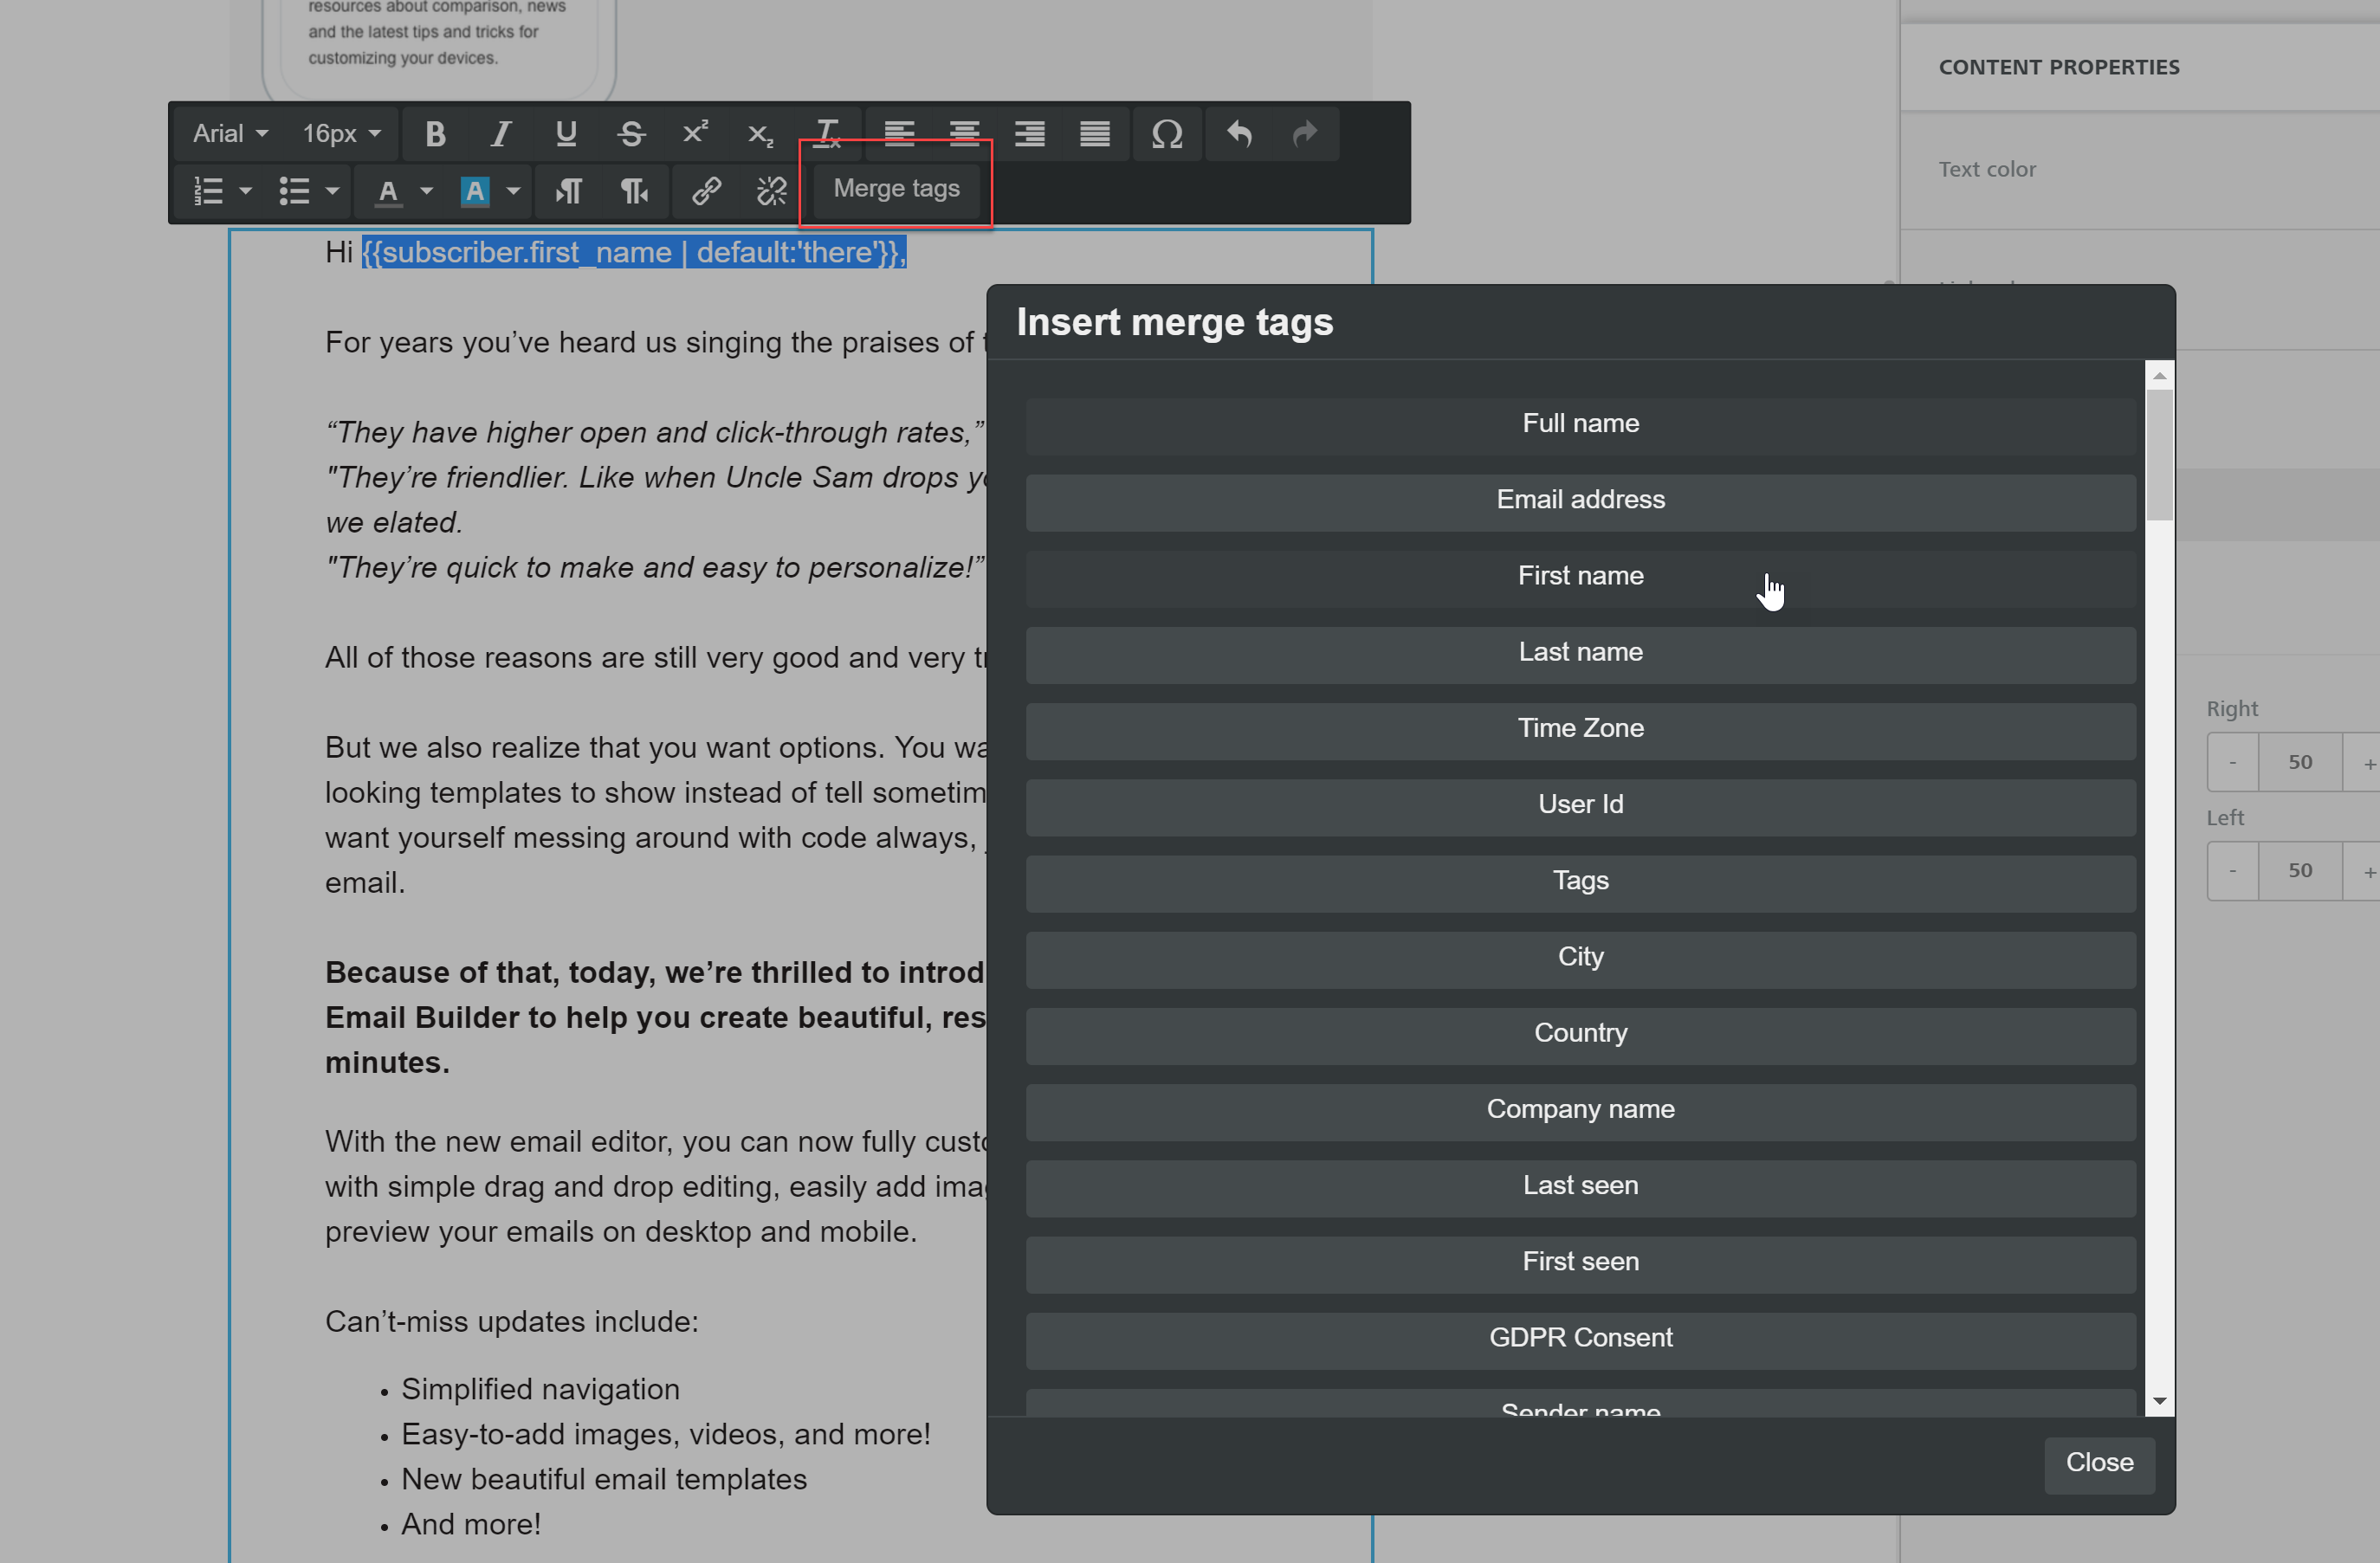
All text blocks, including your subject line and body copy, accept personalization variables, sometimes called “merge tags.” So, if you want to craft a personalized message for your readers, you can insert fields like first name, company name, or job title.
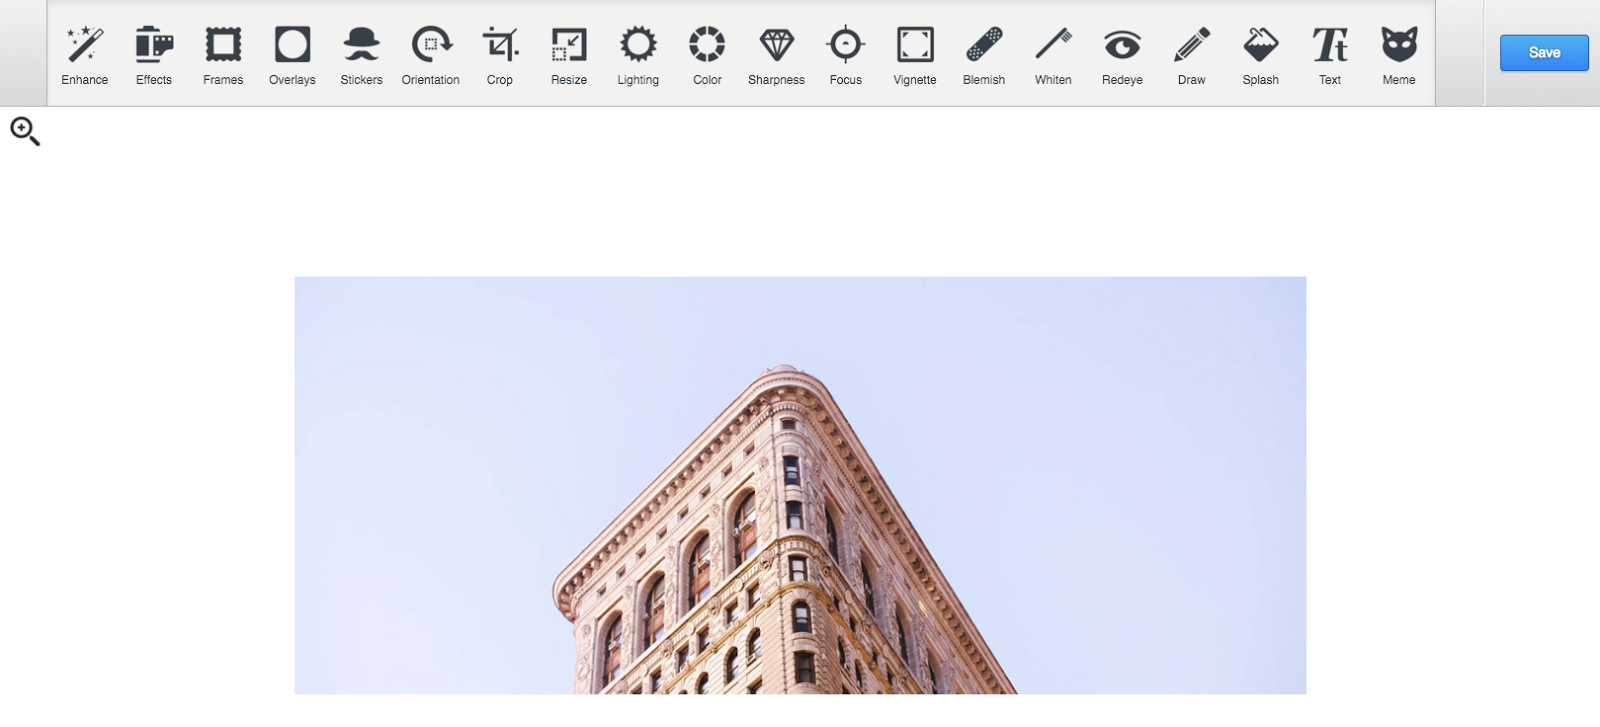
The Visual Editor also allows you to upload images and save them to folders for later use. Once you’ve inserted an image, you can resize it and edit it to your liking directly in the editor.
 The Structure tab helps you arrange your content. For example, you can put three images next to each other, try out a two-column format, or insert a full-width header by dropping blocks into your email.
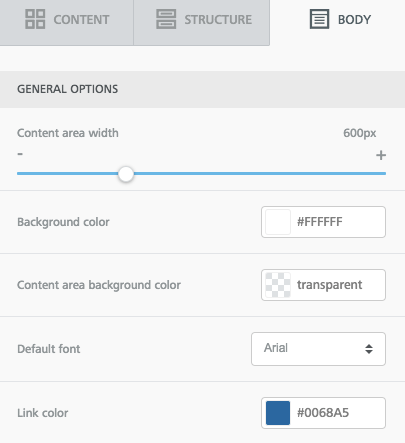
When you click on the Body tab, you can adjust properties like background colors, fonts, and content area width.
Together, these features give you the flexibility and functionality to create emails that match your brand’s style, all without writing a single line of code.
Add merge tags (otherwise known as personalization variables)
You can make your emails more personal by using personalization variables (otherwise known as "merge tags").
You can add them to any part of an email:
- Subject and and body (see below)
- From Name, From Email and Reply-to Email
- CC and BCC
- Links
You can also add fallbacks to personalization variables to handle situations where that particular contact doesn't have value in your chosen field.
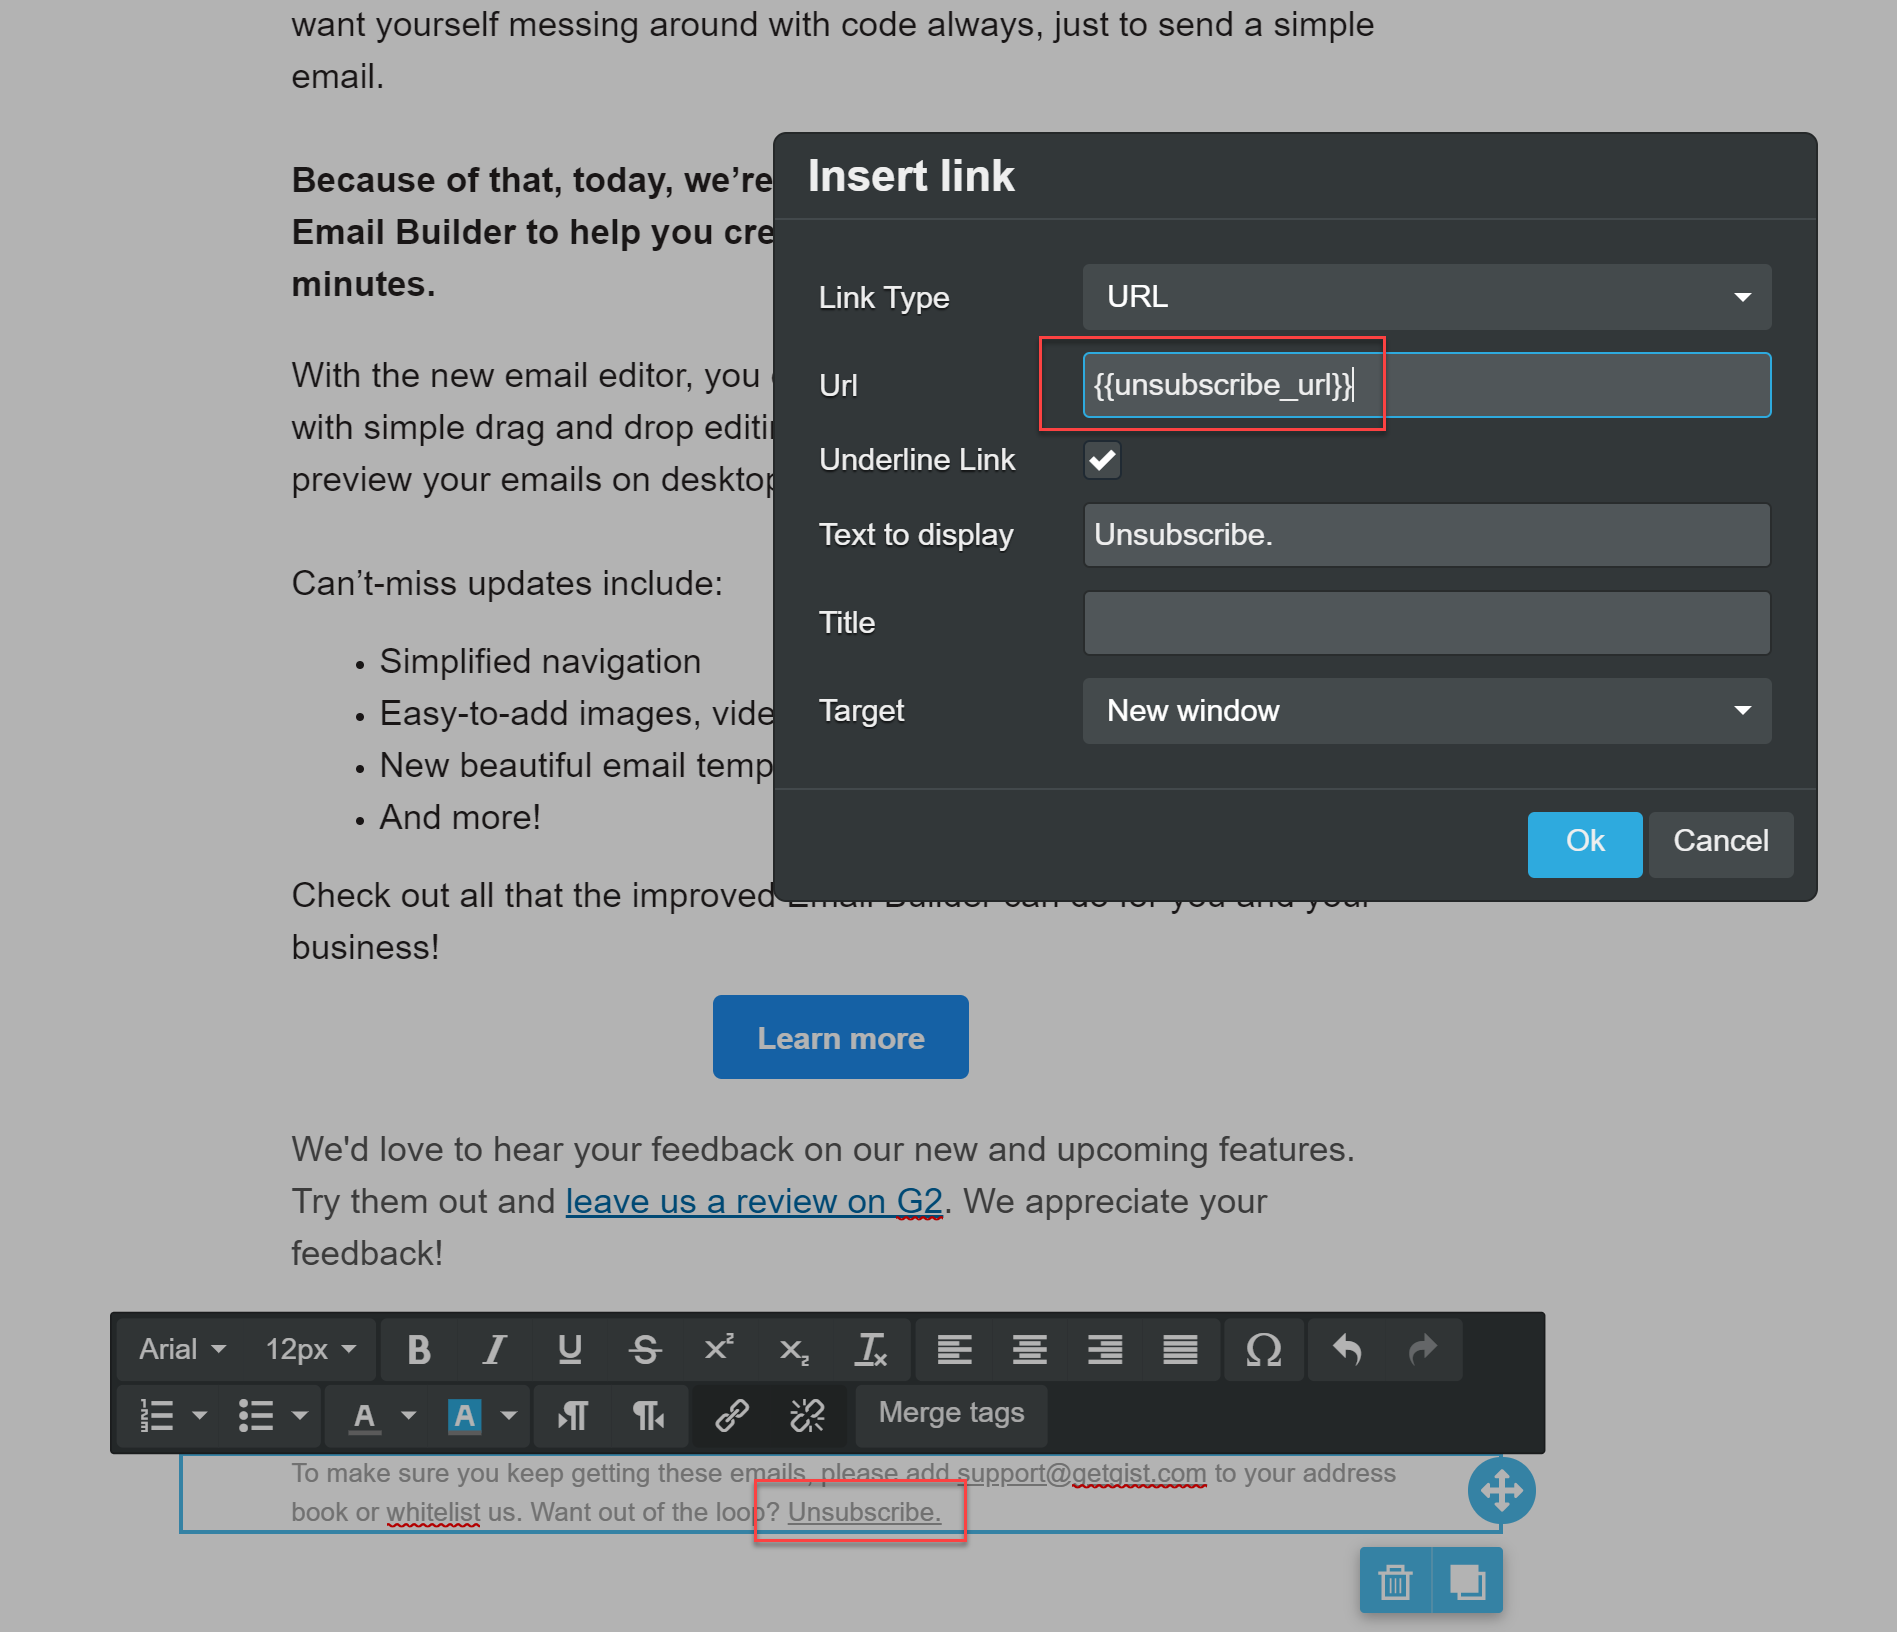
Add a customized unsubscribe link
To comply with our acceptable use policy, you must include an unsubscribe link in your emails. You can customize the text, position, size, and color of the unsubscribe link in each of your emails. However, you must ensure it is clear and conspicuous.
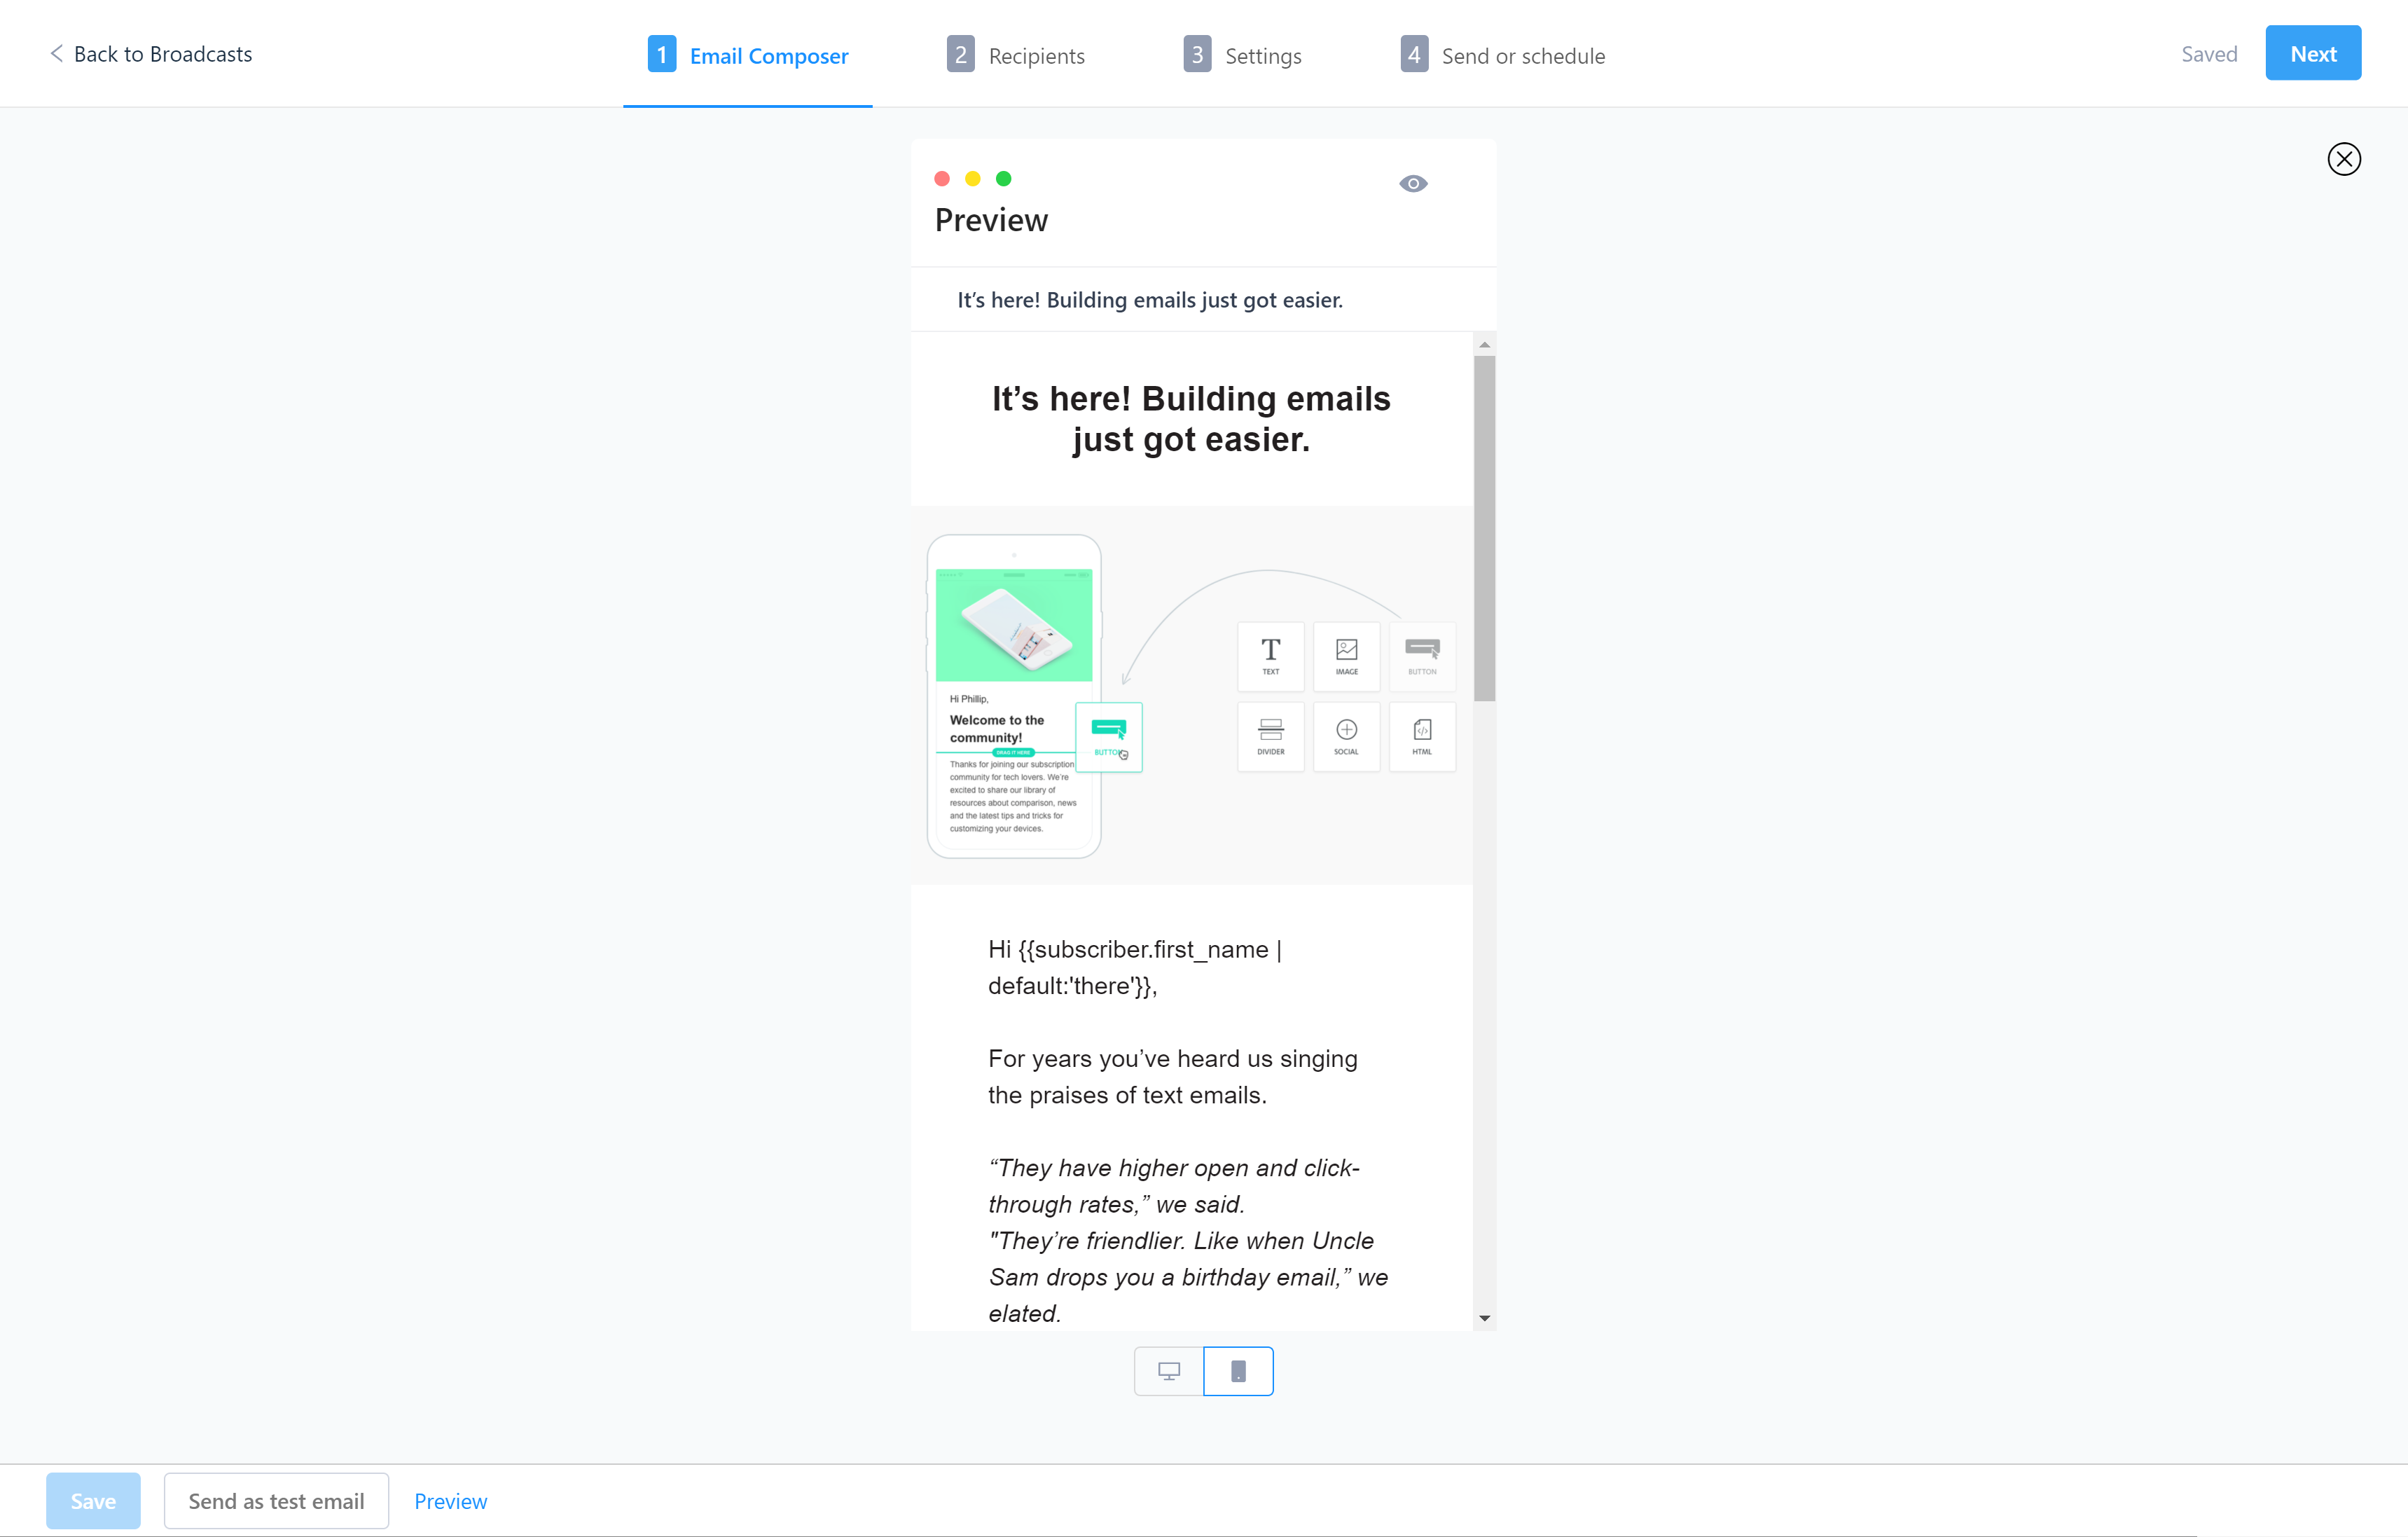
Preview your emails on desktop and mobile
The emails you create with the Visual Editor have a “responsive design.” This means they respond to a screen’s size and look good on every device.
With the Visual Editor, you can see exactly what your responsive emails will look like on desktop and mobile by selecting “Preview” next to the “Send Test” button in the bottom left corner.
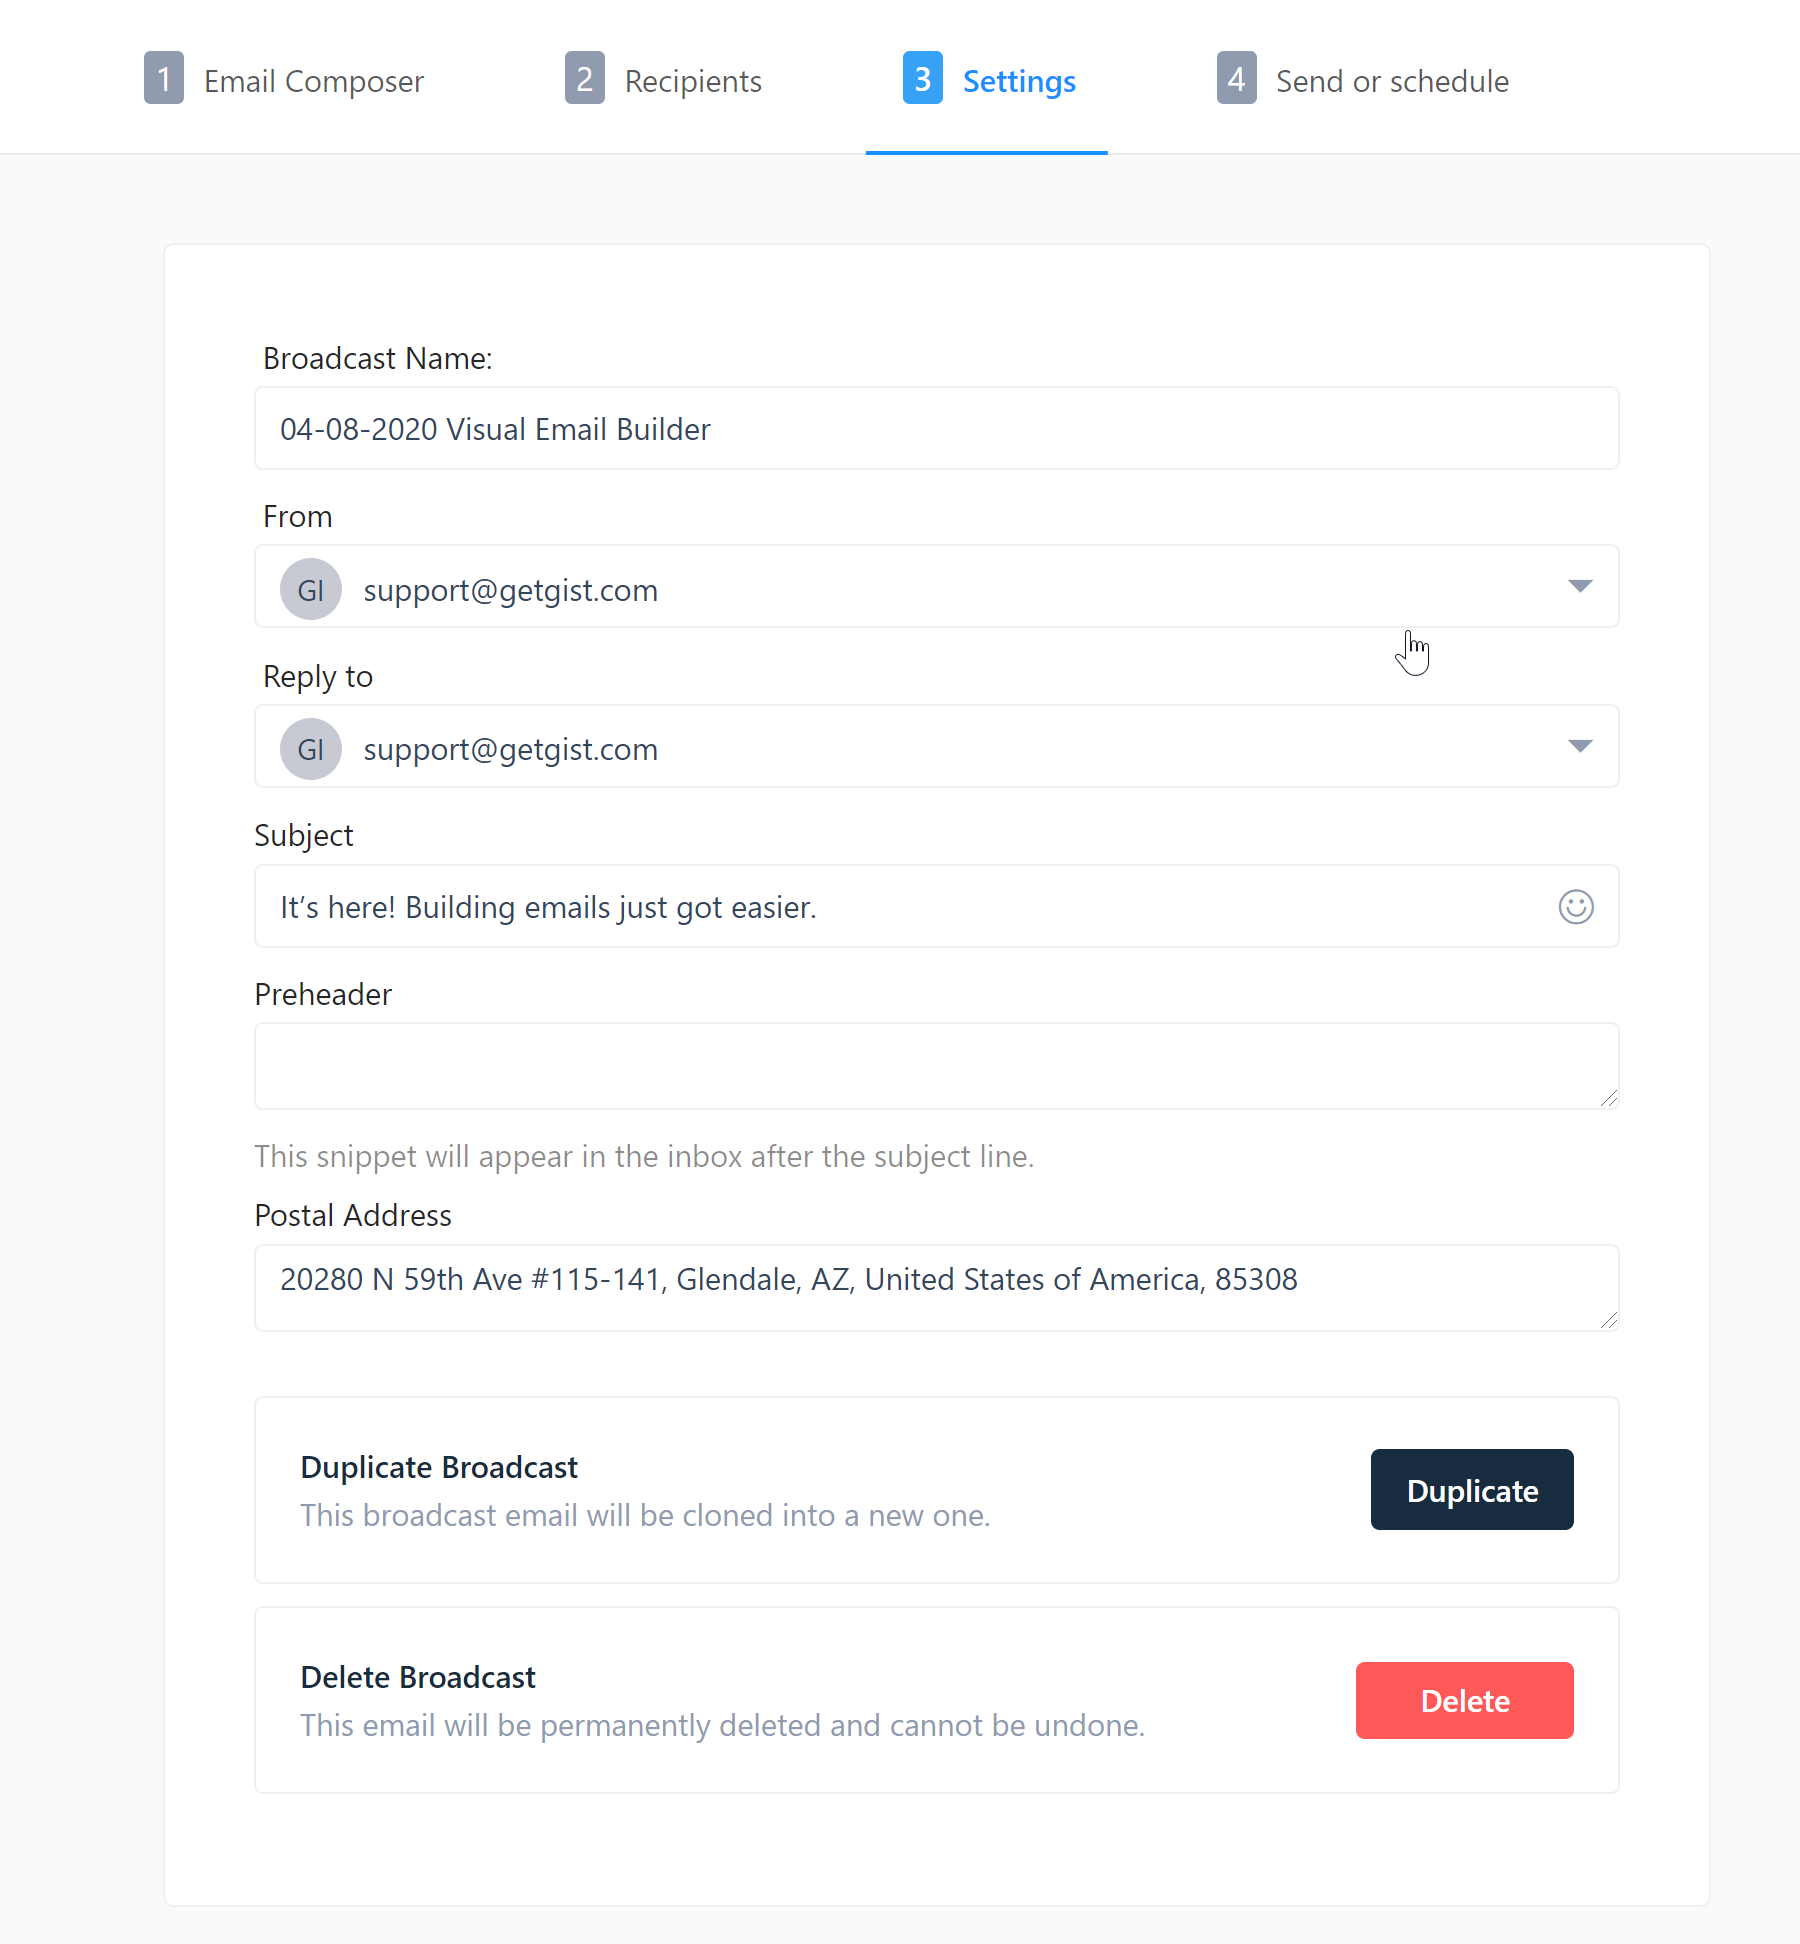
Edit your email settings
At the top of the screen, click the Settings tab. Here, you can customize the following settings:
- Broadcast name: the internal name of the email that appears in the email dashboard. This name is not visible to email recipients.
- From address: the email address the email is sent from. Click the dropdown menu to select the email address of a Gist user in your account.
- Reply to address: the email address the email replies should be sent to. Click the dropdown menu to select the email address of a Gist user in your account.
- Subject line: the email subject line that appears in an inbox. Enter your email subject in the Subject line field. Click the emoji icon emoji to add emojis to your subject line
- Preheader text: add preview text that usually appears next to the email subject line in an inbox.
This editor will streamline your team's process for creating emails that personalize messages to your audience.
Want to find out more about the new drag-and-drop editor?
Check it out here.