

In this article, you will learn the step-by-step process of adding a form element to your Gist form, which allows you to efficiently gather valuable contact information from your visitors.
Setting up the form element
1. Add a form element
To begin, click the green + icon to add an element to a column and choose the "form" element type.
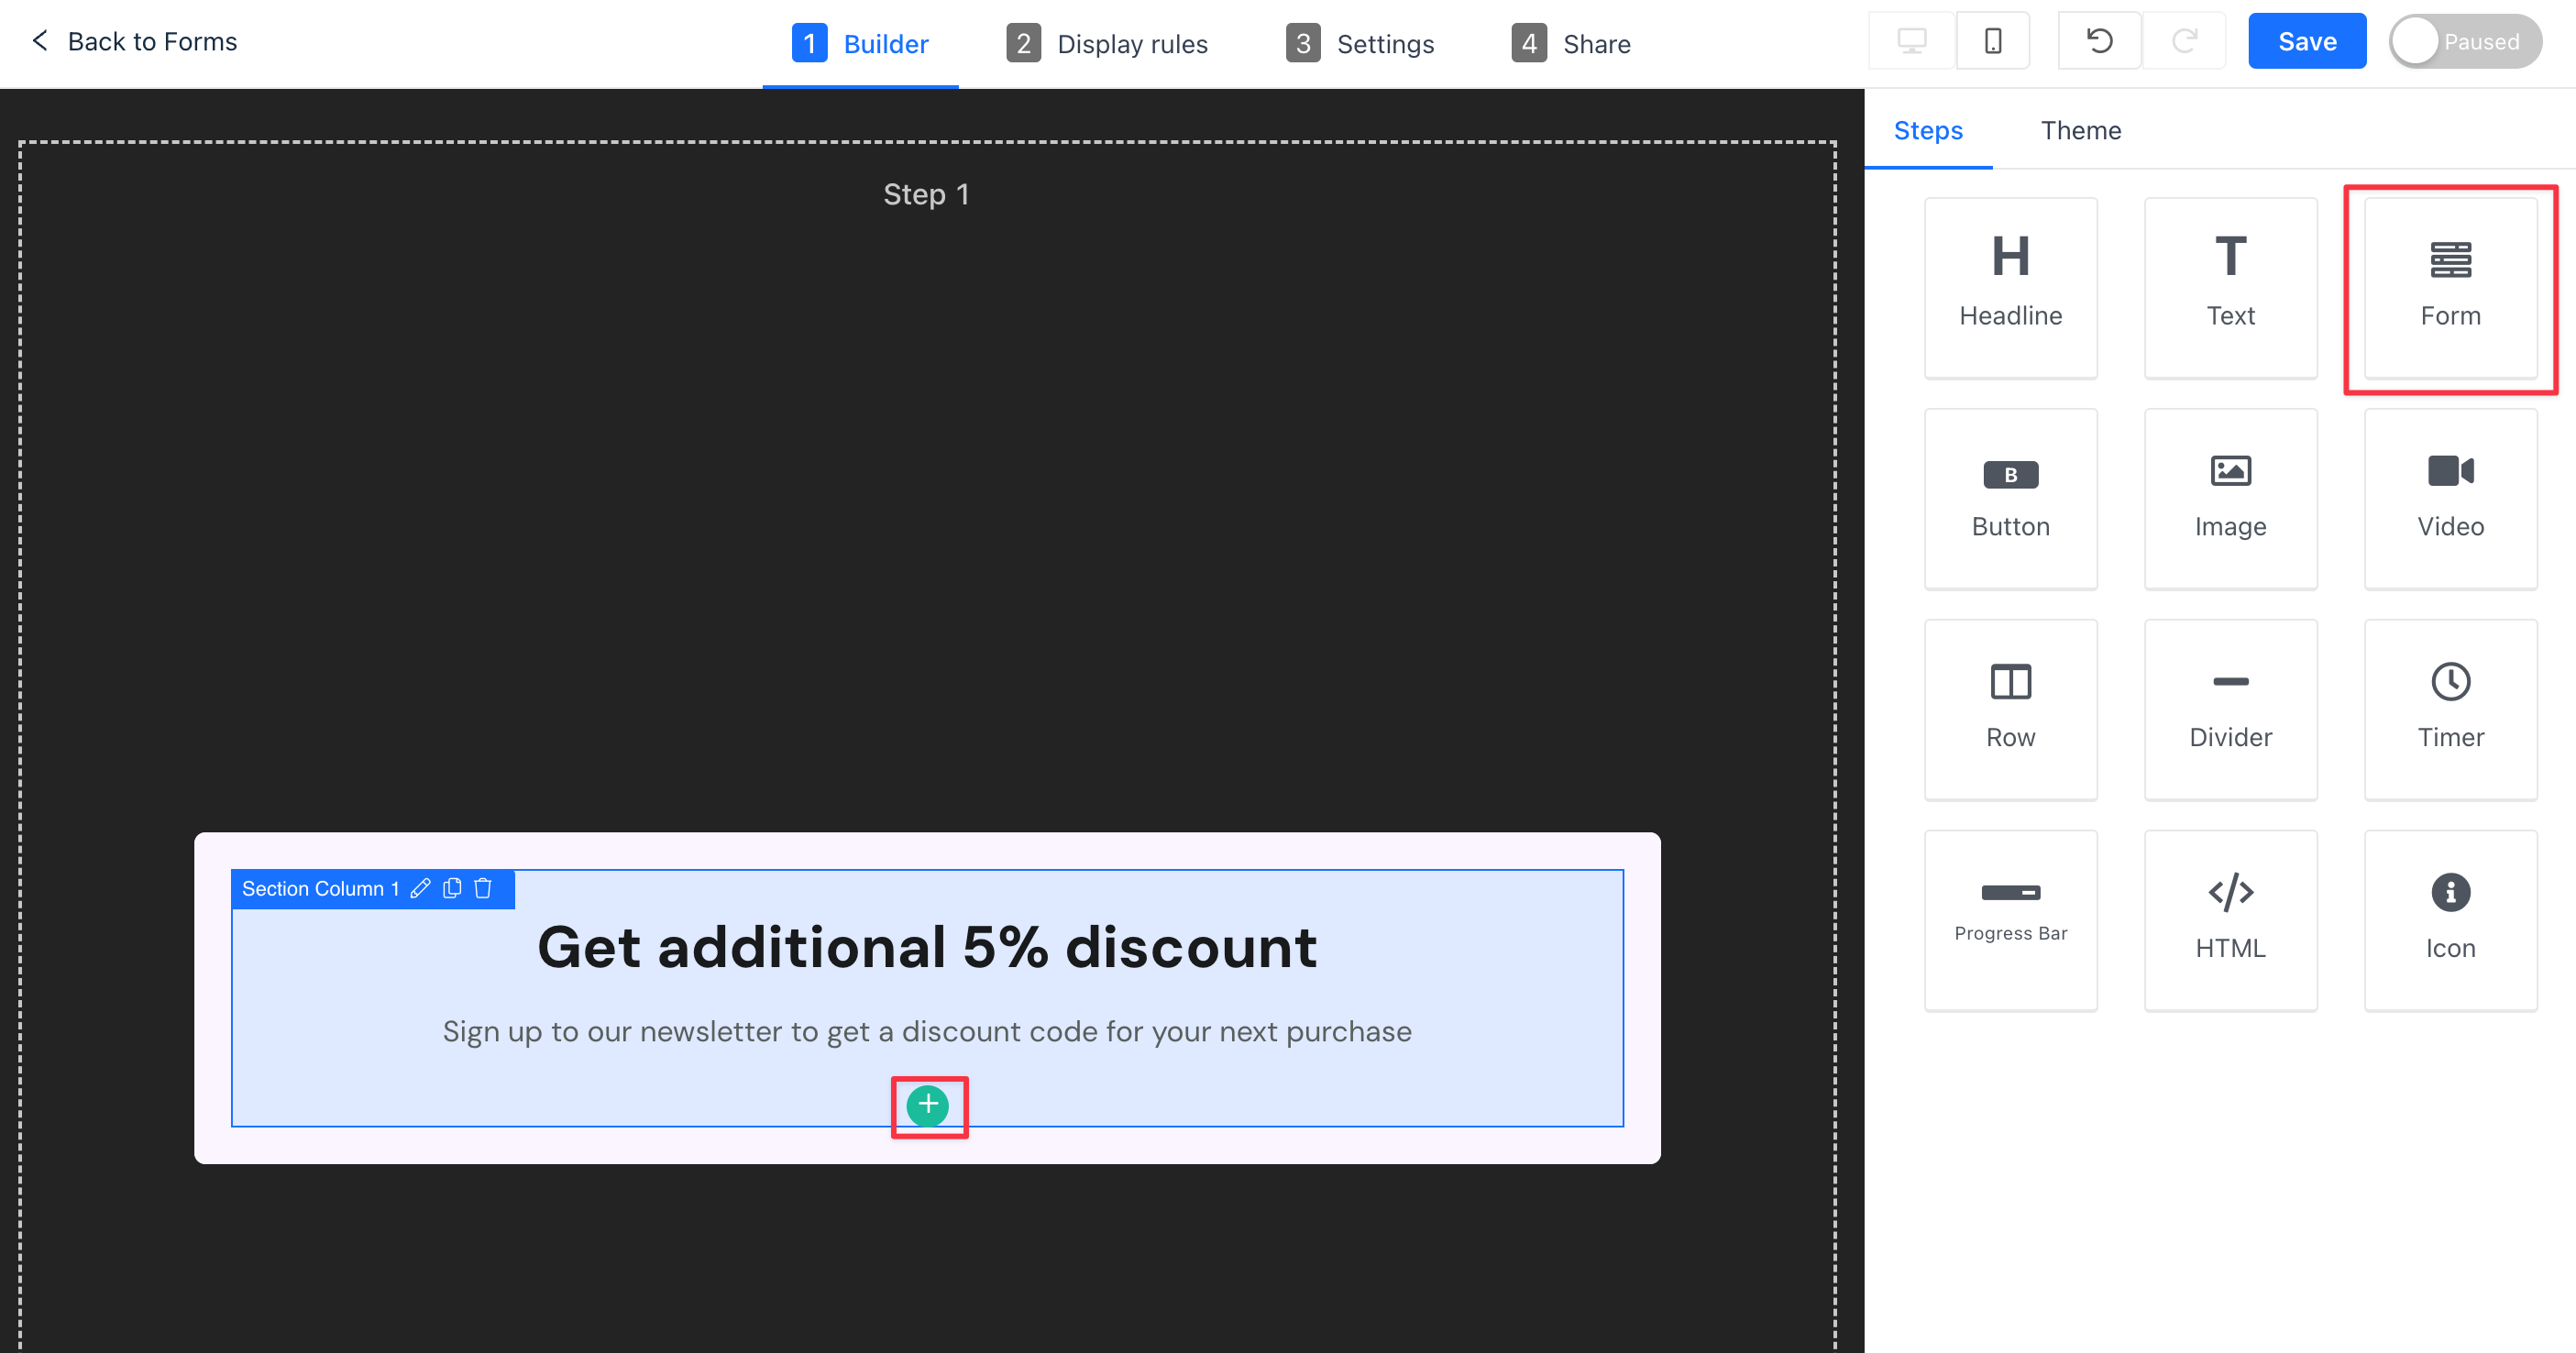
After adding your form, click on it to view the form settings in the builder panel. This action enables you to customize the form according to your specific needs.
Note: To view form responses/submissions, ensure the visitor is an identified contact in Gist by providing an email address.
2. Configure preset form fields
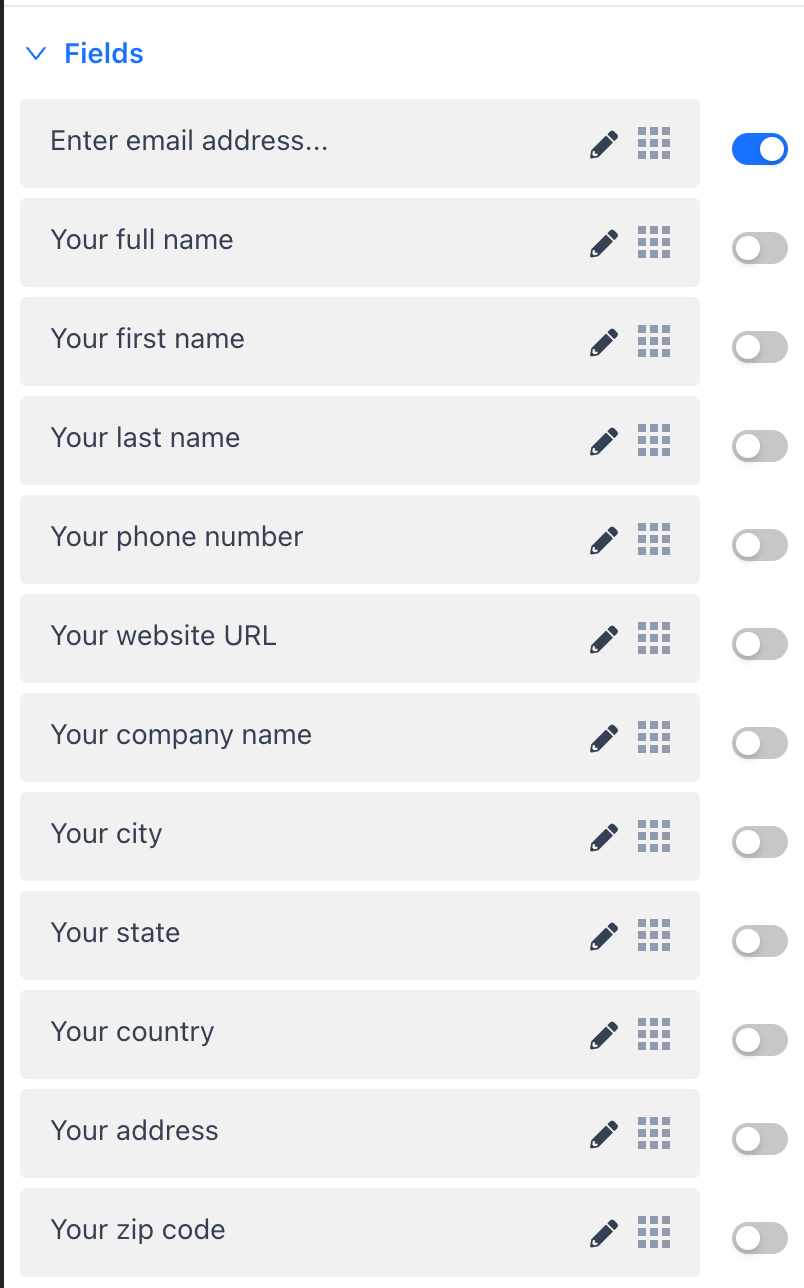
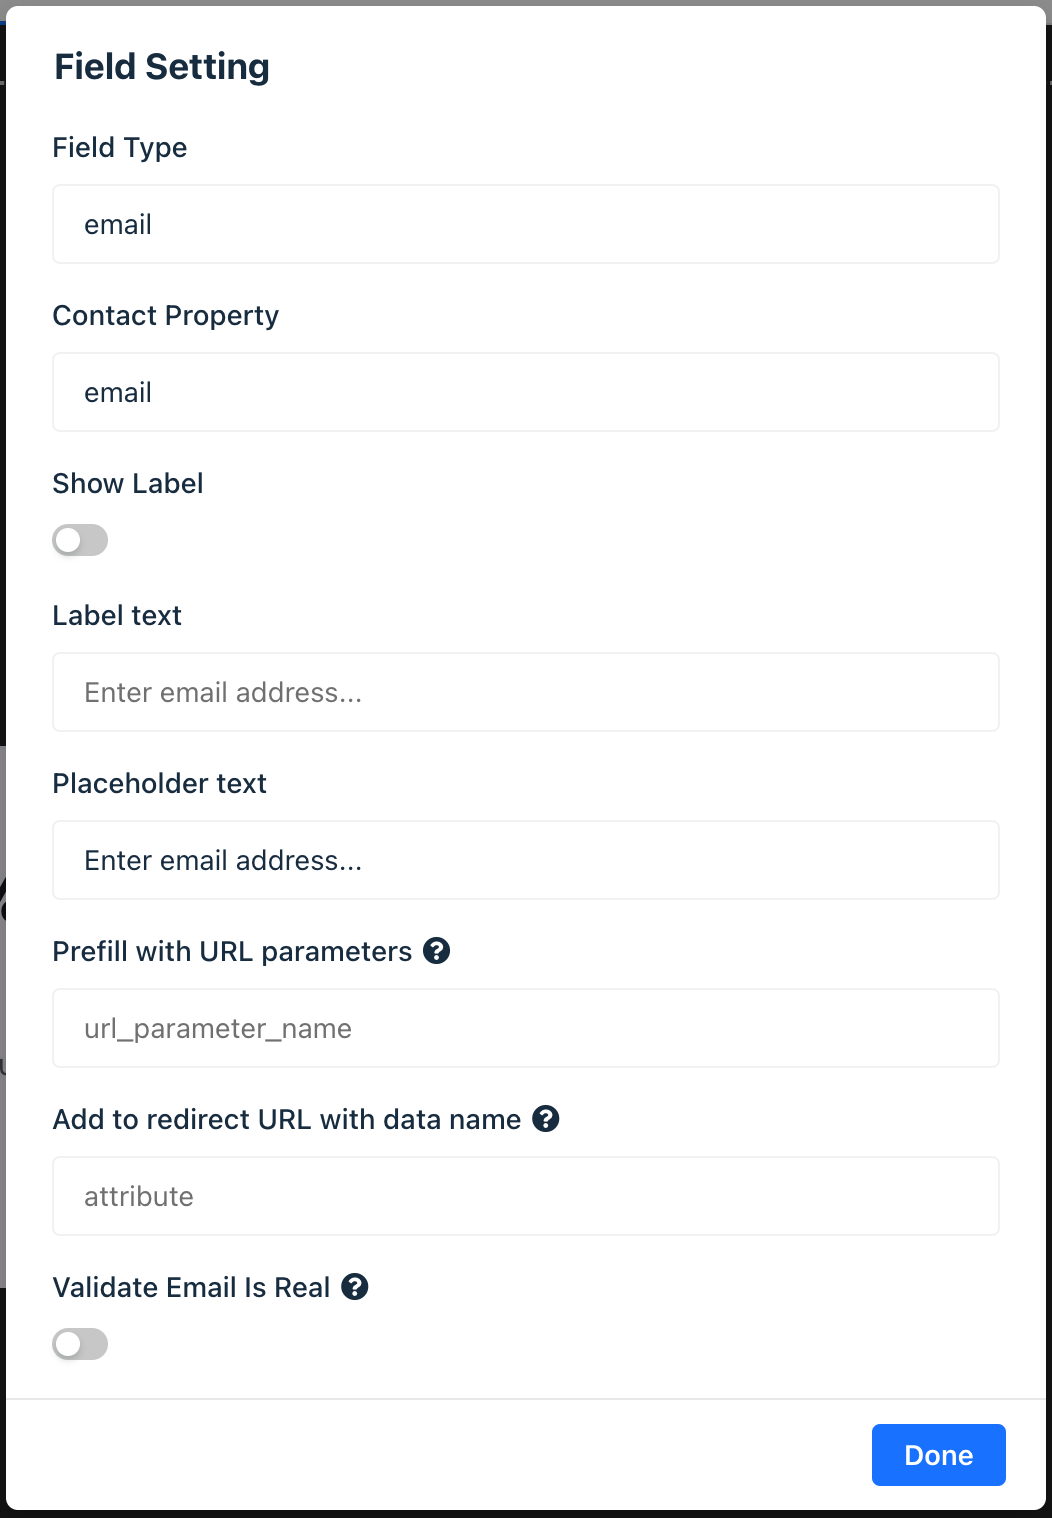
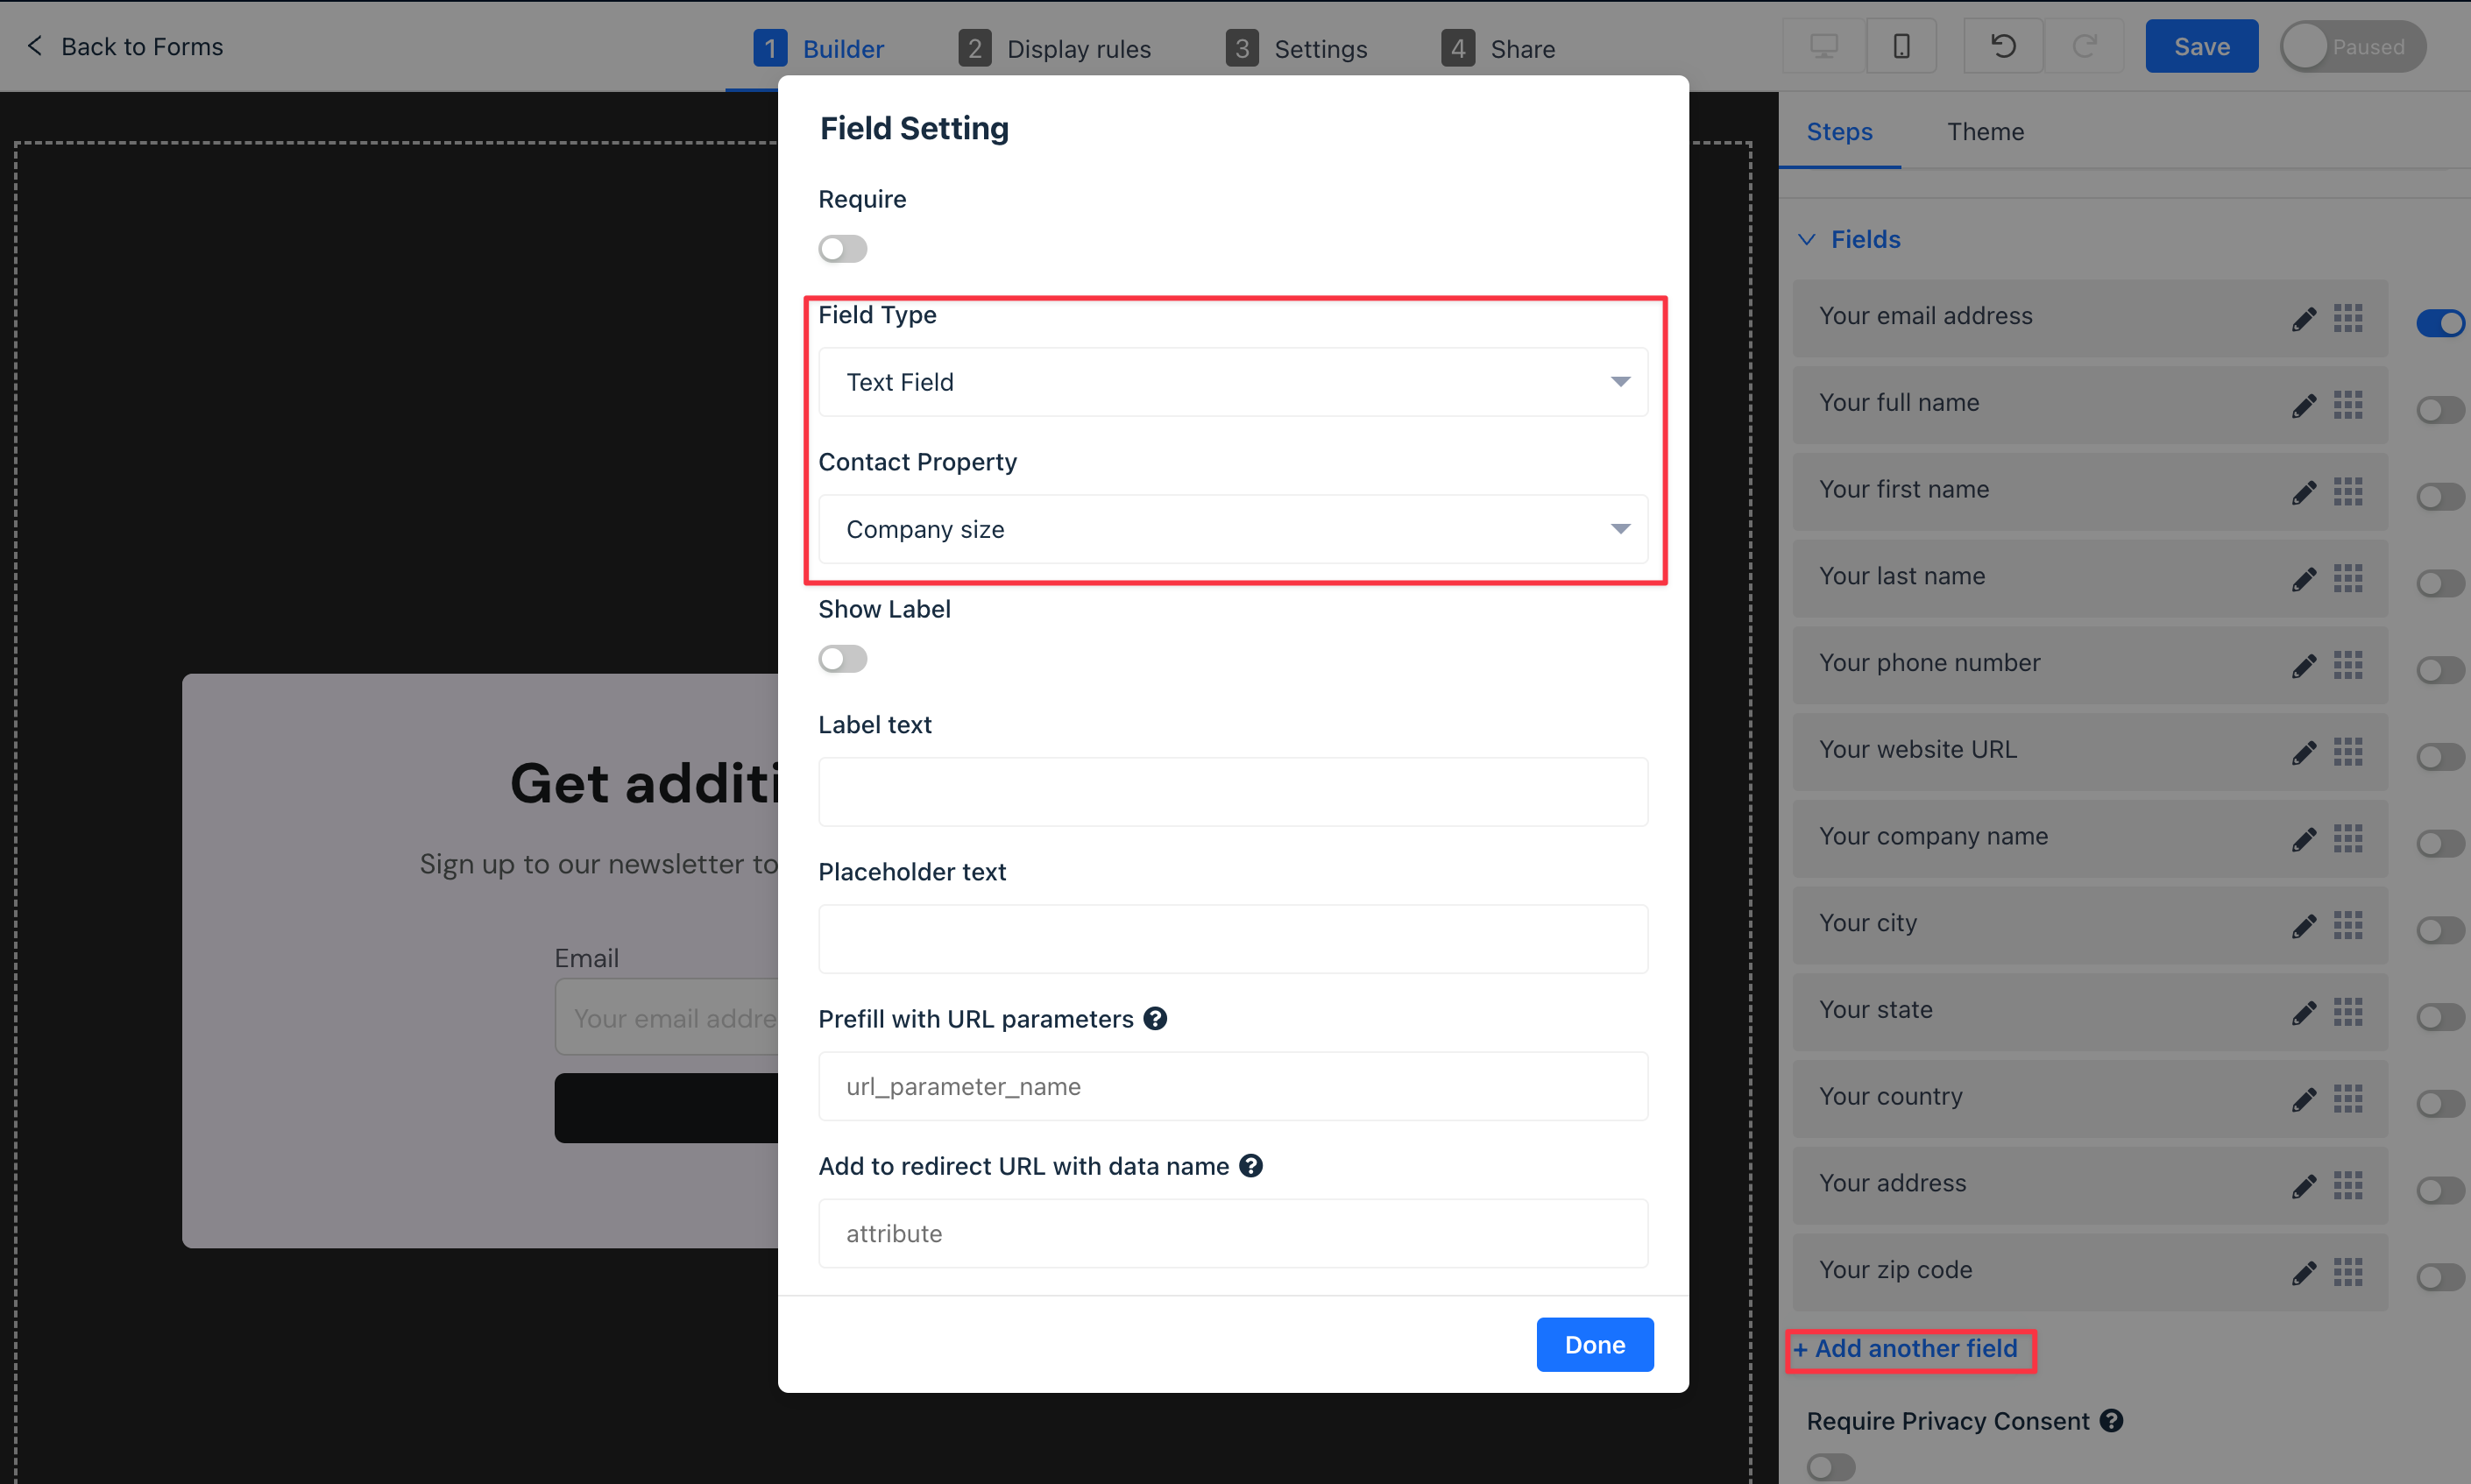
Navigate to the "fields" settings to enable all the fields you desire to display. Gist provides preset fields, pre-configured to help you collect standard contact information swiftly. Editing each field is simple - click on the field setting in the builder panel and adjust the options as needed.
3. Hide pre-filled fields

Gist’s progressive profiling pre-fills known information for visitor convenience. You can choose to hide these pre-filled fields entirely, depending on your form's context.
4. Add consent checkboxes
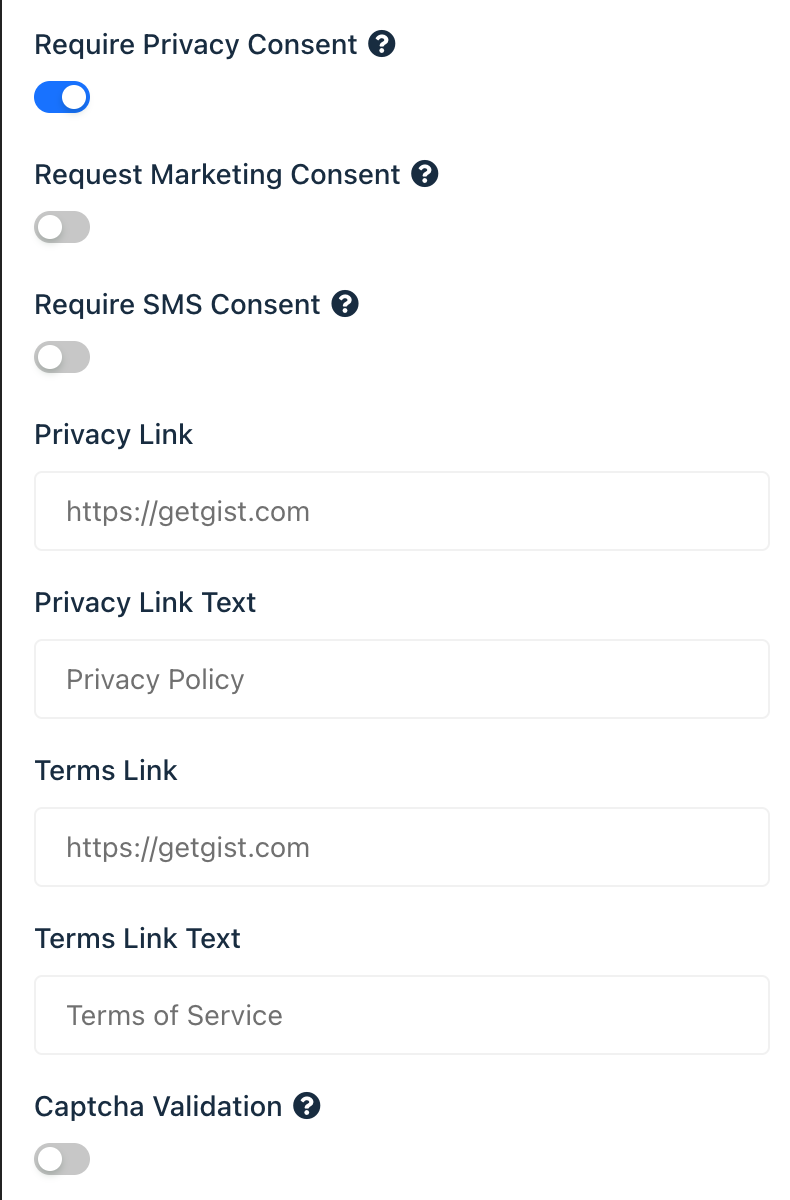
Add GDPR compliance checkboxes to maintain transparency and adhere to legal standards while collecting information from European citizens. Include links to your privacy policy and terms of service alongside a required checkbox by enabling the "Require Privacy Consent" checkbox.
5. Add Additional Fields
Click on the "+ Add Field" link to add custom fields to your form. Select a custom field data name and type, tailoring it to the information you aim to collect. Each field type offers unique configuration options, ensuring your form is as detailed and comprehensive as needed.
Designing your form
6. Style your form
Your form’s appearance is crucial to user experience and brand representation. Gist allows you a broad range of styling options to ensure your forms are not only functional but also visually compelling and consistent with your brand image.
Spacing and Alignment:
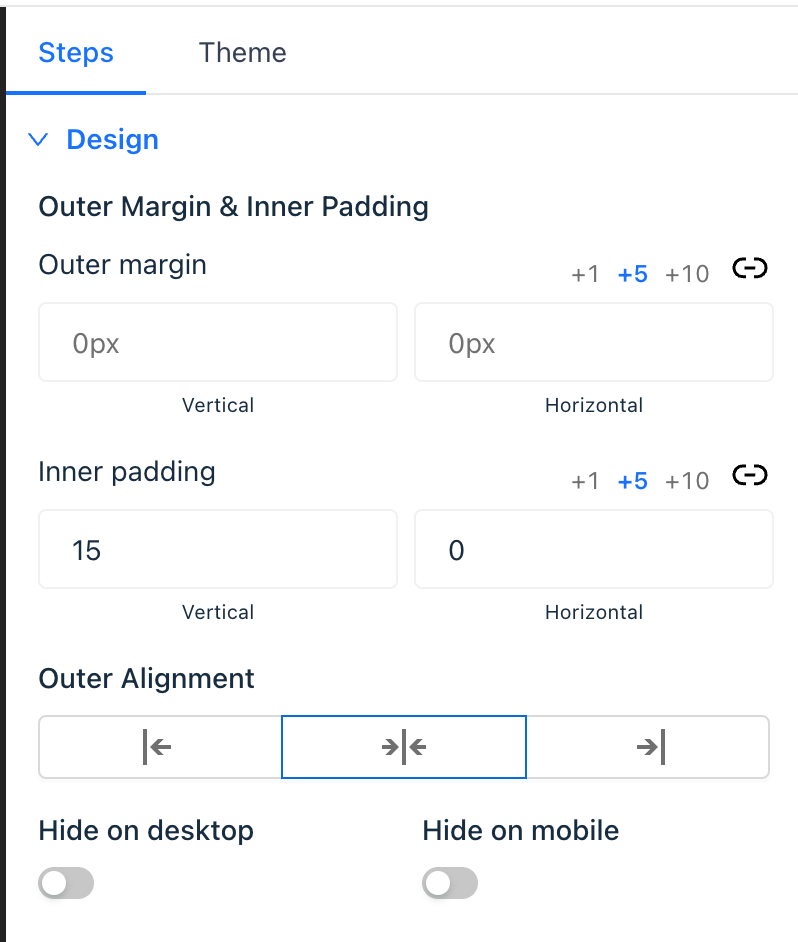
Outer Margin & Inner Padding: Easily adjust the vertical and horizontal spacing around your form, as well as between form elements, to provide a cleaner, more organized look.
Outer Alignment: Whether you prefer your form to sit to the left, in the center, or to the right of its parent container, you can set its alignment with ease.
Responsive Design: Tailor your form's visibility with options to 'Hide on desktop' or 'Hide on mobile', ensuring optimal viewing across devices.
Form and Field Layout:

Form Layout: Choose between a horizontal or vertical alignment for your fields based on your form's content and length.
Form Width: From slim designs to full-width expanses or even custom dimensions, you can determine how your form occupies space on a page.
Field Size & Font Styling: Customize the size of your fields - regular, large, or custom. Additionally, with access to the entire Google Fonts library, set your preferred font family, size, and weight for field text.
Form Aesthetics:
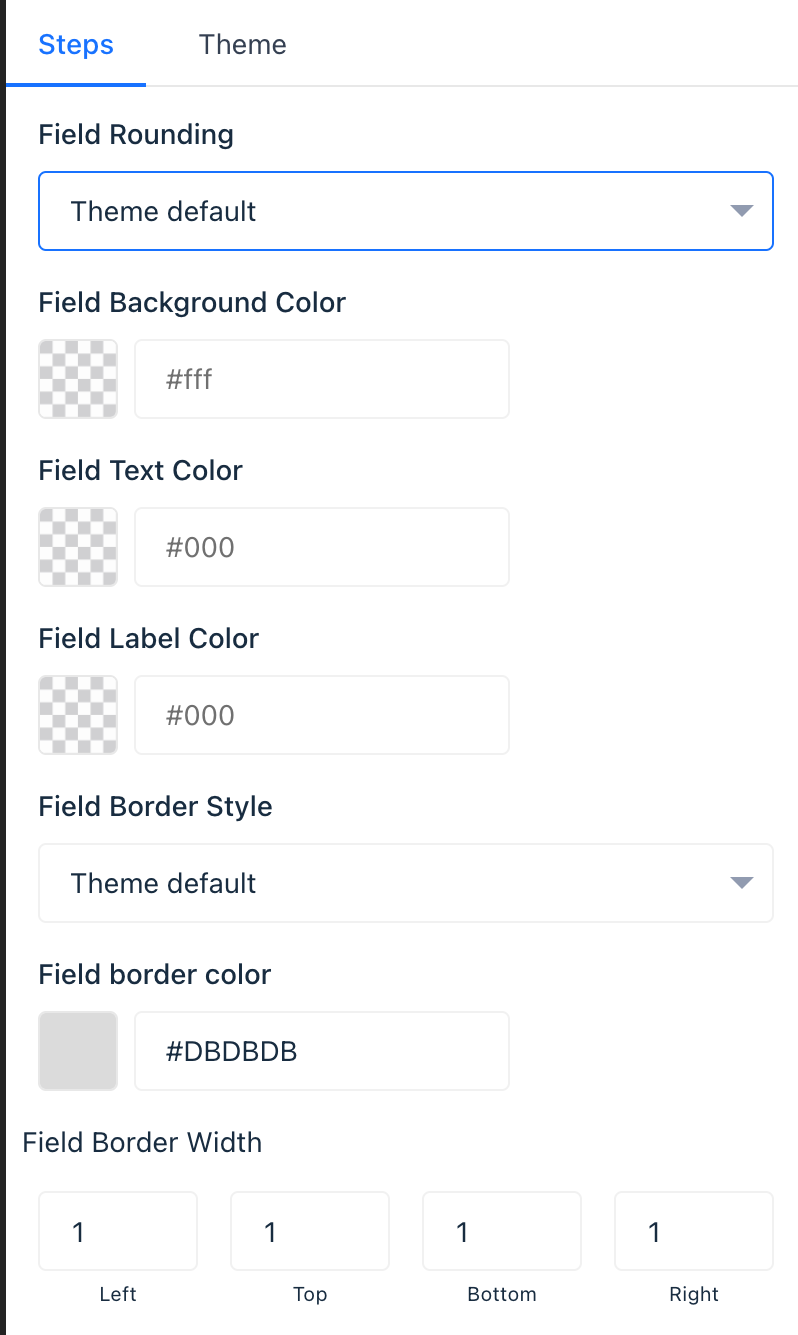
Field Appearance: Fine-tune the rounding of your fields, from sharp corners to fully rounded edges, or set a custom border radius. Determine background colors, text hues, and even the colors for field labels and borders to match your brand palette.
Drop Shadow: Add depth to your form using shadows. Opt for a subtle soft shadow, a more pronounced hard shadow, or create a custom shadow to fit your design vision.
Button Styling:
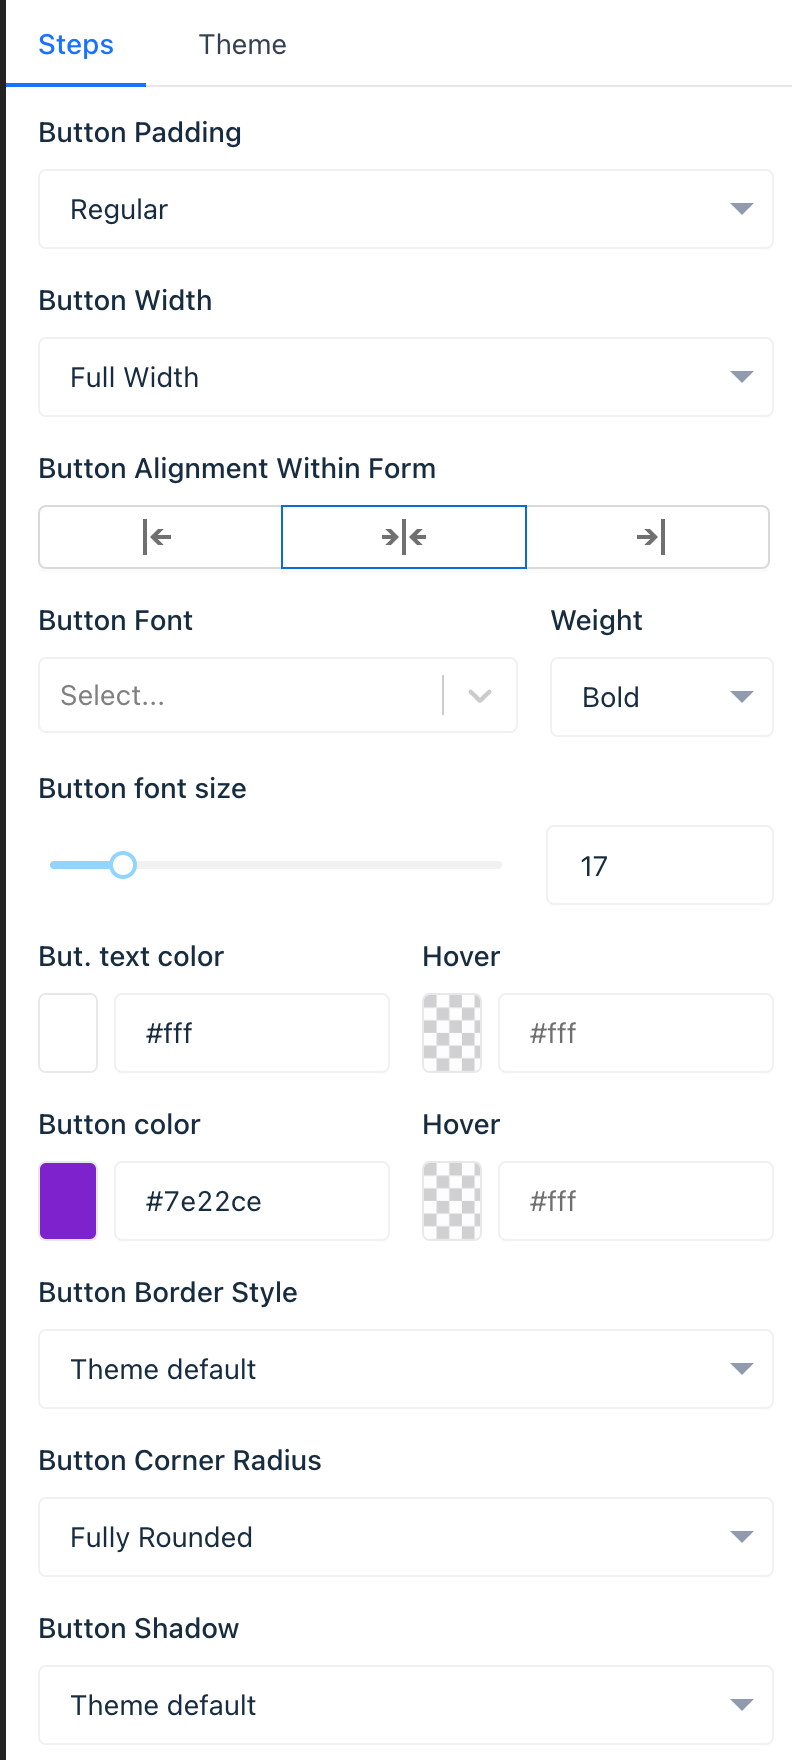
Button Size and Position: From padding and width to alignment within the form, style your button to be inviting and consistent with your design.
Button Aesthetics: With various border styles and the ability to determine the border radius, you can design buttons that range from sleek and modern to bold and distinctive.
Button Shadow: Just like with the form, add a shadow to your button, choosing from preset options or customizing it for the desired effect.
7. Setup form actions
After a visitor submits a form, guide their next interaction with your site by setting up post-submission actions. Below are the possible actions and their potential applications:
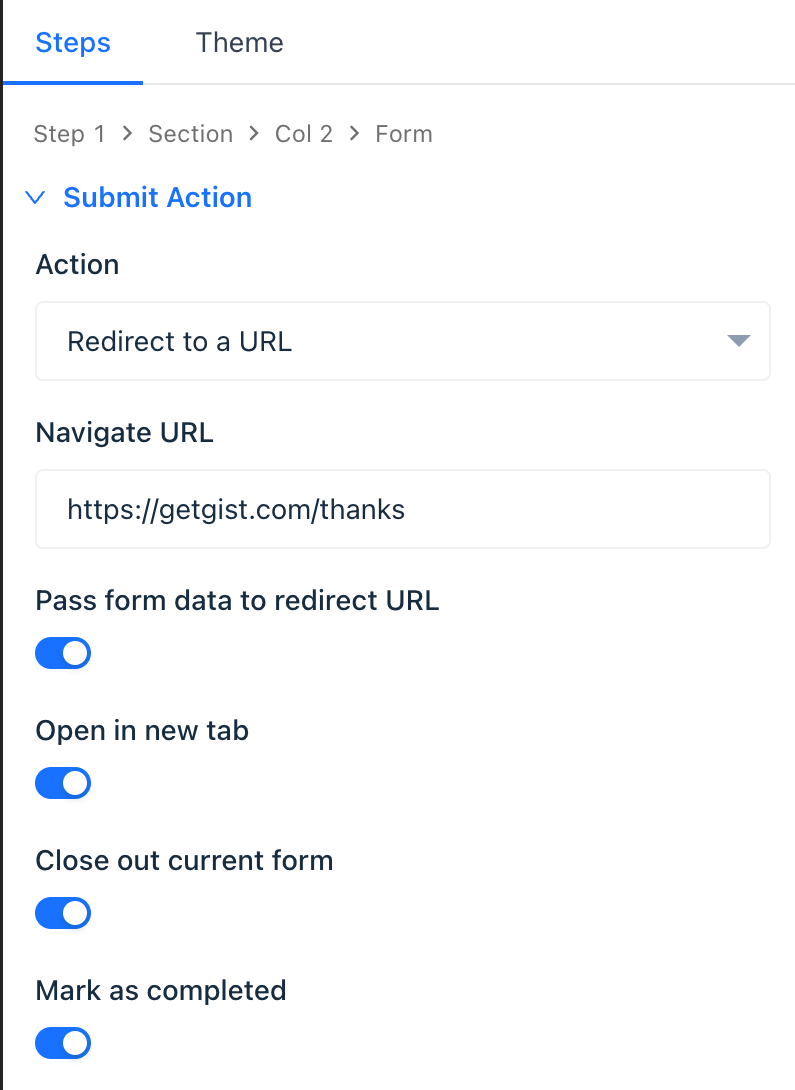
1. Redirect Visitors to a URL:
If your form is for a special offer or a specific product inquiry, redirecting subscribers to a related landing page can keep them engaged. This is also helpful for sharing additional resources or directing traffic to a particular section of your site.
Within the 'Submit action' section of your form settings, select the option to redirect to a URL and enter the desired web address.
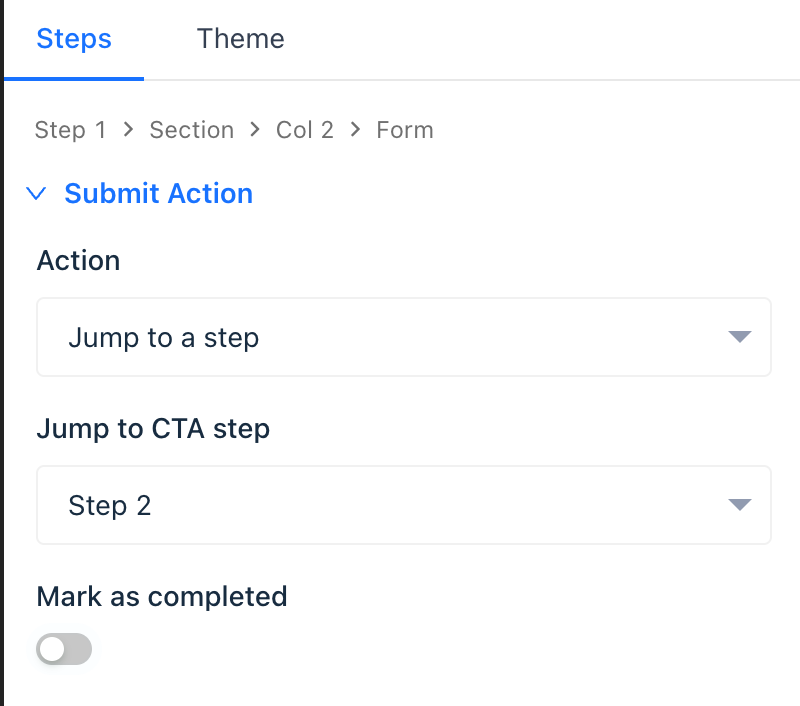
2. Show Another Step in the Form:
Useful for multi-step forms where gathering detailed information is essential. By breaking down a lengthy form into shorter, more manageable sections, you enhance user experience and increase the likelihood of form completion.
In the 'Submit action' section, choose to show another step in the form and configure the subsequent steps accordingly.
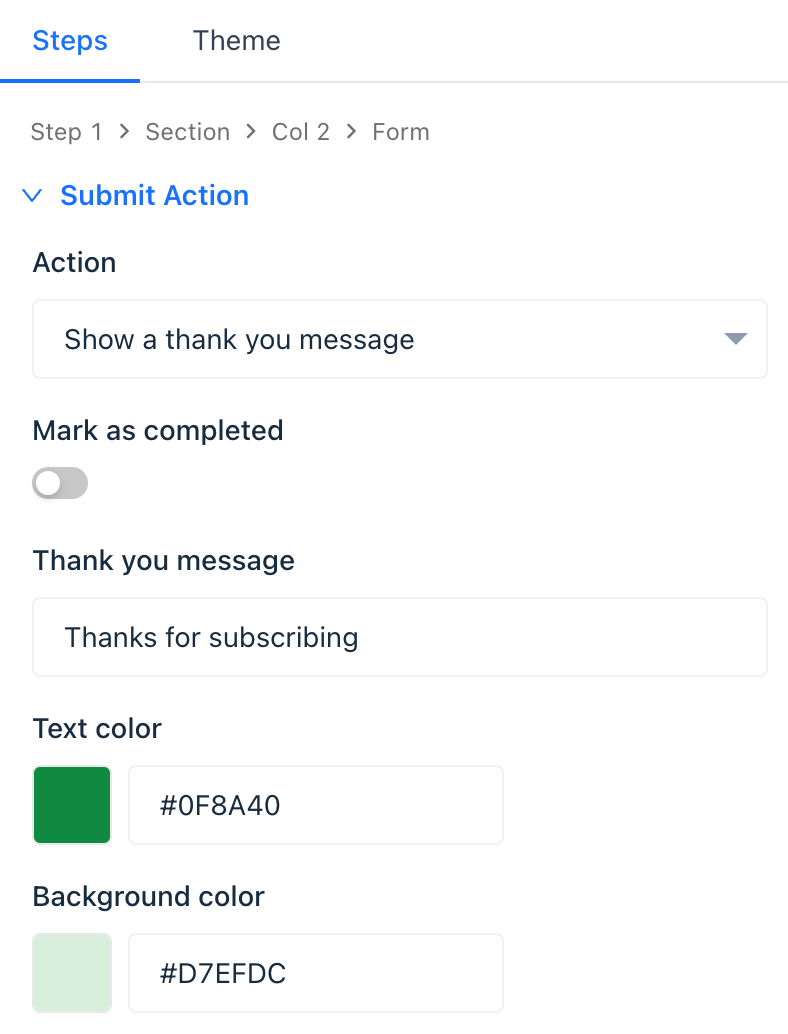
3. Display a Thank You Message:
Displaying a thank you message is a simple yet effective way to acknowledge the time and effort visitors took to complete your form. Personalize the message to express gratitude and potentially offer a reward, such as a discount code or a free e-book, enhancing their experience and building a positive brand impression.
Choose to display a thank-you message in the 'Submit action' section and customize the message to align with your brand voice and message.
Each post-submission action uniquely enhances the user's journey and interaction with your brand, ensuring you make the most of each form submission.
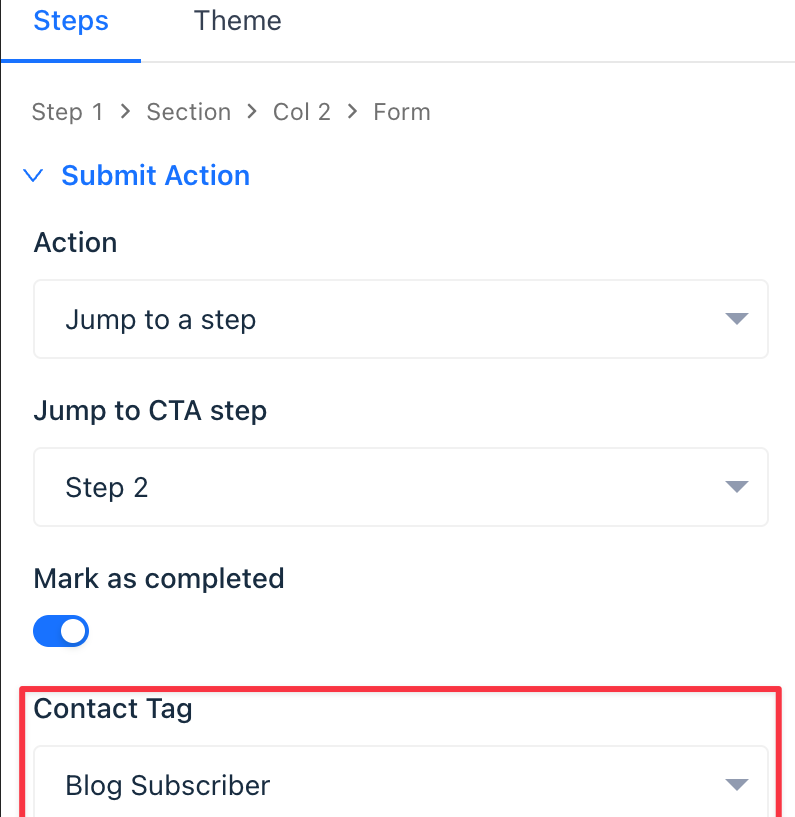
8. Add a contact tag
When a user submits a form on your site, automatically assign a tag to the contact. This allows for precise segmentation. Tags act as unique identifiers, categorizing each contact based on the specifics of the data they've shared through the form submission.
Use-Cases:
E-commerce: User Preferences
A customer fills out a form expressing interest in a specific category of products. Automatically tag these contacts based on their preferences.
Benefit: Send out targeted promotions and updates for products within their area of interest, making your marketing more relevant and effective.
SaaS: Feedback or Query Forms
A user submits a form seeking more information about a particular feature of your software. Tag these users based on the feature they inquired about.
Benefit: Provide them with detailed and tailored information or updates about the feature, enhancing their user experience and possibly encouraging an upgrade or continued subscription.
E-commerce: Newsletter Subscription
A visitor subscribes to your newsletter through a form submission. Tag them as a ‘Newsletter Subscriber’.
Benefit: Offer them exclusive subscriber-only deals and news, promoting customer loyalty and repeated business.
SaaS: Trial Signup Forms
A visitor signs up for a free trial of your software through a form. Tag them as a ‘Trial User’.
Benefit: Send them resources, tips, and offers to help convert them from trial users to paid subscribers, enhancing your conversion rate.