

Tags come in handy when creating contact segments in Gist. They allow you to understand your customers based on their behavior on your site, and as a result, segregate them into contact groups effectively. Tags help you attach a label or a piece of data to a contact based on what they do on your site. Tags help you give a visual representation of contact actions.
You can add or remove a tag based on what a contact does or doesn't do on your site. For example, when a contact subscribes to your newsletter, you can add a tag named 'newsletter' to their profile so they can later be segmented as per requirement.
Try to make tags obvious enough for you to understand, but also specific enough to help you customize your message to your customers. Broad terms like 'user' or 'customer' may not be that effective. If you make sure your tags are specific enough, then they can help you understand how important the contact is to your business. You can view all the tags a contact belongs to, in the contact's profile page.
Applying tags
Tags can be applied manually or automatically. Gist's automation tool helps you apply tags automatically based on contact properties or behavior. To apply tags automatically to contacts, you will need to create automation rules and conditions.
In the automation tab, select the trigger that you would like to focus on. For instance, if you wish to automatically apply a tag to a contact when they click the pricing page link on your website, you can do that using automation.
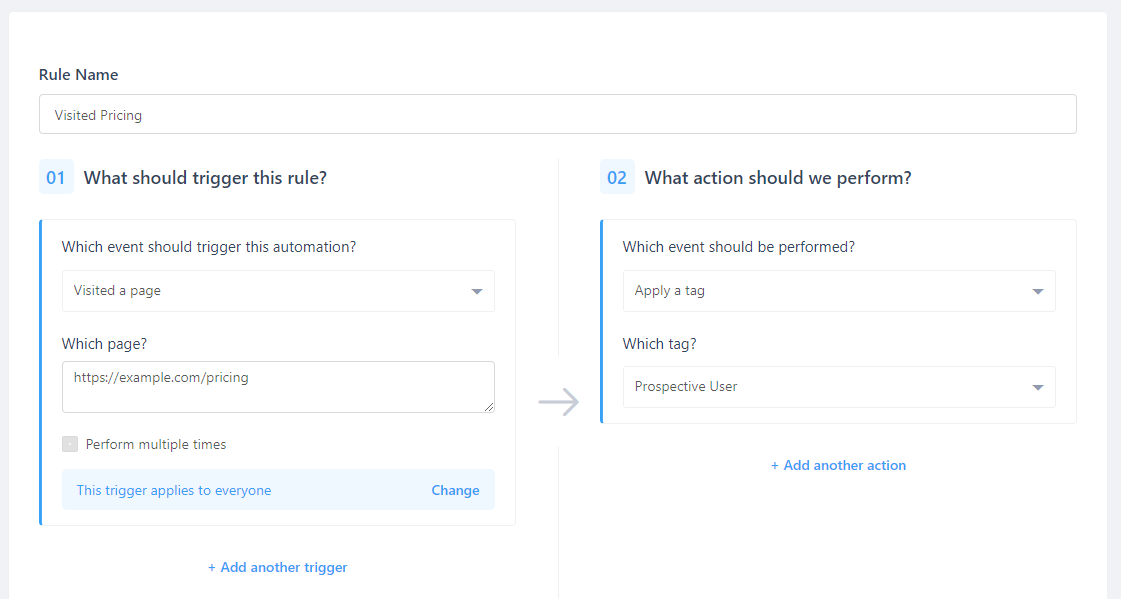
Also, just like with tags, it is important that you name the automation rule properly so that it is easy to remember it. In this case, because the contact visits the pricing page, you could say they are interested in signing up for your service, and so you can name the tag 'Prospective buyer', or 'Prospective contact' etc.
Need Help?
If you have any further questions, please start a Live Chat. Just "Click" on the Chat Icon in the lower right corner to talk with our support team.