

Tags are the most common criteria you will use when creating contact segments in Gist. They allow you to understand your customers based on their behavior on your site and, as a result, segregate them into contact groups effectively.
Tags help you attach a label or a piece of data to a contact based on what they do on your site. Tags help you give a visual representation of contact actions. Tags are very useful in creating contact segments.
About Tags
You can add or remove a tag based on what a contact does or doesn't do on your site. For example, when a contact subscribes to your newsletter, you can add a tag named 'newsletter' to their profile so they can later be segmented as per requirement.
Try to make tags obvious enough for you to understand but also specific enough to help you customize your message to your customers. Broad terms like 'contact' or 'customer' may be ineffective. If you ensure your tags are specific enough, they can help you understand how important the contact is to your business. You can view all the tags a contact belongs to on the contact's profile page.
Applying tags
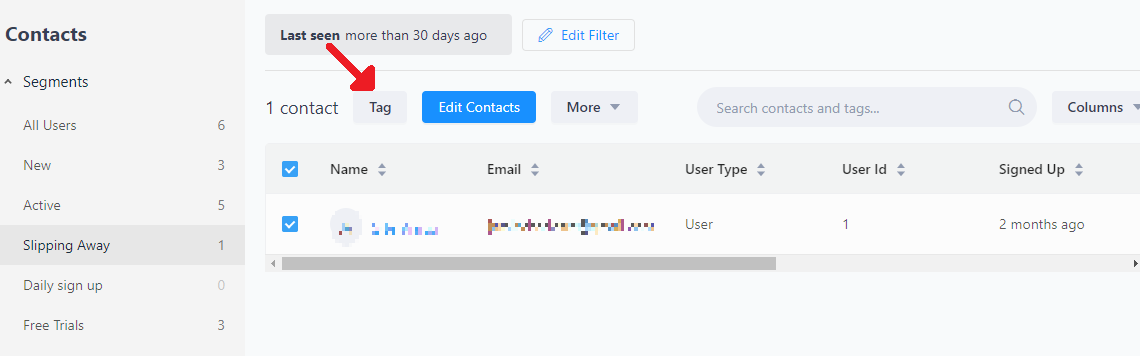
Tags can be applied manually and automatically. To apply a tag manually to a contact, go to the 'Profile' tab, select the contact(s) you want to tag, and click on the 'Tag' button on the top of the screen.
For example, you can choose to tag contacts who are inactive. By filtering out all those who have not logged in more than 25 days, and then applying the tag 'Inactive Contacts' to them.
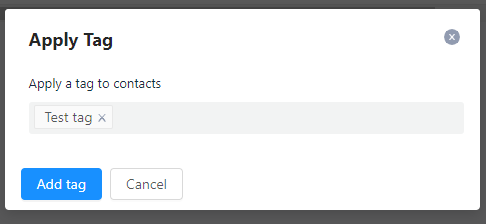
You can either add existing tags or a new tag as and when you need.
If you wish to apply an existing tag to those contacts, you can select the tag from the existing list, and all the selected contacts will automatically be tagged. You can follow this method to tag one or more contacts directly on the People page.
If you wish to apply a new tag you have not created previously, then you can type in your new tag and save it.
Another way to tag individual contacts is on the Contact Profile page. This is useful if you want to tag an individual lead or contact them specifically while talking to them. Go to the 'Contact Profile' page from your team inbox view, and then you can add tags there directly.
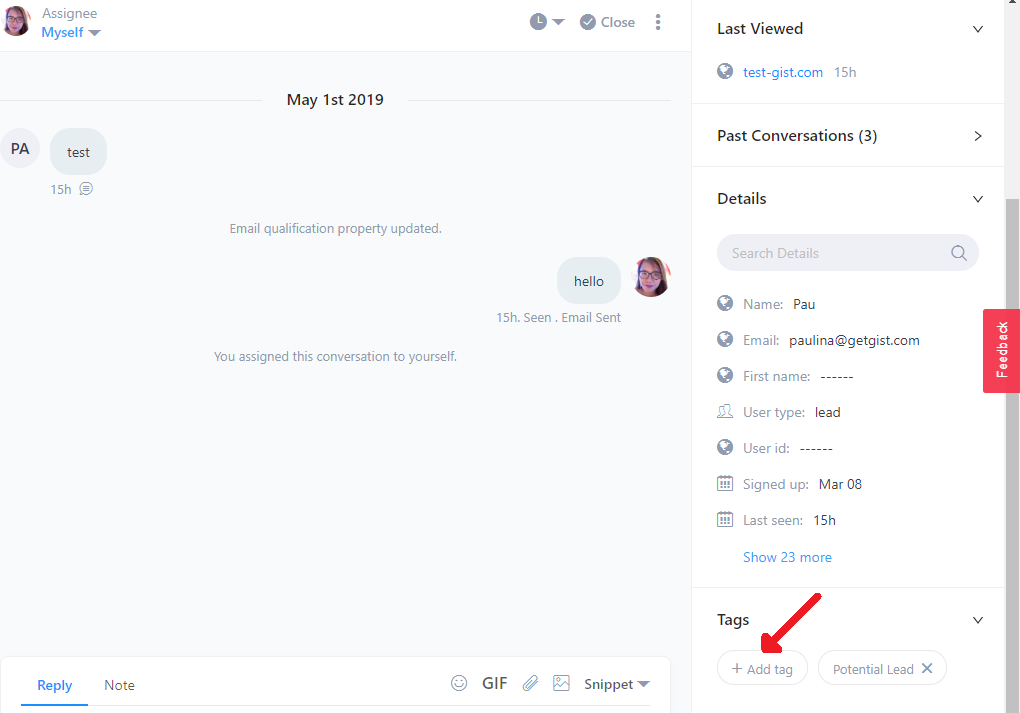
You can also add tags on the Contact's live profile in the team inbox, even when you're talking to them in real time. For instance, if someone tells you during the conversation that they are interested in your Enterprise plan, you can tag them as such (Potential Enterprise Lead). If you already have that tag created, it gets attached to this contact. If you did not create such a tag previously, you can create a new one right there.
Tagging Use Cases and Best Practices
Here are some use cases to help you use tags correctly on Gist and get the best out of them. Tags are important to your project because you can use them to create highly specific contact segments that you can use to send targeted messages and email campaigns.
Tagging contacts based on contact properties
You can add tags based on the default contact properties that Gist tracks automatically. For instance, you can filter all contacts who signed up via a Facebook campaign, using the 'Signup Source' filter, and then tag them all with something like 'Facebook'. Or you can tag everyone from a certain city, those who are using Windows, those who have subscribed to a certain email campaign, and more.
Tagging contacts based on custom properties
If you have identified contacts inside your member area or app using the identify method, and are sending custom properties to Gist, you can tag contacts if and when they match these custom properties. For instance, if adding new projects inside your app is important, tag all contacts with less than three projects in their account. You can tag contacts who have viewed your course completion page or a plan upgrade page.
Tagging contacts based on custom events
You can attach tags to all contacts who have done a particular event or action on your website. Since Gist auto-tracks all page views, you can add a tag to everyone who views a certain page on your site.
For instance, you can add a 'Potential Customer' tag to a contact who views your Pricing page or an 'About to Churn' tag to someone who views your refund policy page so you can send them relevant emails.
If you are also tracking custom events on your website, you can also tag contacts based on which events they do on your website. For instance, if you're tracking the 'Sign up' button on your homepage, or 'Enter the classroom' on your course page, or a signup form on your contact page, you can tag them appropriately to create dynamic segments out of these contacts.
Tagging subscribers based on source of import
If you have contacts and subscribers on multiple platforms (live chat, email marketing, CRM, etc.) and want to import all of them into Gist, it would be useful to add specific tags to your contacts inside each CSV file you're importing. For example, if you're importing your MailChimp subscribers, you can add a 'Tag' column header in the CSV and add MailChimp for all the contacts.
When these contacts are added to Gist, their profiles will be automatically tagged with 'MailChimp' so you can use that information later when communicating with them or for internal review purposes.
Tagging contacts automatically
If you would like to automatically apply tags to a contact based on their activity on your site, you can do so using automation rules. When you have multiple tags to apply and many contacts, you can set up automation rules to tag these contacts.
Important Guidelines for Tagging
Moving from a list-based system to a tag-based system is a huge leap forward and makes managing your contact base a lot easier. However, it is important to plan how to use tags to your advantage upfront while avoiding overusing them so much that it would be a disadvantage. It is important that you invest the time now in the beginning and plan your tagging regimen to avoid the confusion and frustration that comes with managing complex contact data that only keeps growing as you grow.
Use tags only when needed
Even though tags are extremely useful to organize your contacts better, you need to ensure that you follow a simple tagging system. You may be tempted to use tags for every little action or use property because it is natural to think that more data is always better. After all, you will need that data someday in the future. But this often isn’t the case. Using many tags when there is no immediate need would complicate your tagging system unnecessarily, so you can no longer use all the data you’ve collected.
Before you start tagging contacts or even before you create tags, you can plan the purposes of your tags, list them in a document, and review it. Whenever you want to create a new tag, see how it fits into your overall plan.
Use tags only where they are appropriate
Sometimes, you may find that creating contact segments may serve the same purpose as tags. For example, if you are tagging contacts who have opened a particular email or clicked a certain trigger link, keeping them in a segment rather than applying tags would be better. This is because, even if you apply a tag, the ultimate action you will take is to send them an email or put them in a campaign. So, it would be a lot easier to skip the tagging part and put them in a segment directly.
Keep your tags up-to-date
If you make sure to organize your tags and prune them from time to time, it's easier to manage your tagging system because you'd then easily understand the entire system and can spot when it is getting out of hand. You can also spot duplicate tags and have a backup resource when needed.
If you want to edit or remove existing tags, you can do so in Settings > Data > People Tags.
Need Help?
If you have any further questions, please start a Live Chat. Just "Click" on the Chat Icon in the lower right corner to talk with our support team.