

Popups are a great, eye-catching way to convert visitors into subscribers. They take over the visitor's browser window to display your call-to-action. With Gist's targeting conditions and trigger controls, you can always show your overlay popup at the perfect time.
This article will walk you through the process step-by-step to create, customize, and confirm the display of your popup on your website.
1. Create your form
- Start by navigating to the Outbound > Forms page on your Gist dashboard.
- Click on the New form button to get started.
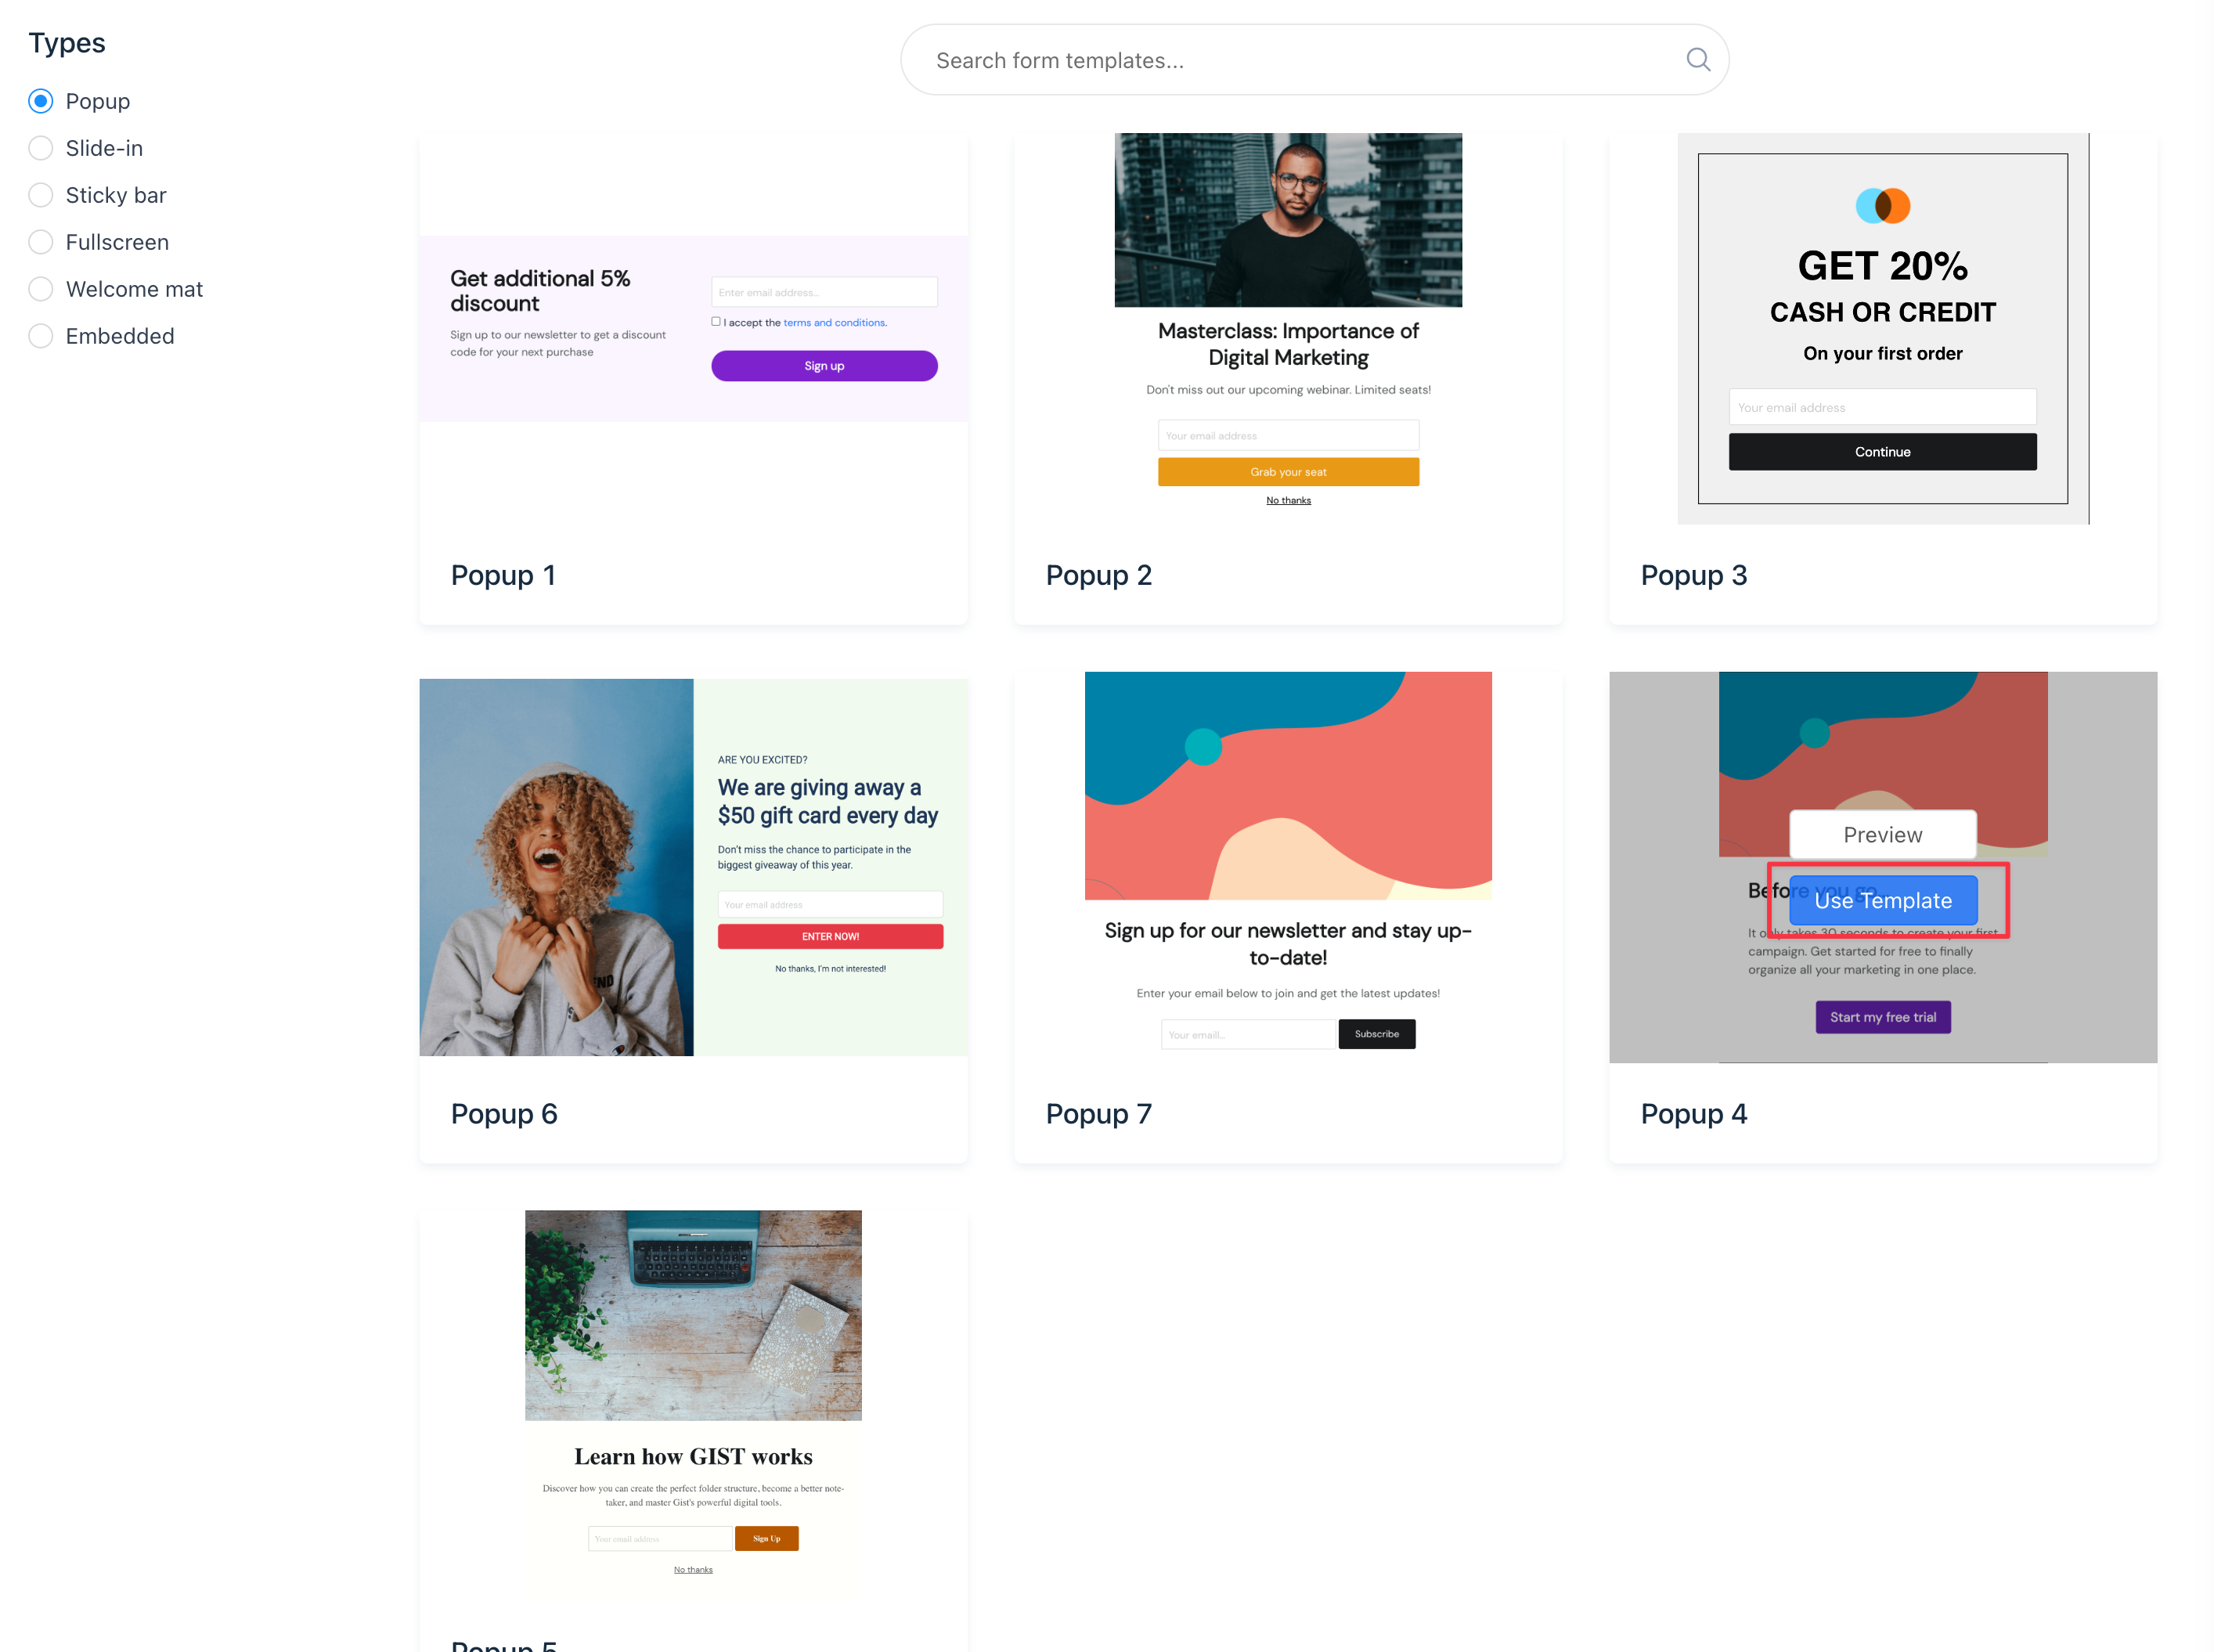
2. Choose a template
- From the left sidebar, select the Popup category to view available popup templates.
- Take your time to preview the various templates. When you find the one that aligns with your brand or specific use case, click Use Template.
Tip: Give your form a clear, descriptive name to ease future referencing. For instance: 'Homepage Lightbox', 'Blog Welcome Mat', and so forth. This practice is helpful, especially as your site grows and you have multiple forms.
3. Customize the design
With Gist's user-friendly drag-and-drop builder, customizing your popup becomes a breeze:
- Modify the headlines, paragraphs, and button text per your requirements.
- Adjust the form actions to fit your desired interaction.
- Remember to Save your progress often to avoid any unintended data loss.
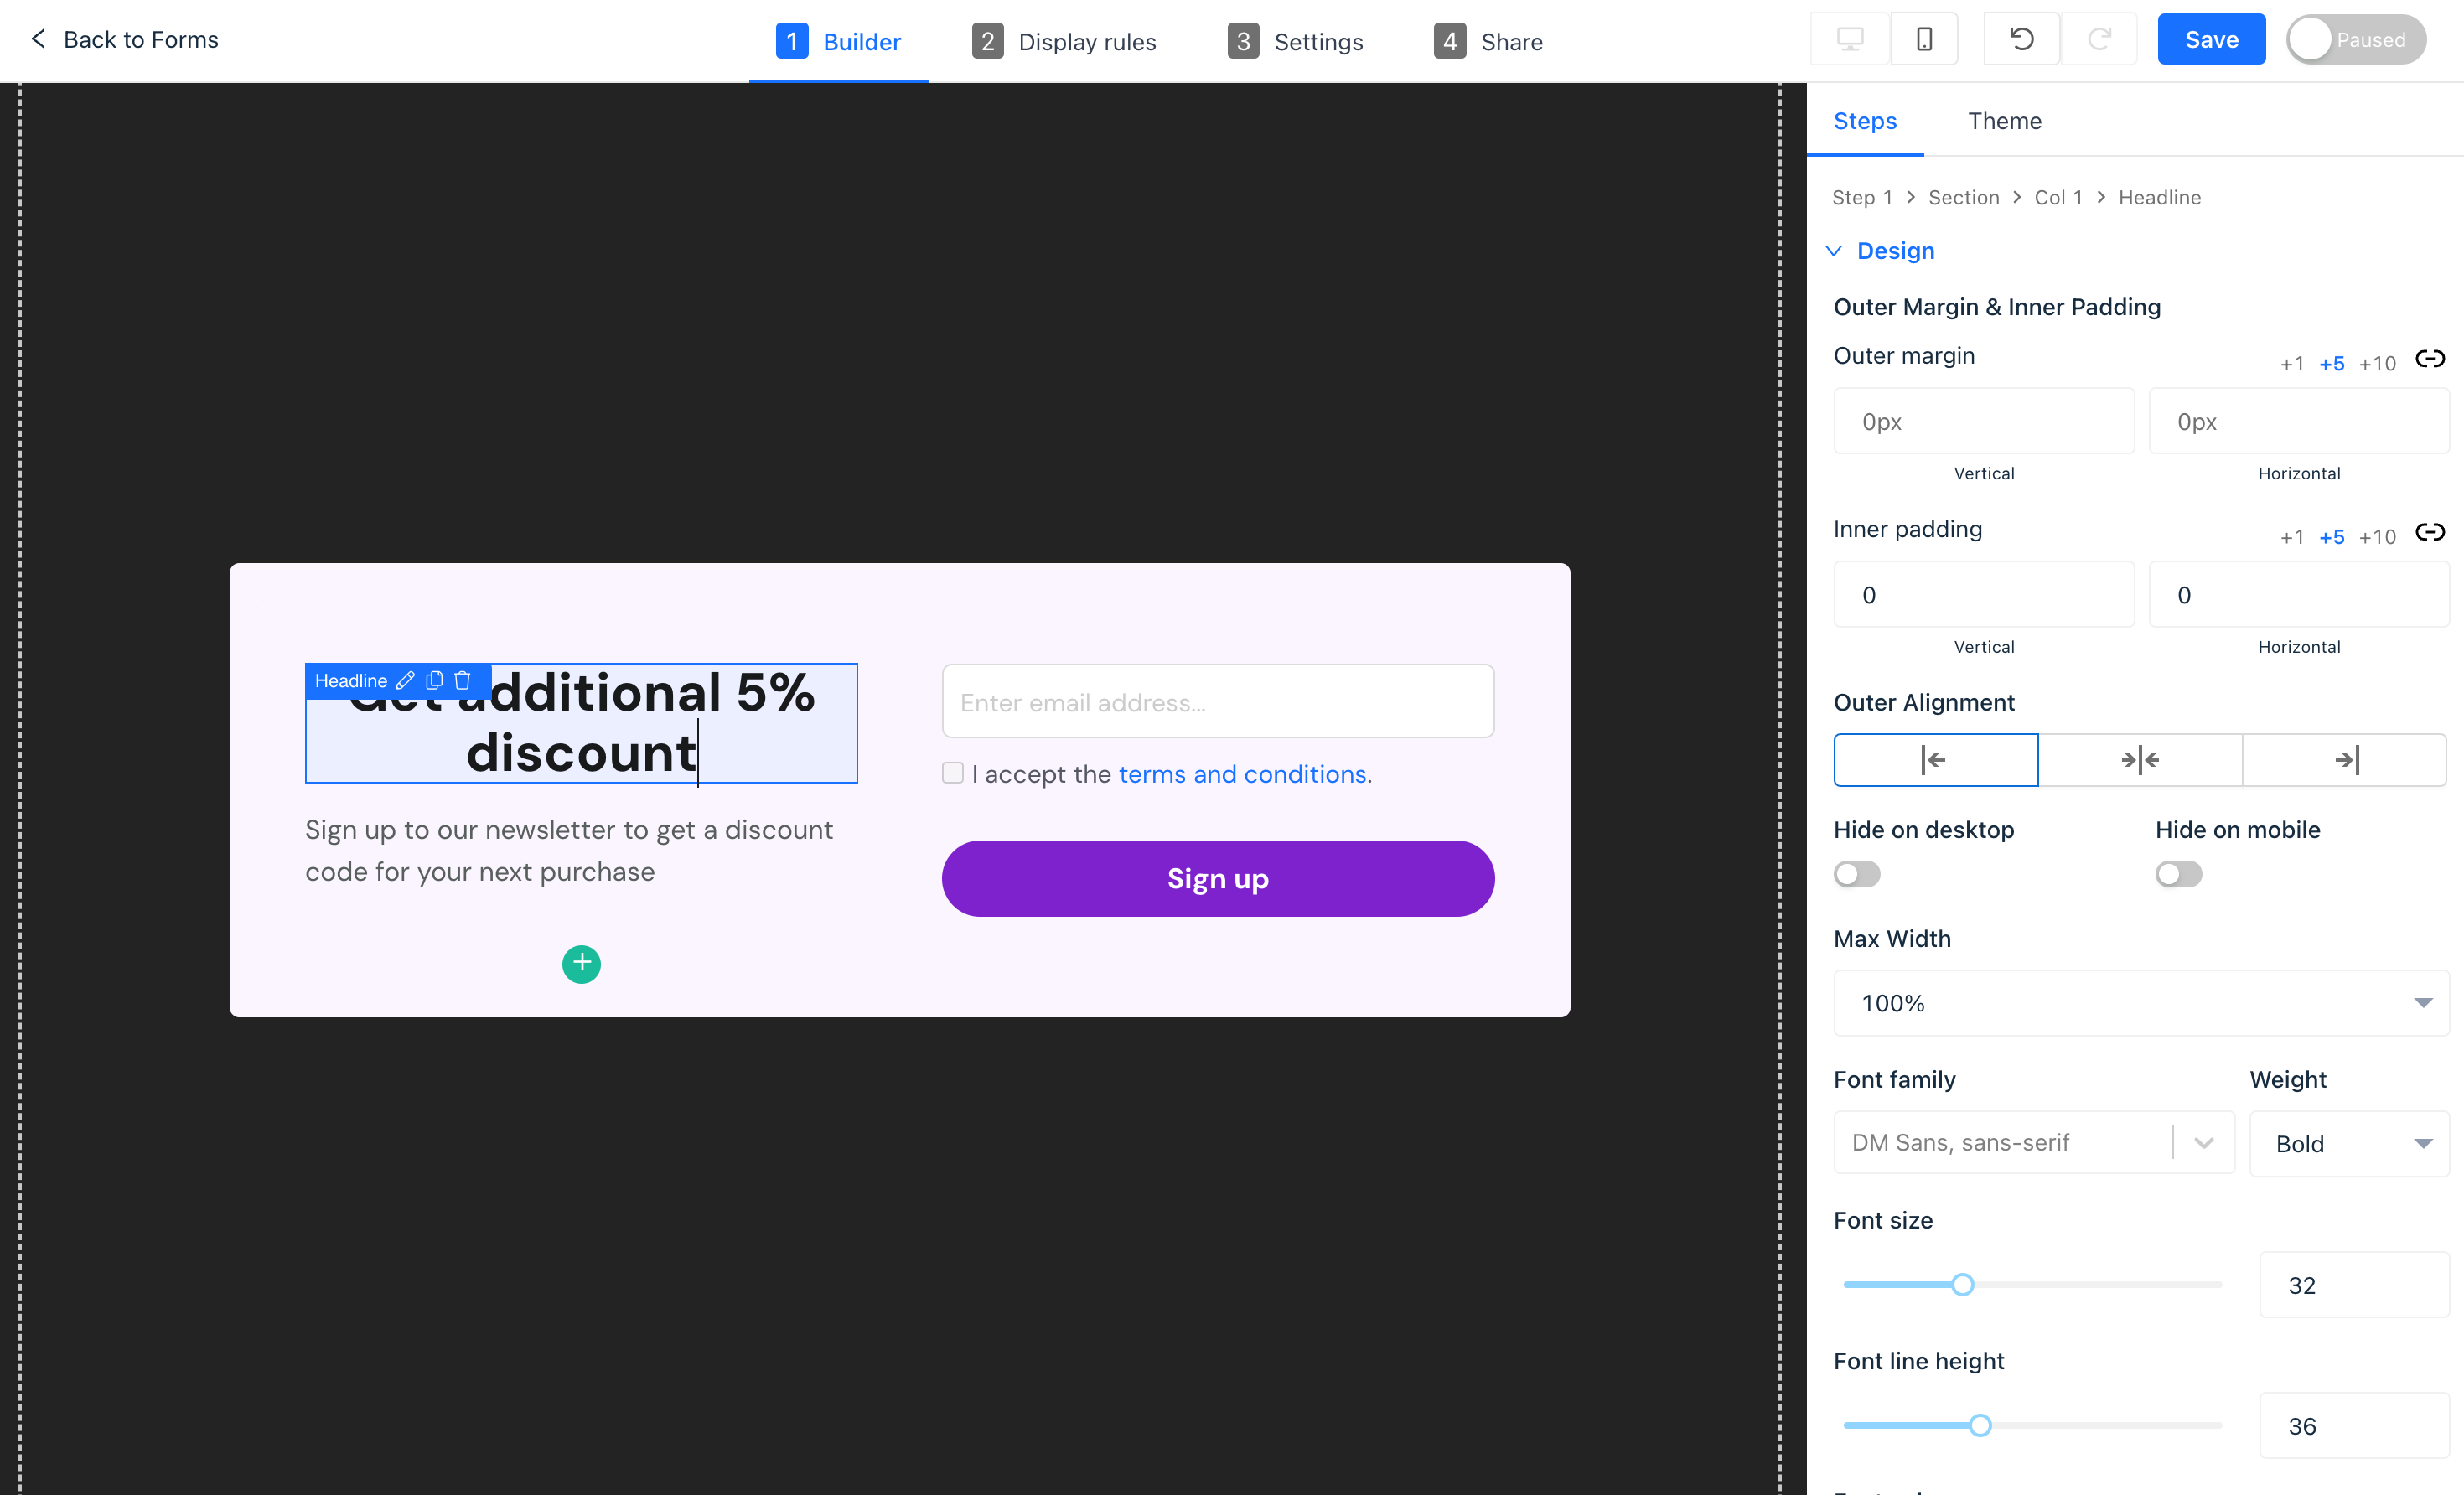
To learn more about using the drag-and-drop builder, head here →
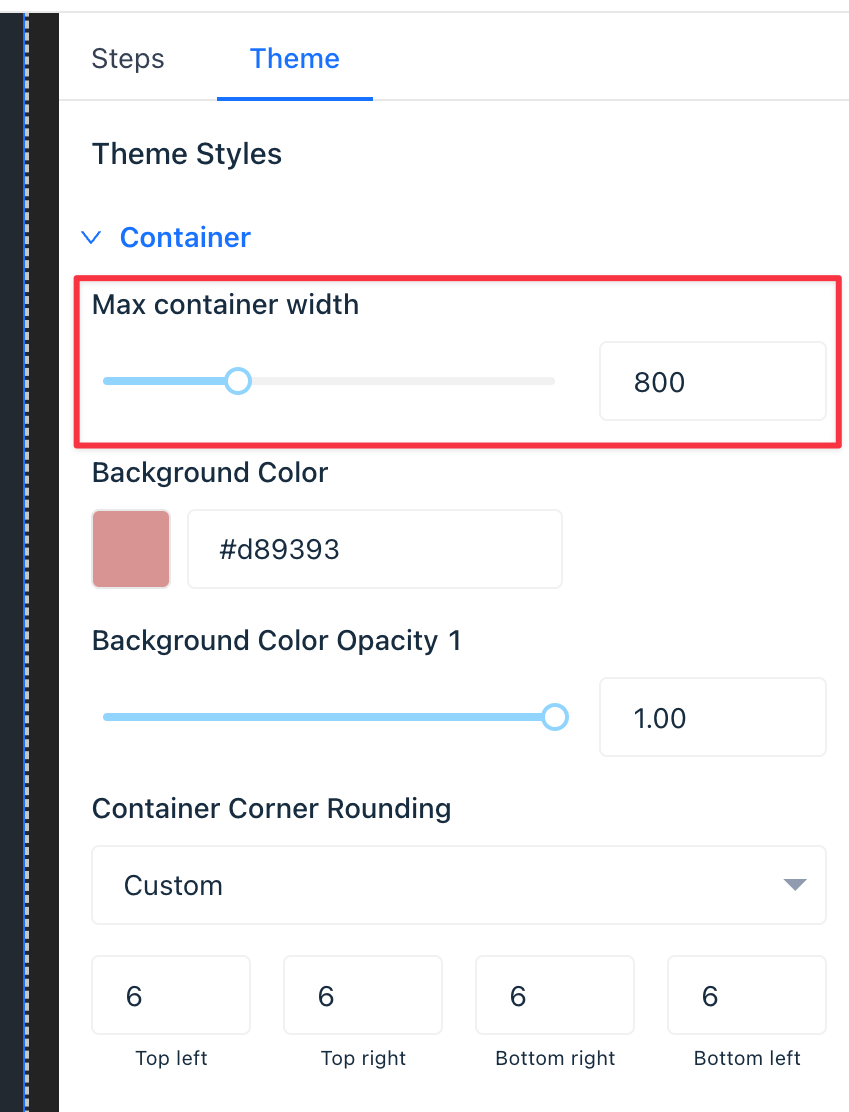
4. Adjust the width
The default width of the popup might not always be ideal for your content. Here's how you can modify it:
- Go to the Theme tab located within the builder panel.
- Under the Container menu, set the maximum width of your popup to better fit your content.
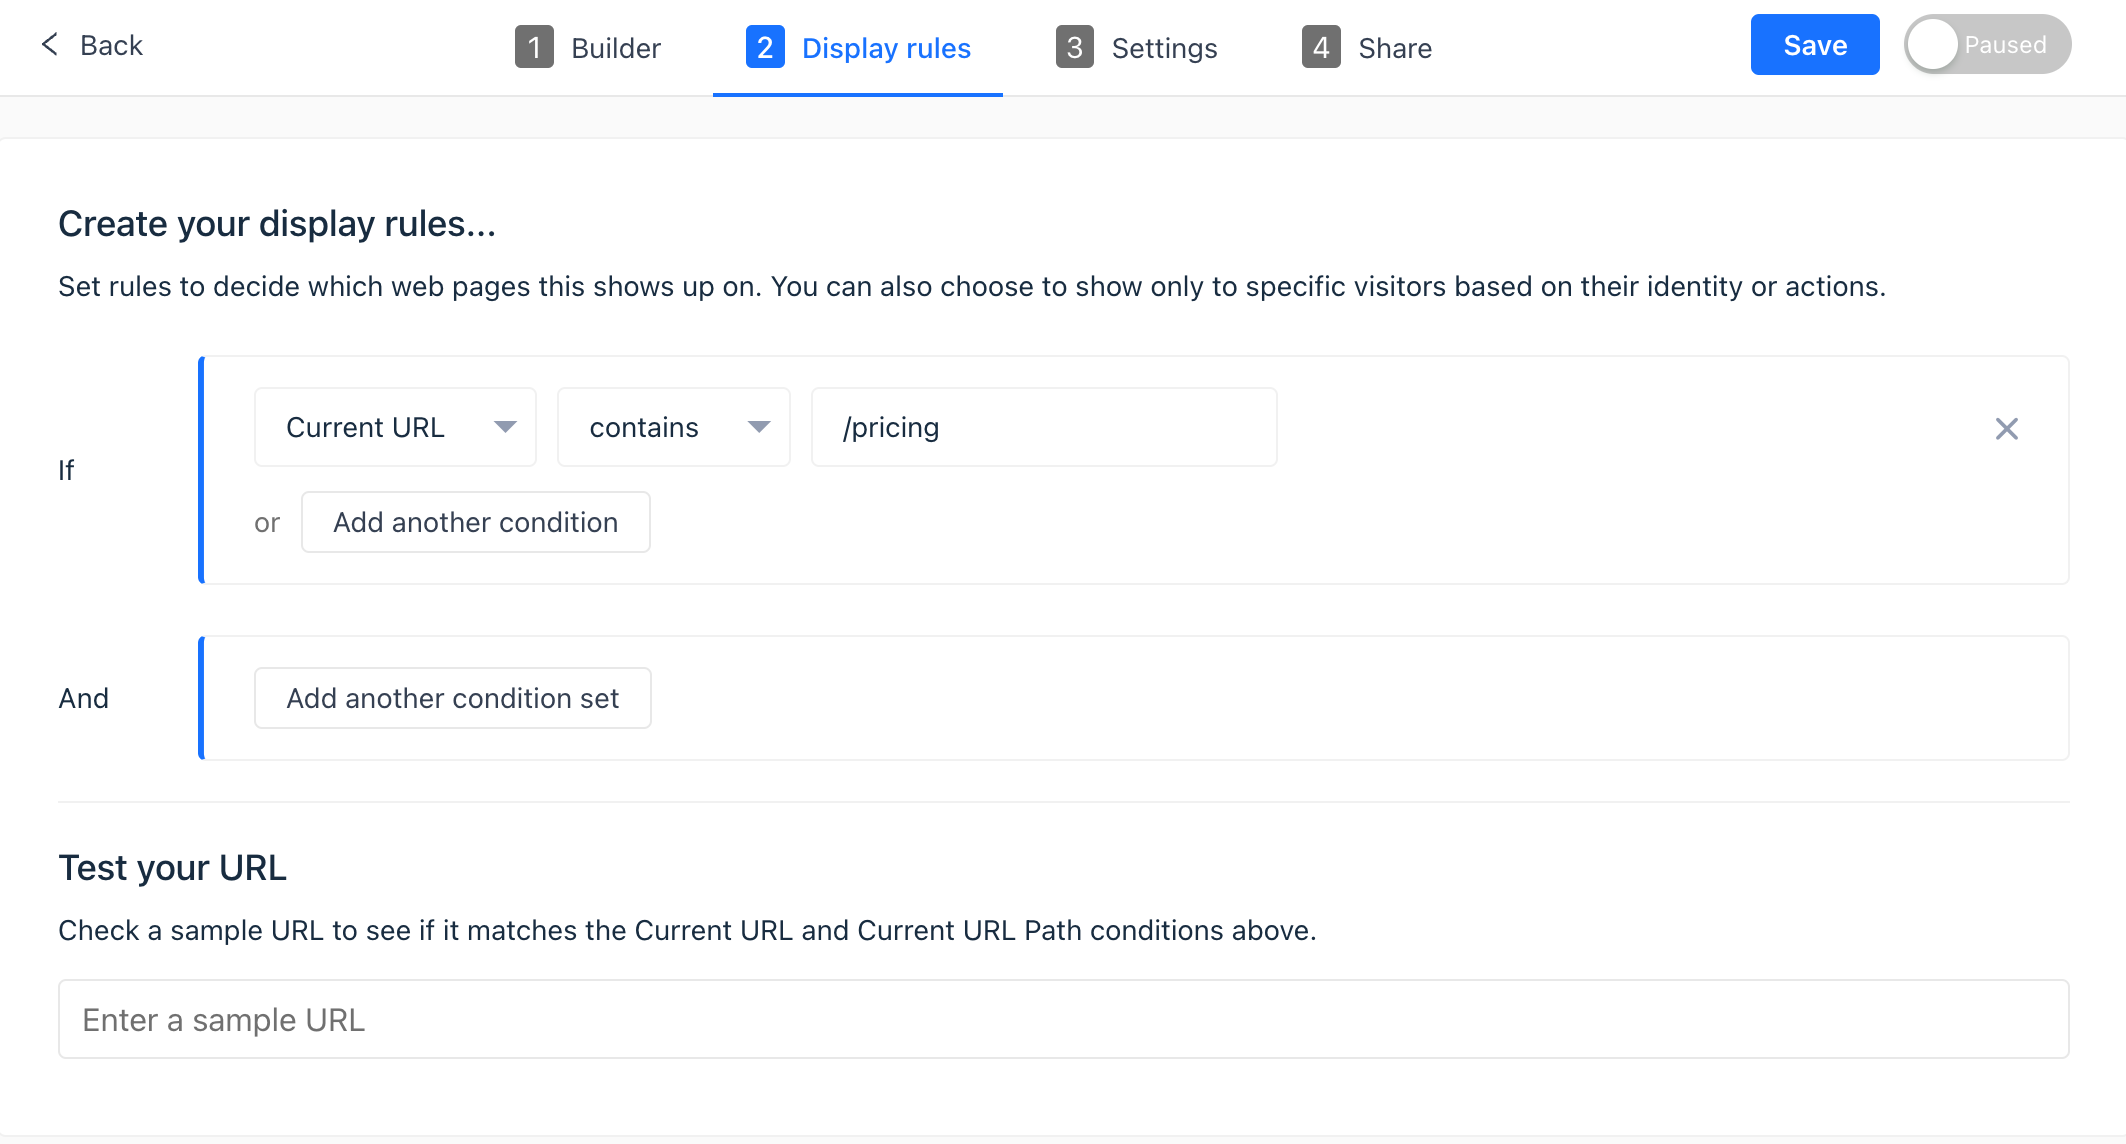
5. Choose display rules
- Navigate to the Display Rules tab.
- Choose the type of trigger you want to apply to your popup. Your choice dictates when the popup appears to your visitors.
- For a comprehensive overview of the various targeting display rule types, kindly consult the Display rules reference guide.
6. Publish your changes
After you've finalized your popup design and trigger conditions, it's time to see it in action:
- Ensure that the Gist script has been appropriately integrated into your website.
- Set your popup live.
- Visit a page on your website where the popup should appear based on the set display rules.
- If the popup doesn't appear as intended, navigate to Display Rules. Under the “Test your URL” section, input the page URL. This will inform you whether the said page meets the set conditions.
When used judiciously, popups can be an invaluable asset to drive conversions and enhance user interaction on your site.
Need Help?
If you have any further questions, please start a Live Chat. Just "Click" on the Chat Icon in the lower right corner to talk with our support team.