

NOTE: This feature is for only some paid plans and may not be currently enabled in your workspace.
Gist surveys help you receive valuable feedback from your contacts and others who might be interested in your brand. Surveys are easy to share on the web, so people can engage with them immediately. If your survey asks for an email address, you can use the collected responses to power workflows to create a more personalized customer experience and drive business growth.
This article will guide you through creating your first survey.
Create a survey
When you create a survey, you choose an audience to associate it with. Responses are collected in that audience, and people who opt in are added as subscribed contacts.
To create your survey, follow these steps.
- In your Gist workspace, navigate to Marketing > Messages > Surveys.
- To create a new survey, click Create survey in the upper right and give your survey a unique name.
Now you'll be able to access the survey builder, where you'll customize your survey. By default, there's a welcome screen and a single step to get started with, which you can edit or remove as you please.
1. Survey Settings
You can change survey settings in the right hand panel. Here you can setup this so you can send your survey from any teammate, or hide the sender entirely. You can also enable/disable a few other customizations:
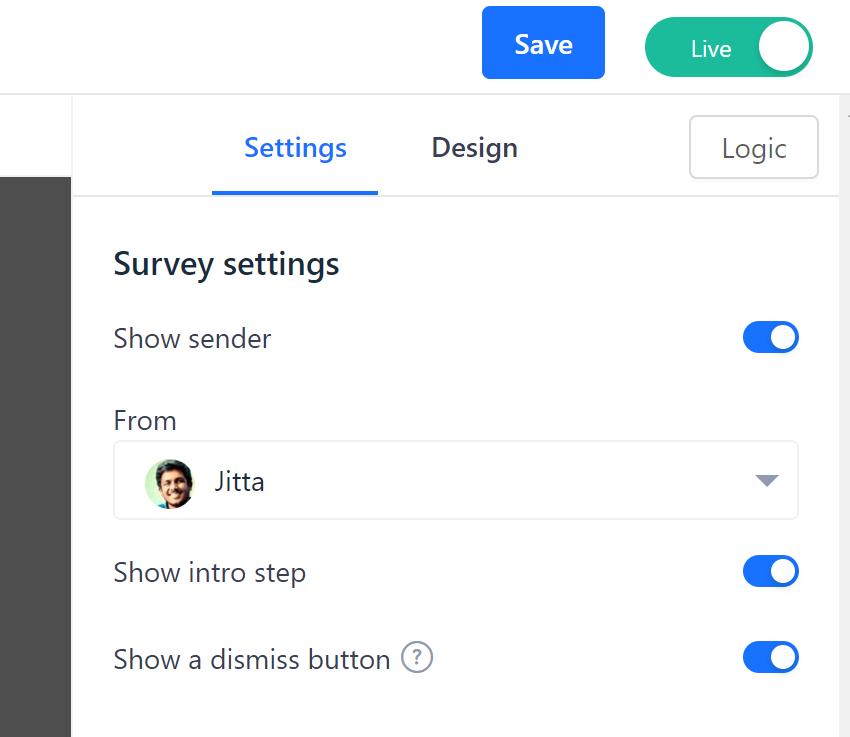
Show sender - this lets you choose whether to add a personal touch by showing a sender avatar and company name to the top of the survey.
Show Intro screen - this lets you set expectations and provide customers with some context before they begin the survey.
Show a dismiss button - use with caution! If this is disabled, customers will continue to see the survey until they complete it, they no longer match the rules, or the survey gets paused by you.
2. Add question
To add a question, go to Step 1 and click the + Add question button to see all different question types:
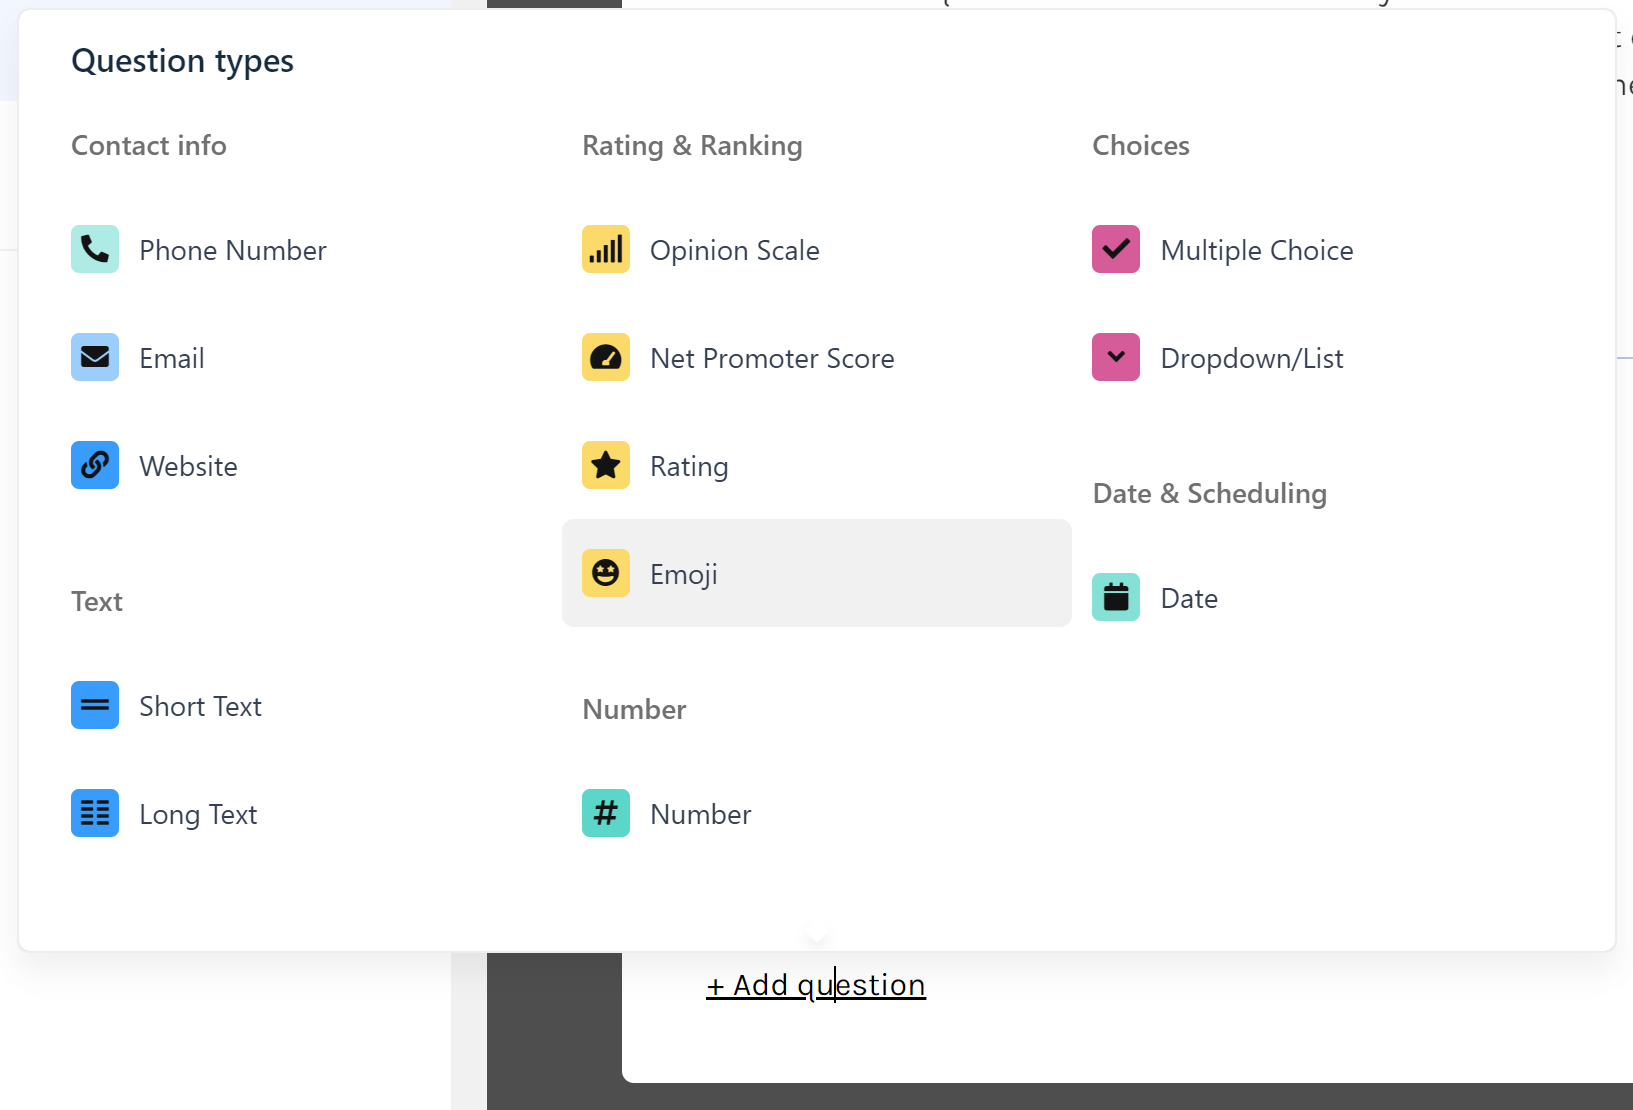
Contact info
Phone Number - to collect phone number
Email - to collect email address
Website - to collect websites or any links
Text
Short Text - to collect short text responses
Long Text - to allow for long text responses
Ranking & Ratings
Opinion Scale - to help you measure opinion on a scale from one to ten
Net Promoter Score® - to capture customer sentiment
Rating - to gather a rating out of 5
Emoji - to capture customer sentiment
Number
Number - to collect any number
Choices
Multiple Choice - to present customers with several options to choose from
Dropdown / List - to allow customers to choose a best fit
Date & Scheduling
Date - to allow customers to select a date
Once you add a question, simply, click it on your survey preview to edit the copy.
3. Question Settings
You can change question settings in the right hand panel. Here you can change things like making the question required, or randomizing answers.
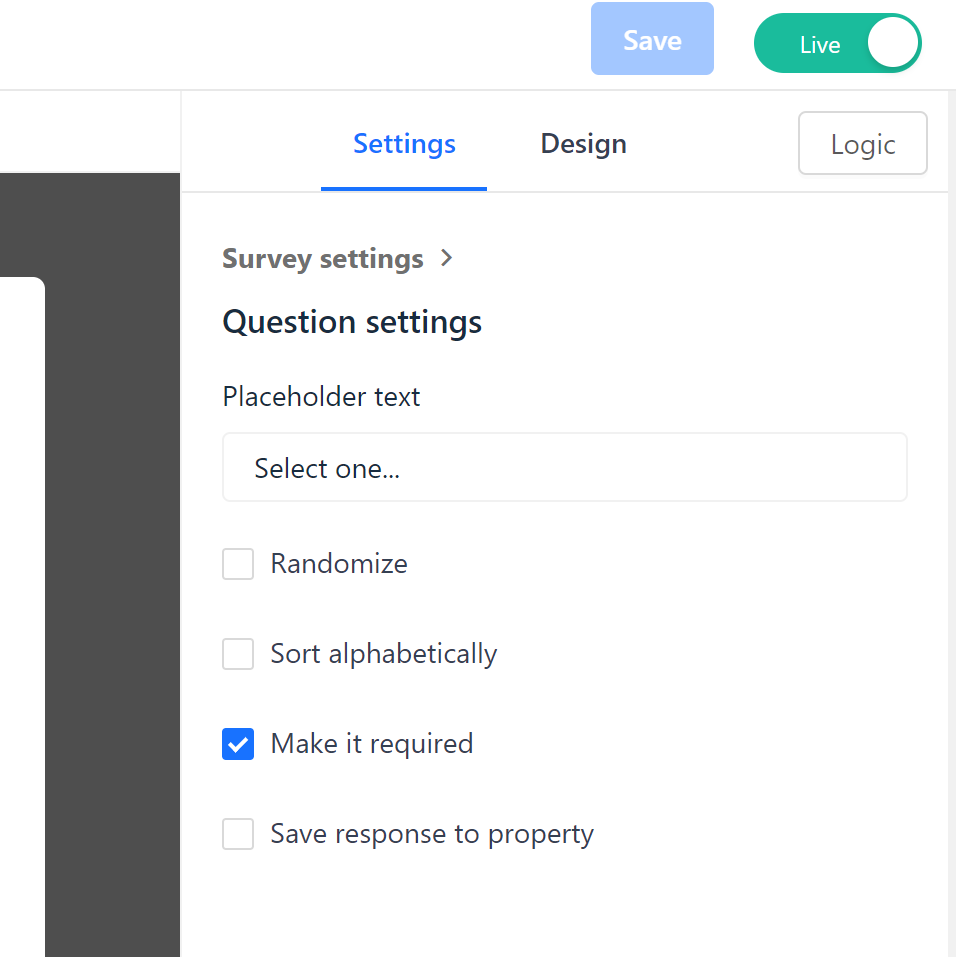
Placeholder text - Customize the placeholder text a user sees before giving their response to explain what you're asking them to do.
Randomize - This allows you to randomize choices in dropdown and multiple choice questions.
Sort alphabetically - This allows you to sort choices in alphabetically order in dropdown and multiple choice questions.
Make it required - Keep this ticked if the user must answer the question before they can proceed to the next step. This ensures you collect the information you need. Leave this unticked if their response is optional and not integral to the purpose of the survey, such as asking for any additional feedback.
Store response to a property - This allows you to capture and store the data your users share in the survey into contact properties. For example, you could track data about the users who found it difficult to set up their account. Then, you could send a follow-up email targeted to these users asking if they would like any additional help.
You can add more questions to the same step by clicking “+ Add question” button. Or, if you want to add more steps with different questions, click the “+” in the left hand panel to add another step.
Once you’ve added all your questions, click on “Thanks” to personalize your thank you step.
Note: You can also choose to send customers down different paths in your survey based on how they respond to questions.
4. Schedule your survey
Next, you’ll be able to trigger your survey to send automatically, or schedule it for later.
Need Help?
If you have any questions, please start a Live Chat. Just "Click" on the Chat Icon in the lower right corner to talk with our support team.