Unlike the traditional method of logging events manually within the code so they can be tracked by analytics software, Gist’s event visualizer lets you define events by simply performing the event yourself, by simply clicking around your website.
You do not need to touch the code at all. Gist’s event visualizer will take care of it.
What is an event?
An event is any measurable action that a user takes on your site. Any action associated with a user. "Clicked Signup Button", "Received Transactional Email," or Visited Pricing Page" are all examples of events.
In most other analytics tools, you need to write custom code on every page of your website, to track events. However, Gist tracks everything automatically without the need to code, which means defining events is a lot easier.
It also means that every event definition is completely retroactive since Gist records every event and user action from day one.
There are two ways to define events in Gist - through our Event Visualizer or on the Events page.
How to use the event visualizer?
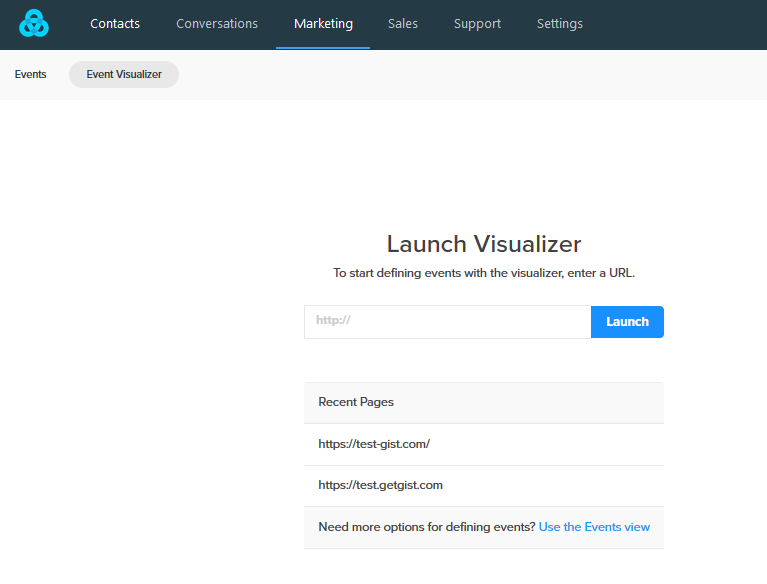
After logging in to your Gist account, you need to go to the Events tab on the top left-hand corner of your screen. Then, click on the ‘Event Visualizer’ tab on the top of your screen.
Enter the URL of the web page that you want to track, and launch it. You can only enter the domain that is attached to your project. Sometimes the pop-up may be blocked by your browser, in which case you will need to allow popups from 'app.Gist.com' in your browser.
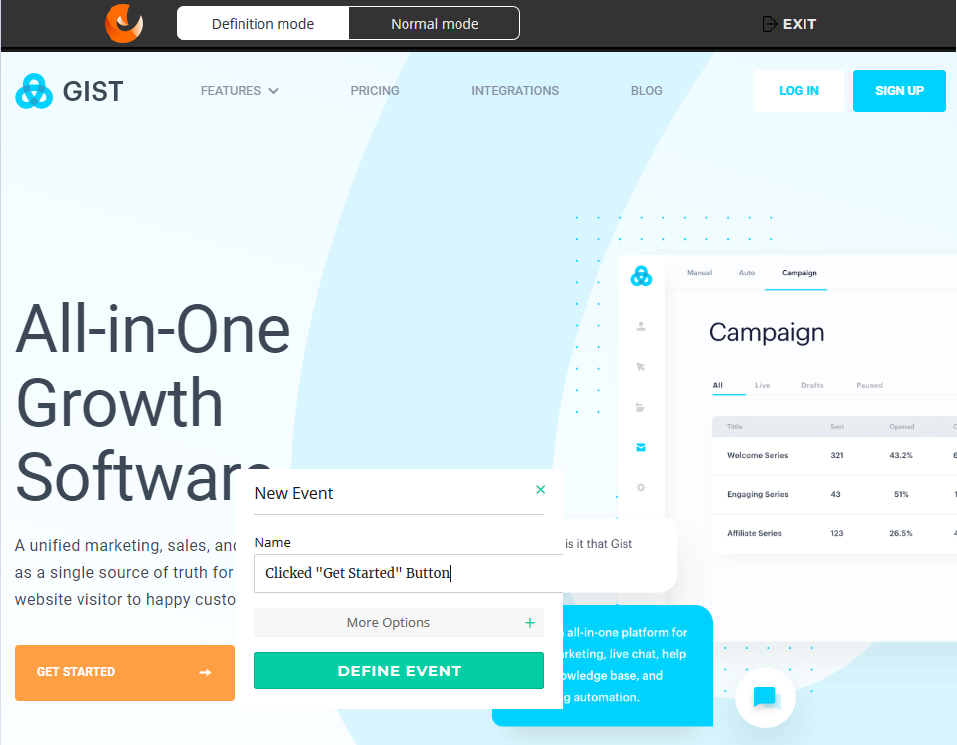
Once this is done, you’ll be redirected to the webpage in a new browser window. Hover over any link or button on your page that you wish to track. Click on the button and a menu will appear.
Name the event, choose the appropriate options, and click on ‘Define Event’.
The event is now defined and Gist will match all previous user actions for this particular event and collects the retroactive data.
Repeat this step for as many links and buttons that you wish to define as events.
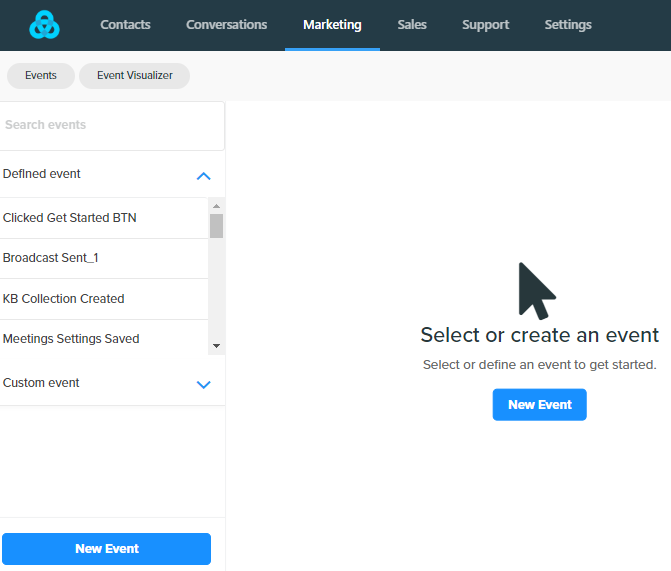
You can now see all defined events in the ‘Events’ tab. Click on each event to get the relevant retroactive data for that event.
If you wish to track custom events such as ‘Order Confirmation’, or ‘Viewed Thank You Page’, or ‘Downloaded e-book’, etc., you can do that by simply using the gist.track() method in your website code.
If there is anything that you need help with, reach out to us via chat and we’ll do our best to help.
Need Help?
If you have any further questions, please start a Live Chat. Just "Click" on the Chat Icon in the lower right corner to talk with our support team.


