

Spread your reach, build your list, and gain new subscribers by embedding your forms to virtually any page on the web. And with Gist, it's incredibly easy to embed any forms on your site.
In this article, you will learn exactly how to create, customize, and launch an embedded form on your website with Gist.
1. Create your form
- Start by navigating to the Outbound > Forms page on your Gist dashboard.
- Click on the New form button to get started.
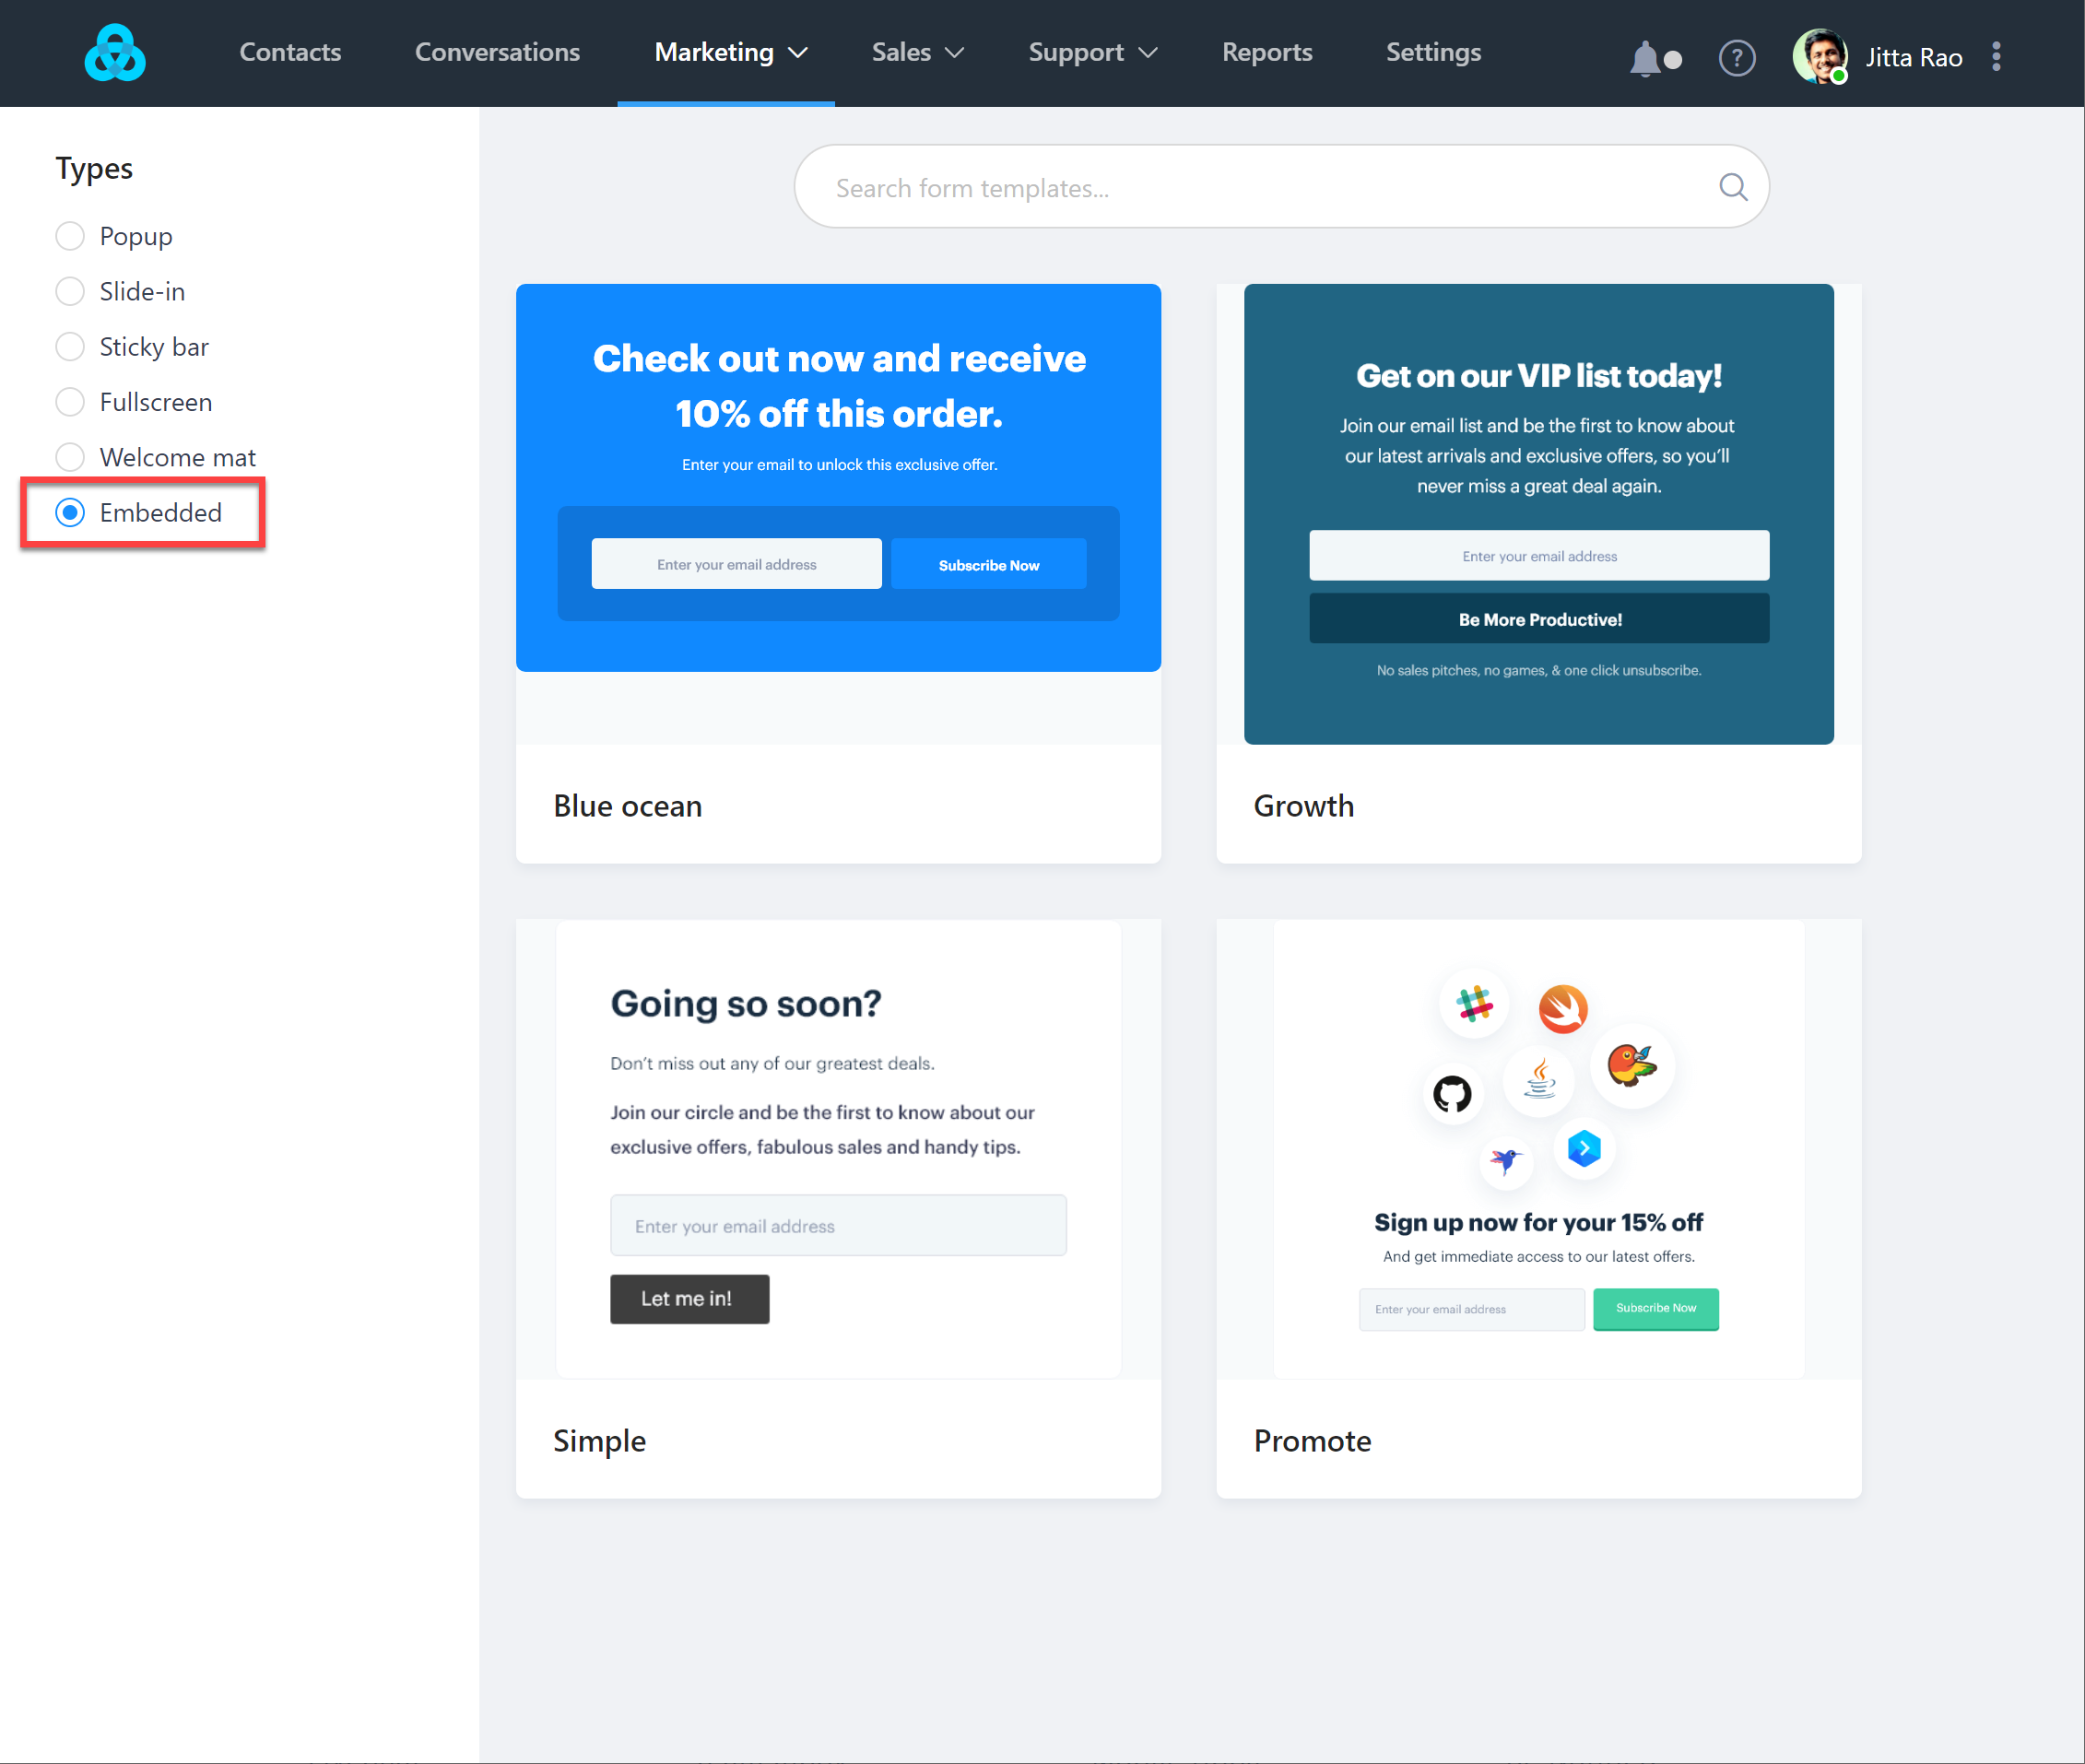
2. Choose a template
- From the left sidebar, select the Embedded category to view available templates.
- Take your time to preview the various templates. When you find the one that aligns with your brand or specific use case, click Use Template.
- Assign a name to your new form.
Tip: Give your form a clear, descriptive name to ease future referencing. For instance: 'Homepage Embed', 'Blog Footer Embed', and so forth. This practice is helpful, especially as your site grows and you have multiple forms.
3. Customize the design
With Gist's user-friendly drag-and-drop builder, customizing your popup becomes a breeze:
- Modify the headlines, paragraphs, and button text per your requirements.
- Adjust the form actions to fit your desired interaction.
- Remember to Save your progress often to avoid any unintended data loss.
To learn more about using the drag-and-drop builder, head here →
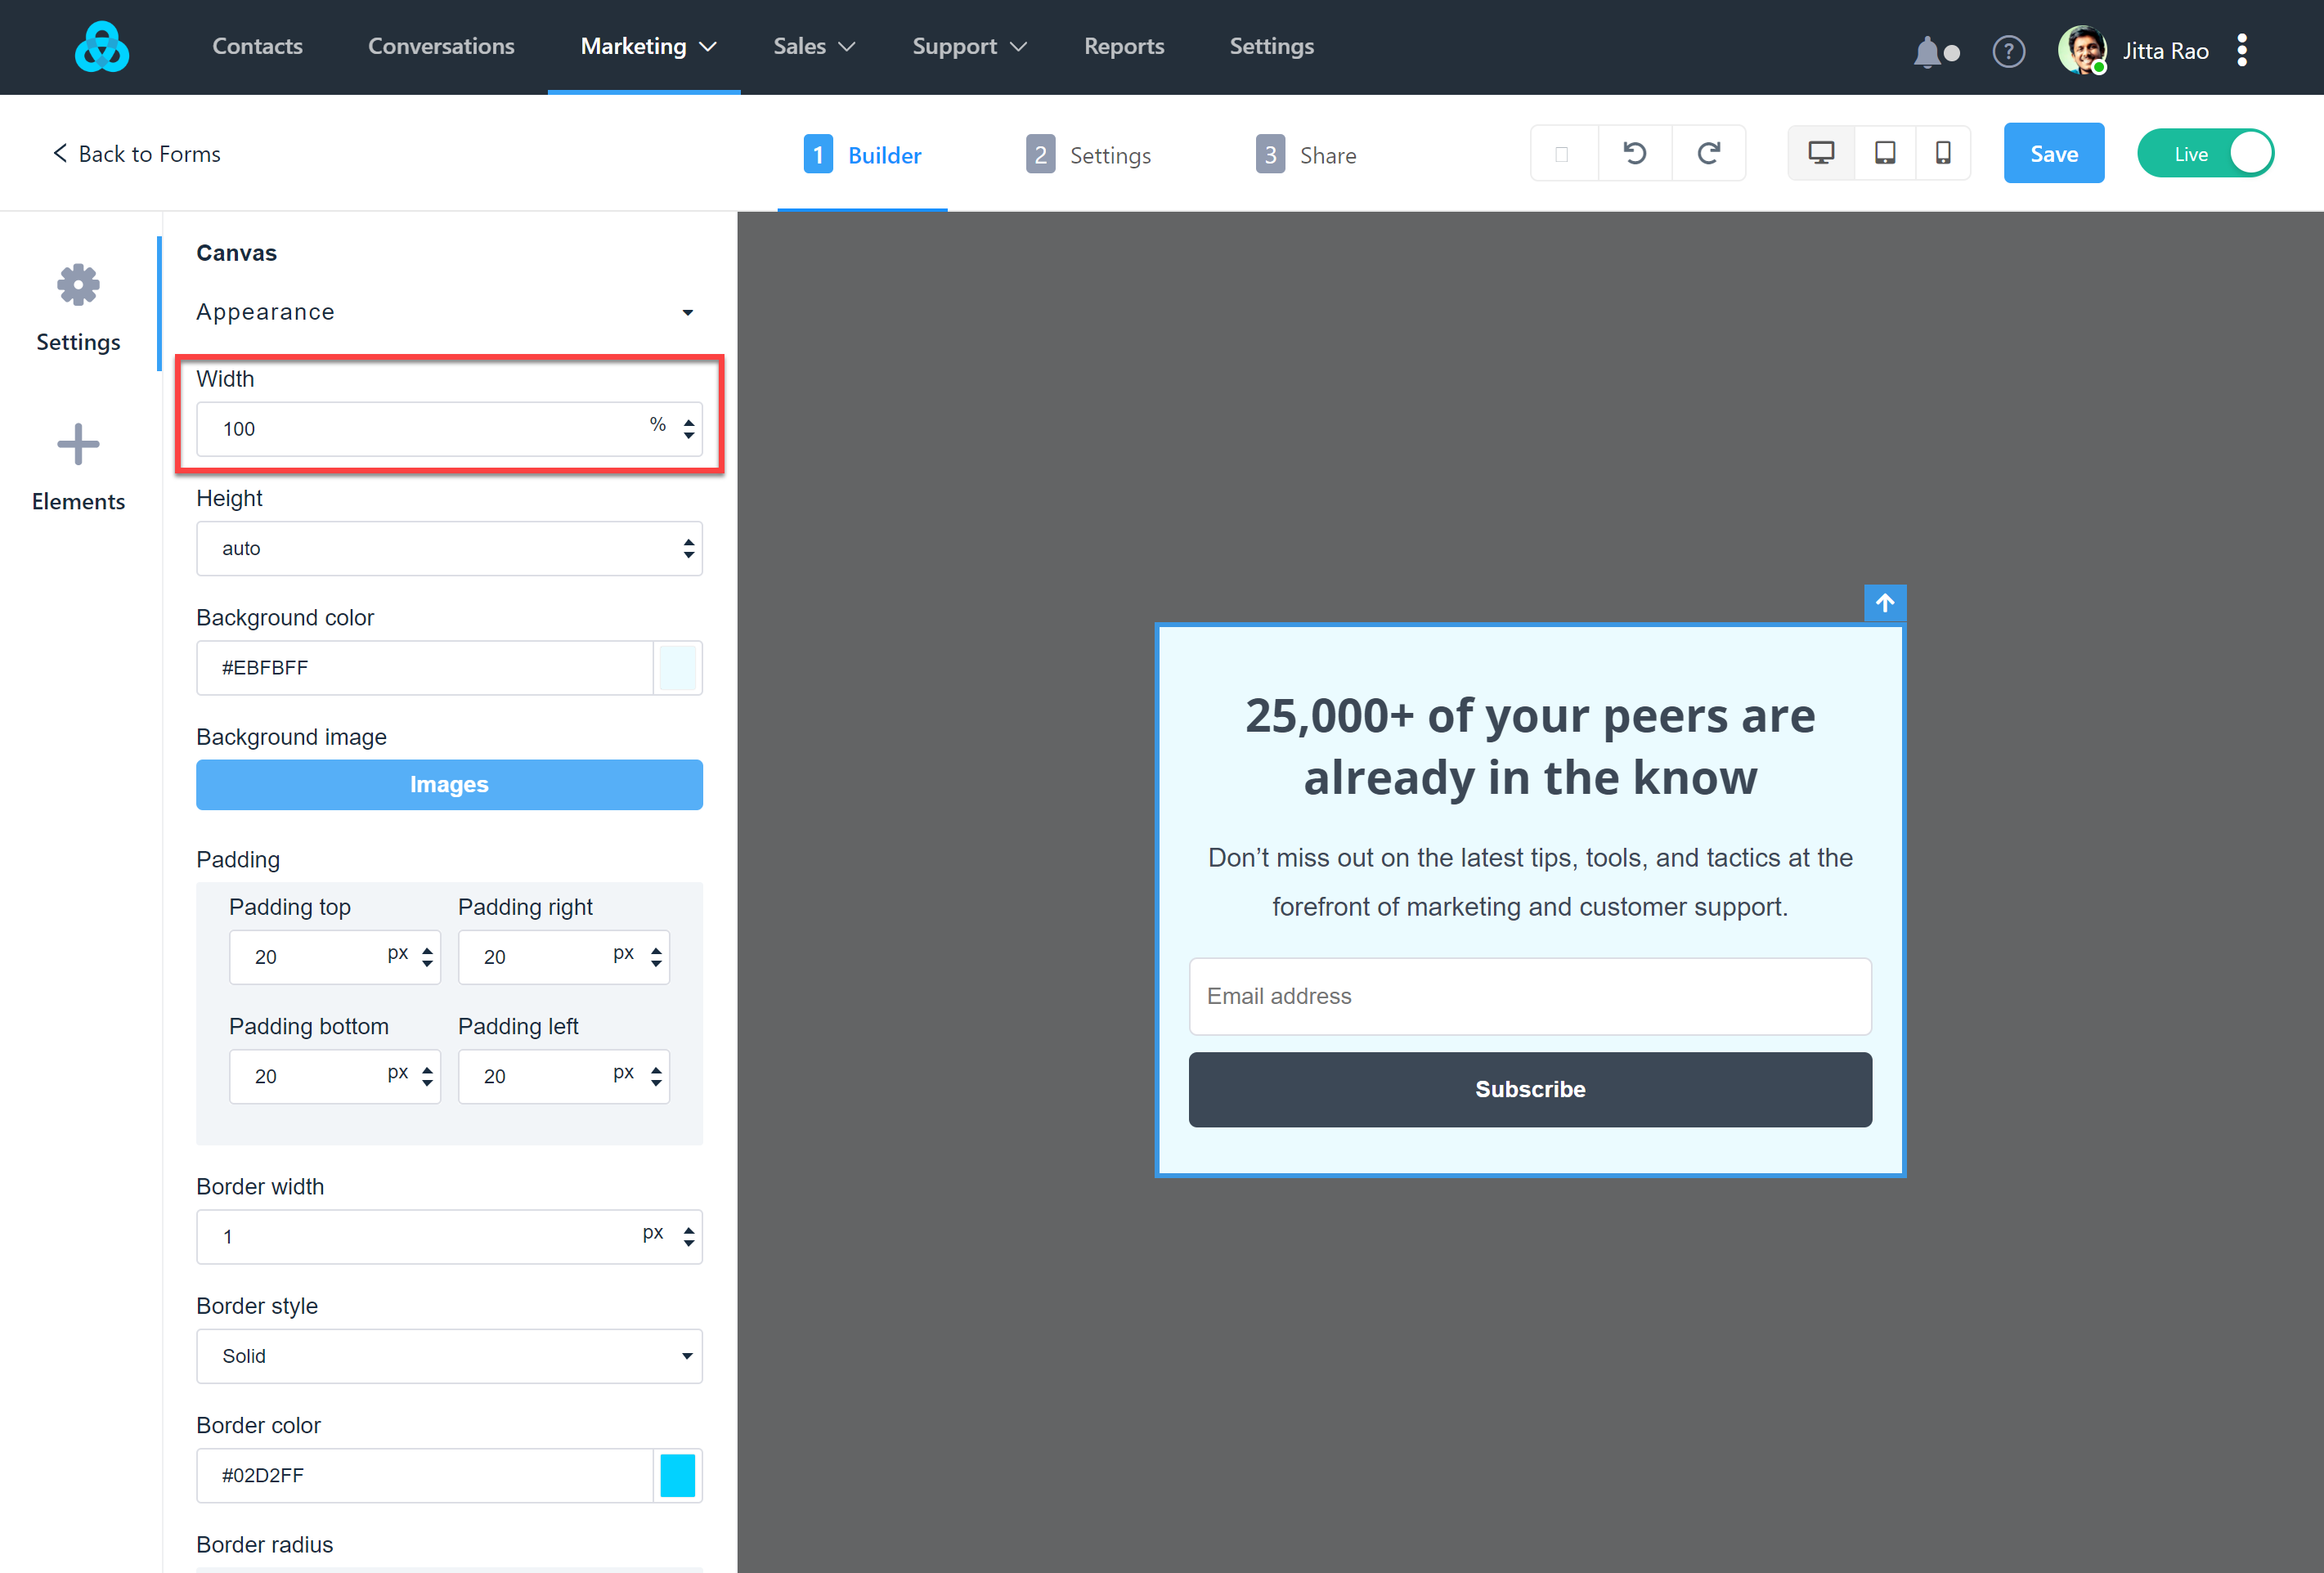
4. Adjust the embedded form width
The default width of the embedded form might not always be ideal for your content. Here's how you can modify it:
- Go to the Theme tab located within the builder panel.
- Under the Container menu, set the maximum width of your popup to better fit your content.
Pro tip: Use the 100% setting if you want your form to expand to the maximum width of the container on the site you plan to place it in.
4. Publish your changes
For this step, we recommend having your site’s code (for whichever page you publish your embedded form to) open while you work. NOTE: If you’re unsure how to access your site’s code, you may need to consult your website software’s support options or whoever set up your site.
- Navigate to the "Share" tab and copy the embed code.
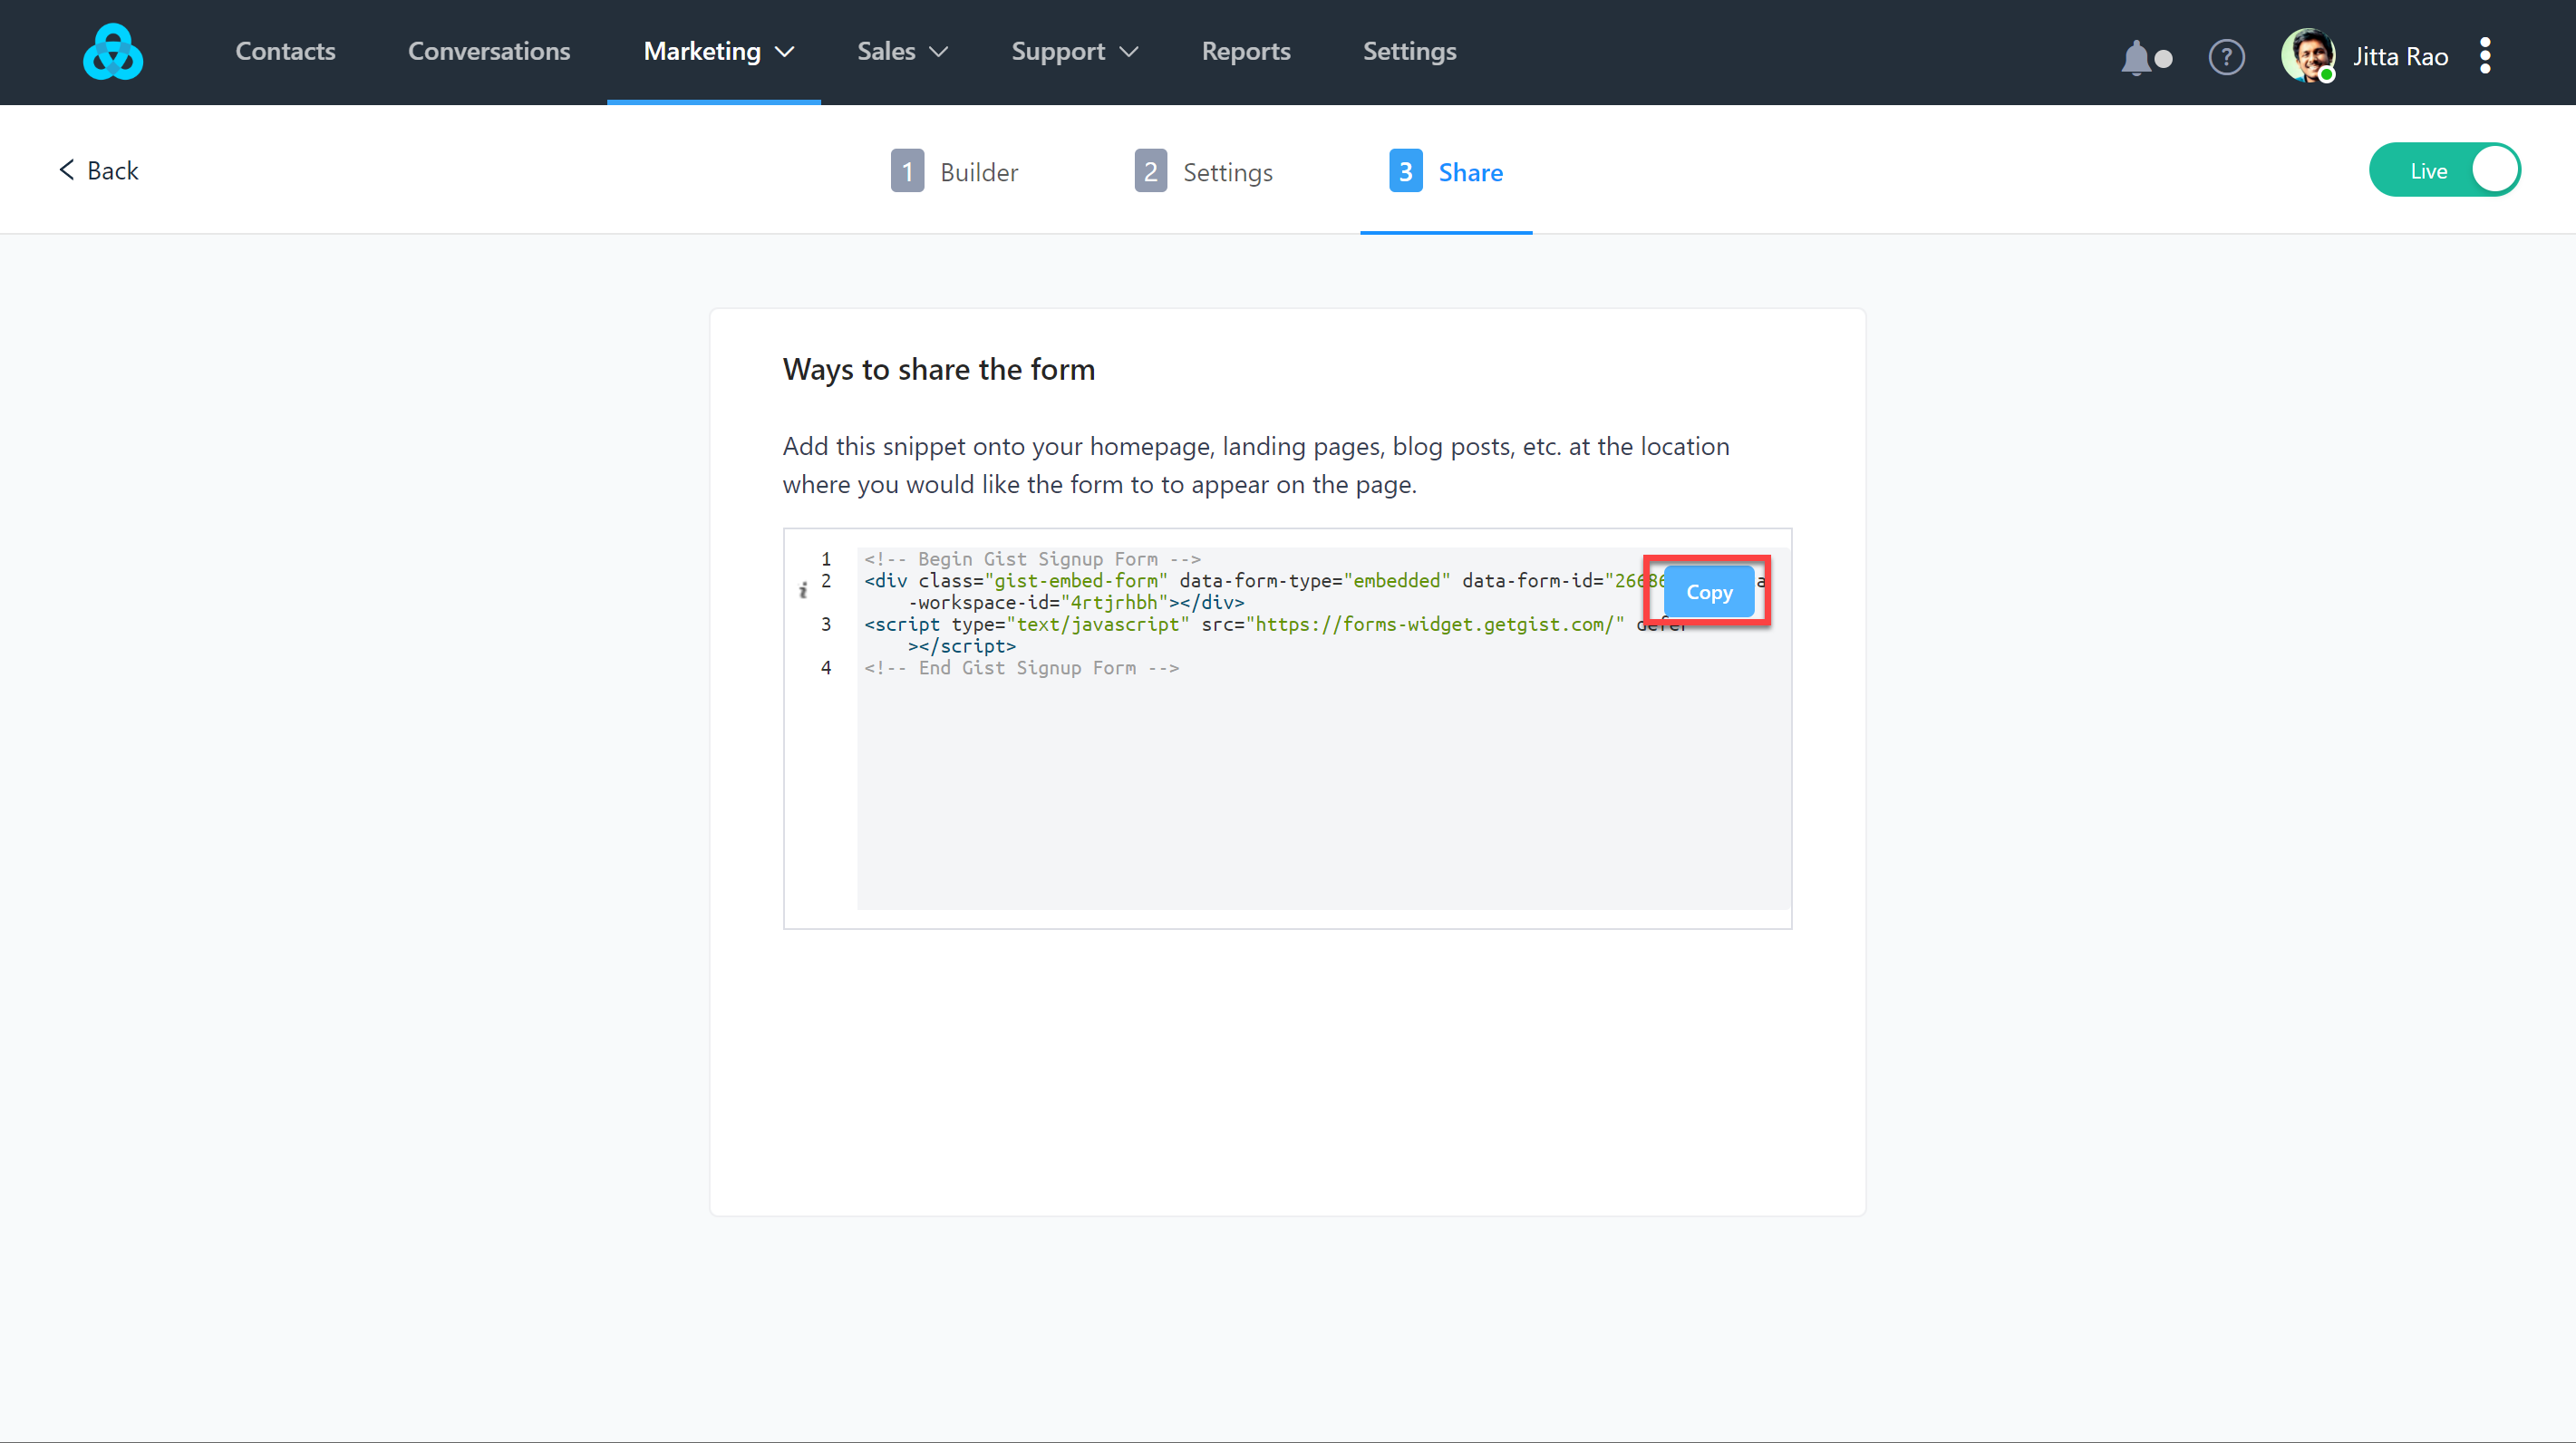
- Paste this embed code in your webpage’s source code at the desired location.
- Update your site and test the embedded form to ensure it is running smoothly.
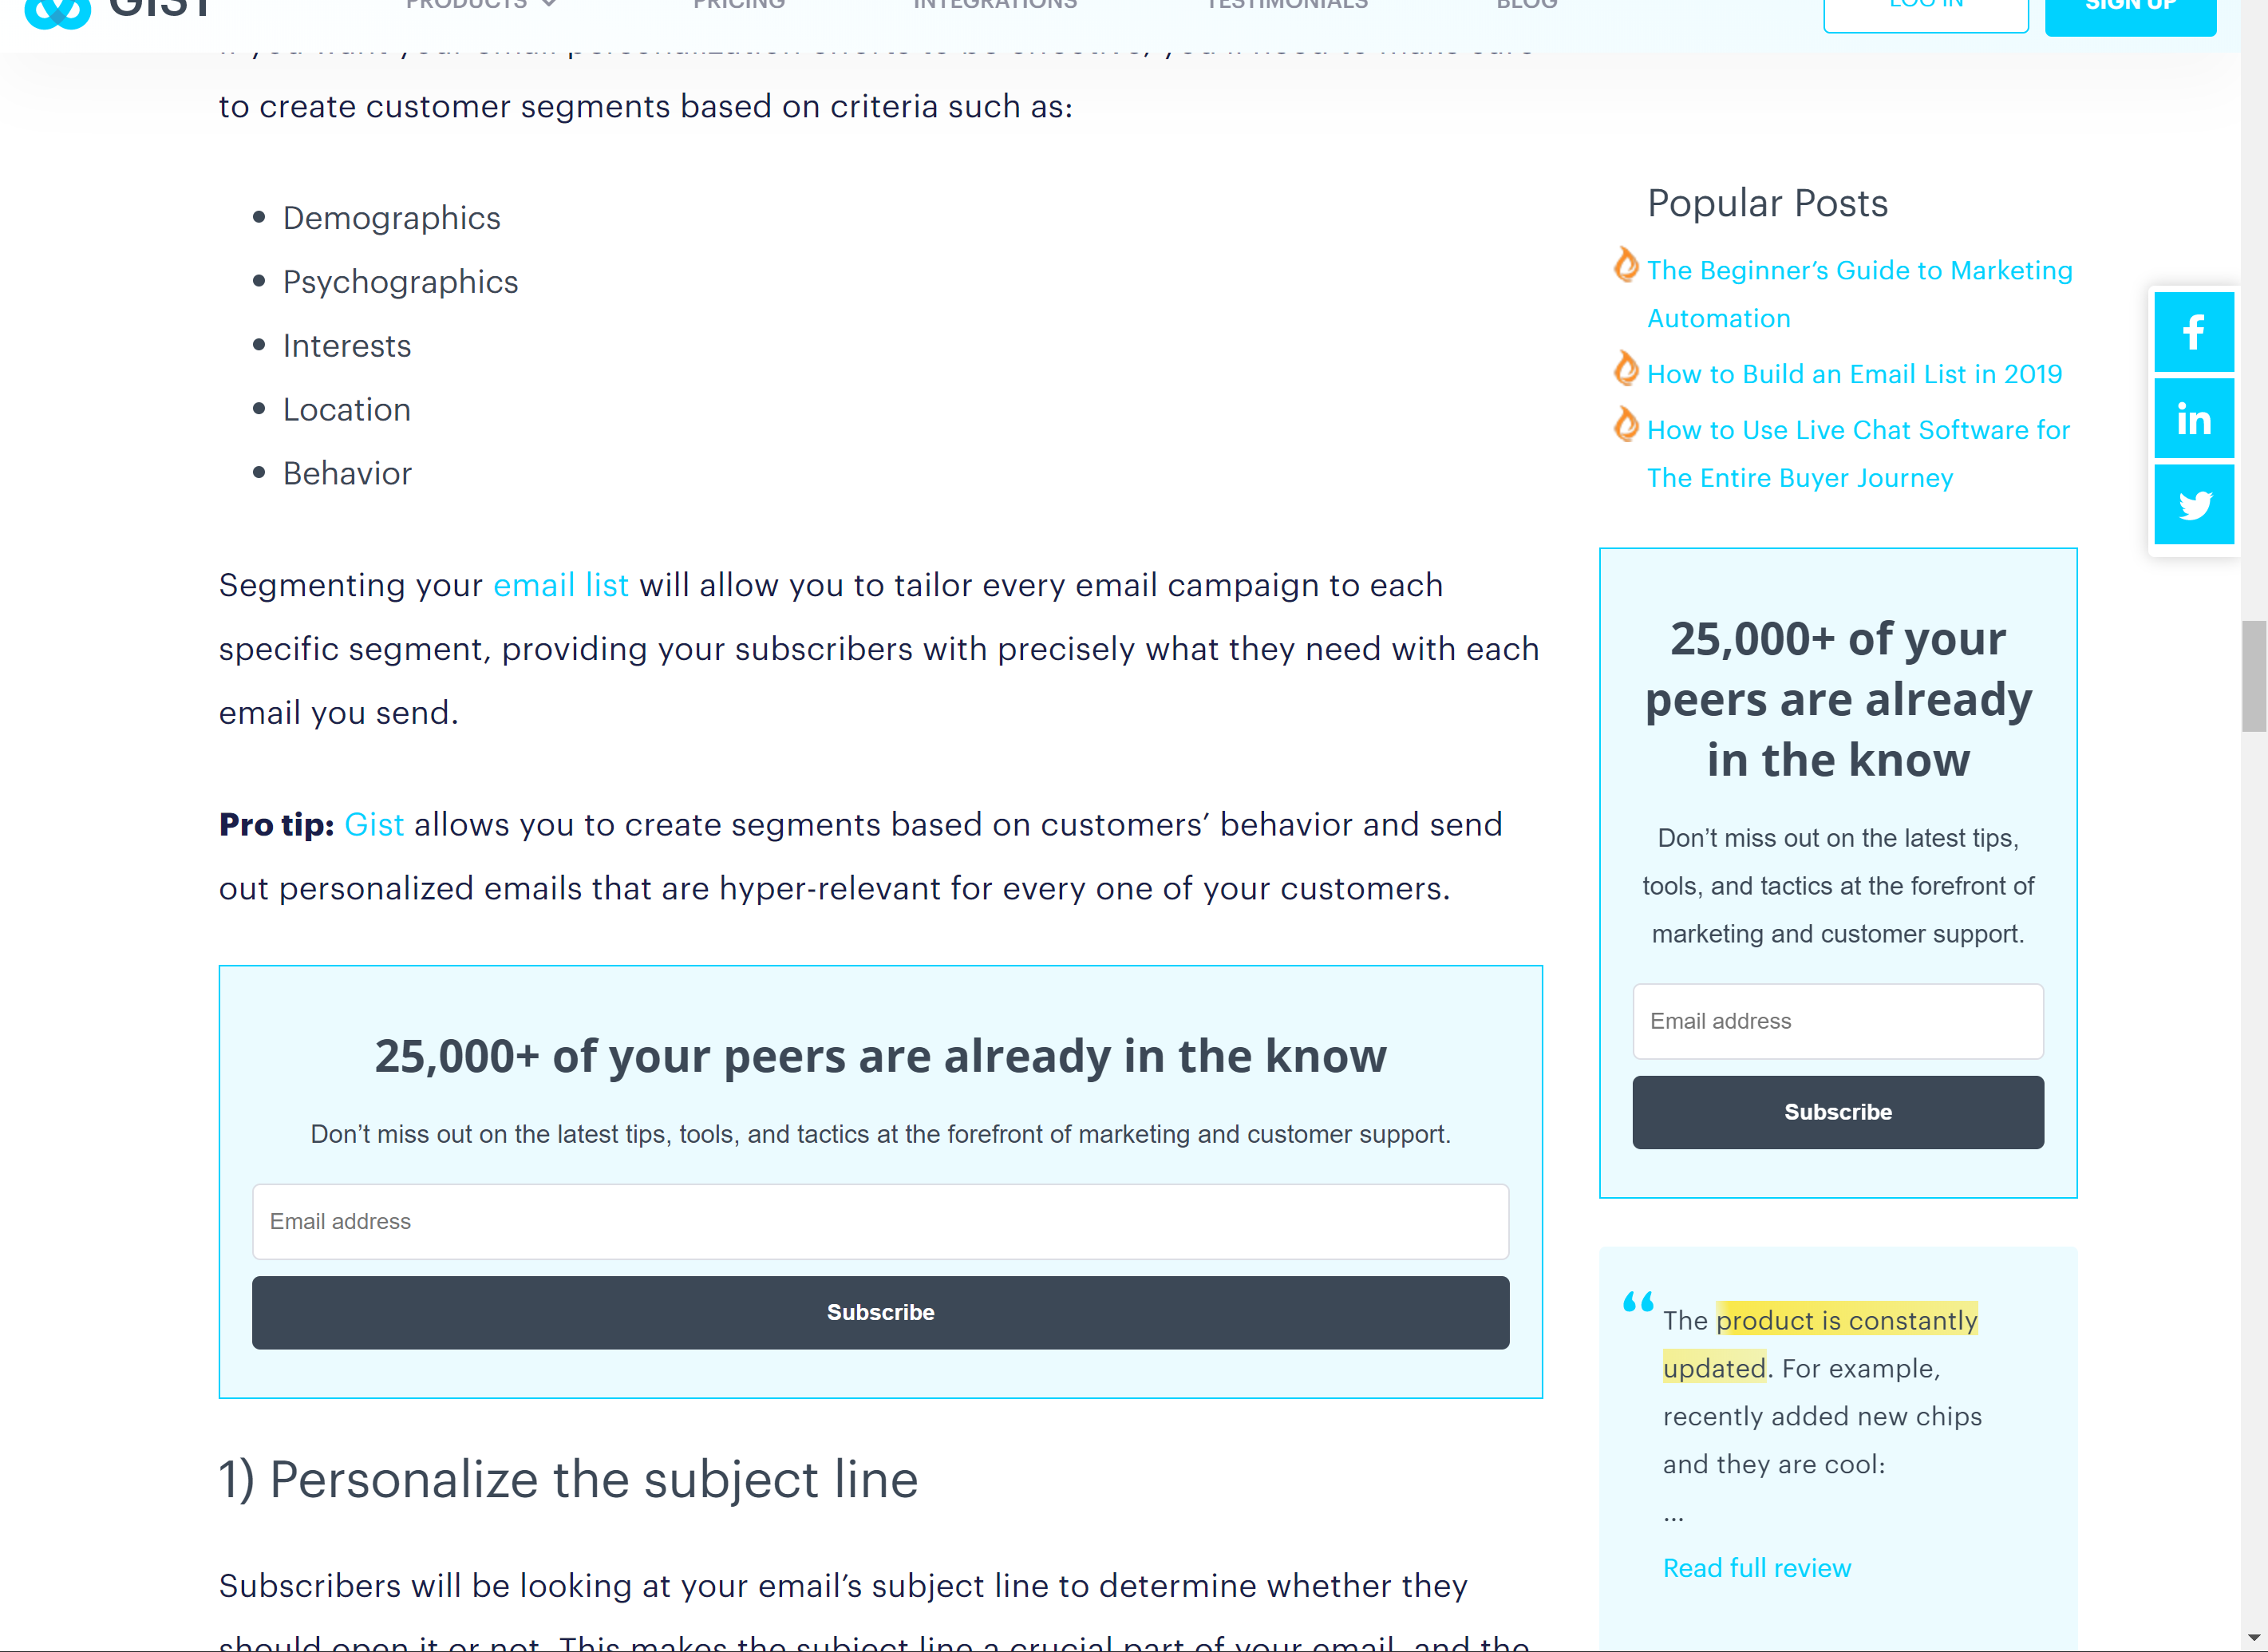
Ideas for Embeds
Embedded forms are versatile and can be positioned in various sections of your website beyond the footer. Integrate an embedded form within a blog post, sidebar, or dedicated webpage for events or sweepstakes, enabling you to capture subscribers as they engage with your content.
FAQs
Q: Can I manually add my campaign to the same page/post in multiple places?
A: Absolutely. It is possible to showcase the same form in numerous areas on the same page or post.