Create one-on-one scheduling pages so contacts can book meetings with you. Your contacts can access these scheduling pages using a meeting link. When you connect your Gmail of Office 365 calendar, scheduled meetings will sync with your connected calendar so your appointments will always be up-to-date.
In this guide, we'll walk you through creating new meeting links.
Create meeting link
- Navigate to Sales > Meetings page.
- In the upper right, click Create meeting link.
- In the dialog box, give it a name and a url slug.
- Click Create.
Continue setting up your scheduling page following the steps below.
Details
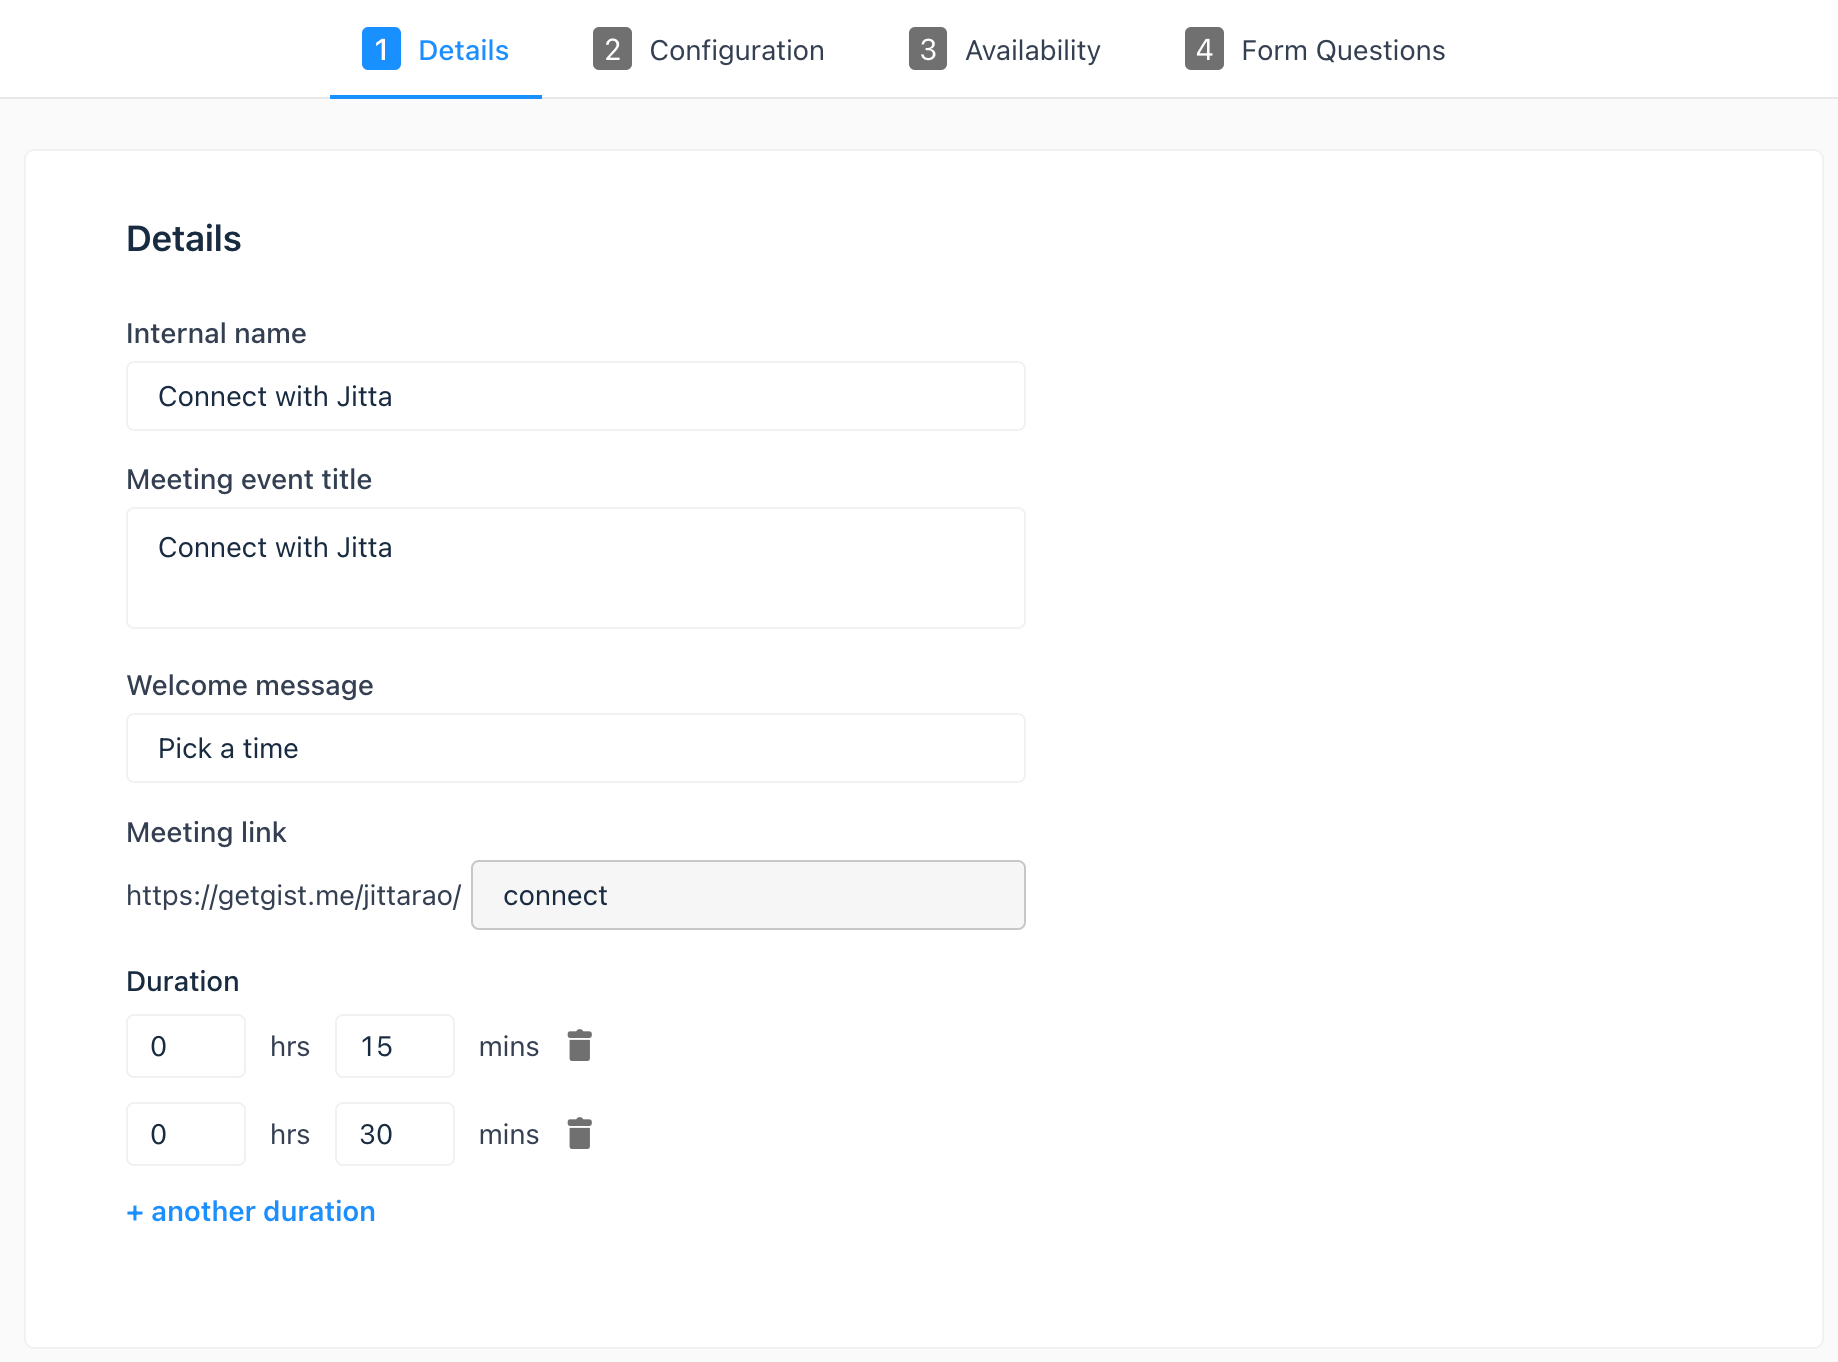
On the Details page, edit the meeting link's basic information.
Internal name: the name that appears when the meeting link used to access the meeting link is added to an email.
Meeting Event Title: the name of the calendar event you share with your contact. For example, "Product Demo" would appear as event name. You can insert personalization tokens in the subject by clicking Contact dropdown.
Welcome message: a short text that appears on your meeting link to inform your visitors what's the meeting about.
Meeting URL: This is the link that contacts will use to book meetings on your calendar, and it cannot be edited after the link is created.
Duration: the length of time visitors can book you for. Click + Add duration to add more options.

Configuration
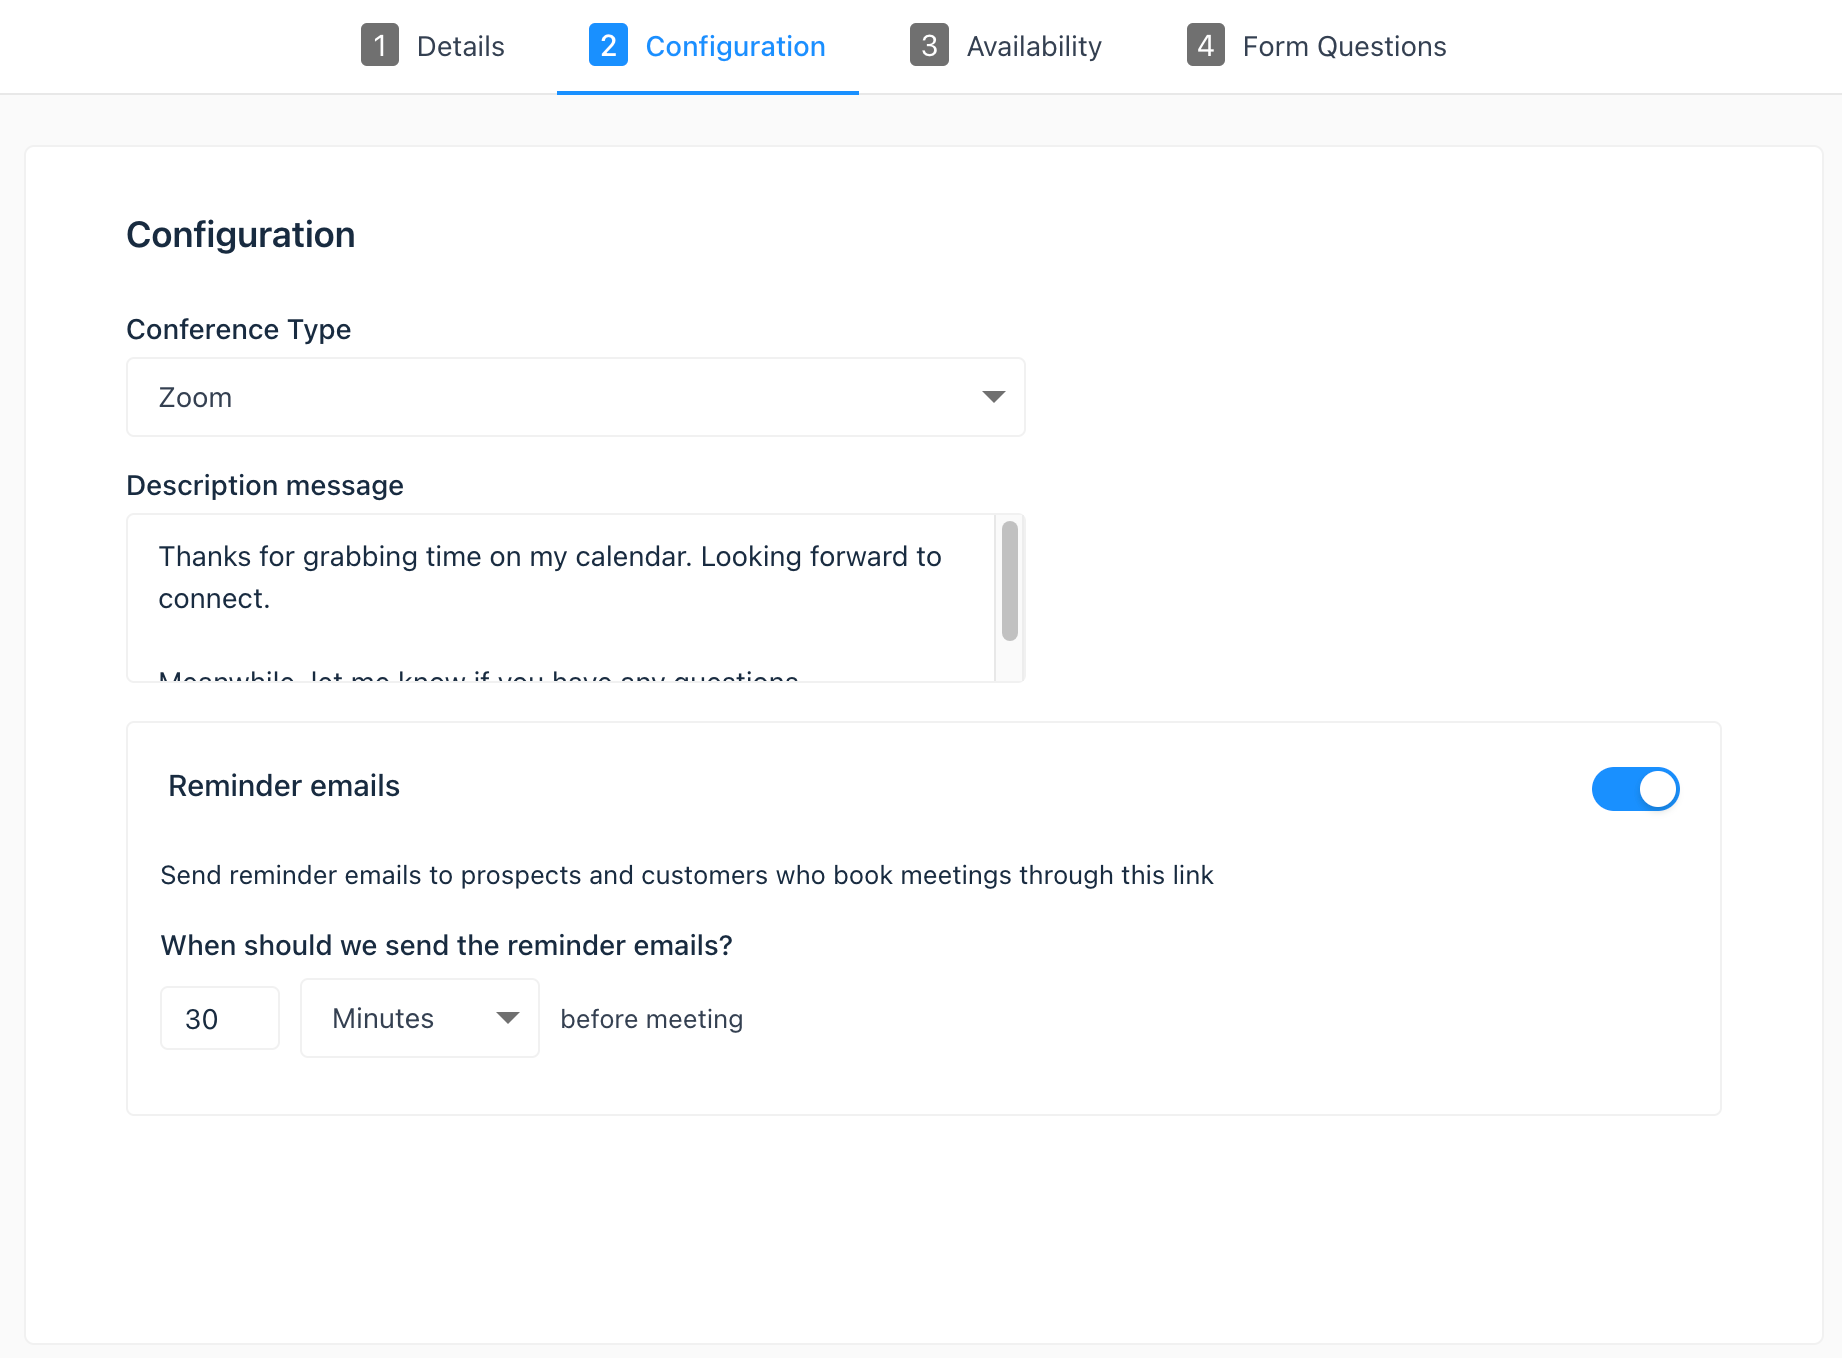
Location: include information about how and where you will connect with your meeting attendee. This can be a call-in link, a physical location, etc. This location will appear in the contact's calendar invite, and the event created on your default personal calendar.
Add videoconference link: if you're using Gist's integration with Zoom, or Google Meet, you can add a videoconference link. If you have not set up a videoconference integration, you will not see this option.
Description: a description of the meeting that appears in the invite when a meeting is booked. This description will appear in the calendar invite your contact receives and the event created on your default personal calendar.
Reminder emails: To send reminder emails before a meeting, click to toggle the "Reminder emails" switch on.
To select how many days, hours, or minutes before the meeting that an email should be sent out, enter a number in the text field, then click the email dropdown menu and select a time measure.

Availability
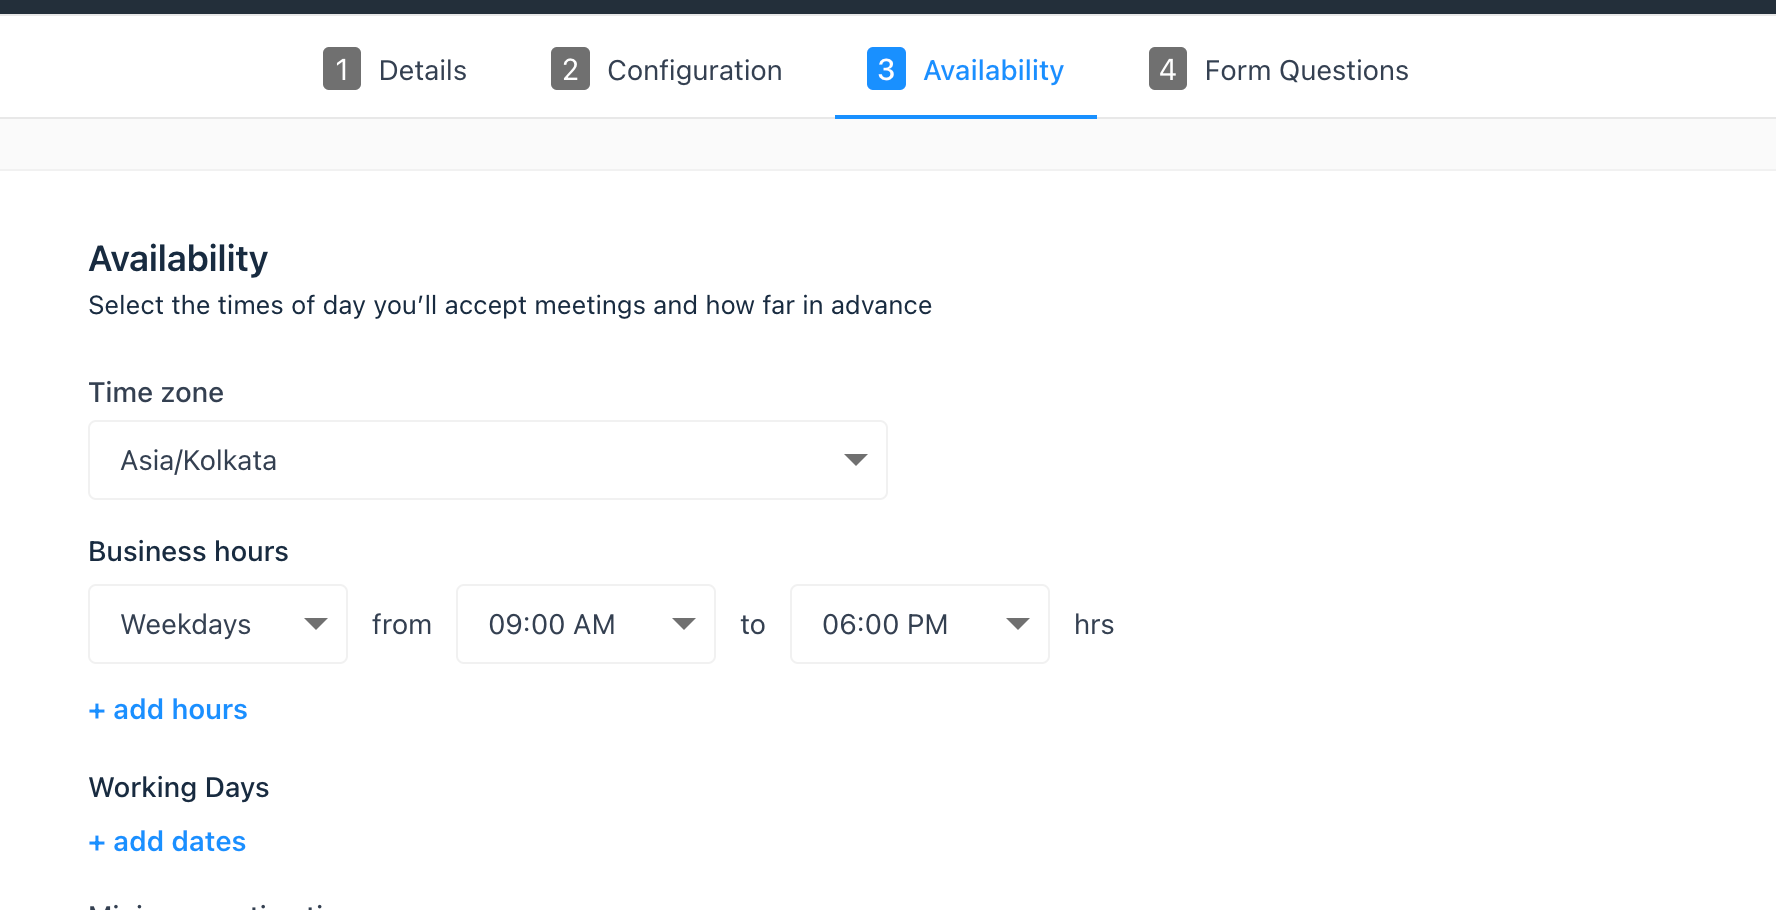
To understand when you can accept new meetings, Gist looks at your availability from two main places:
- Your connected calendar, like Google, Outlook, etc.
- Your Gist schedule, which you’ll set up in this step
Timezone: click the Time zone dropdown menu and select your time zone. This is the time zone that your availability is based on.
Available times: use the dropdown menus to set the days of the week and duration of your available time slots. Click + Add hours to add additional time slots.

Minimum notice time: This is the minimum amount of time before a meeting can be scheduled. This ensures that you are never caught off guard with a last-minute meeting.
Before buffer time: This time prevents meetings from being booked too closely together and controls the buffer time added before a meeting starts. For example, if you have a meeting from 1:00 - 1:30pm and have a "before buffer time" of 30 minutes, your calendar would be unavailable from 12:30pm - 1:00pm.
After buffer time: This time prevents meetings from being booked too closely together and controls the buffer time added after a meeting ends. For example, if you have a meeting from 1:00 - 1:30pm and have a "after buffer time" of 30 minutes, the next available meeting time would be 2:00pm.
Start time increment: set the frequency of your meeting start times. For example, if you are available between 10:00am and 12:00pm for a 60 minute meeting and your start time increment is 15 minutes, a prospect can book 60 minutes with you at 10:00am, 10:15am, 10:30am, and so on.
Max allowed meetings per day: This is the maximum allowed booked meetings per day for this meeting link.
Form questions
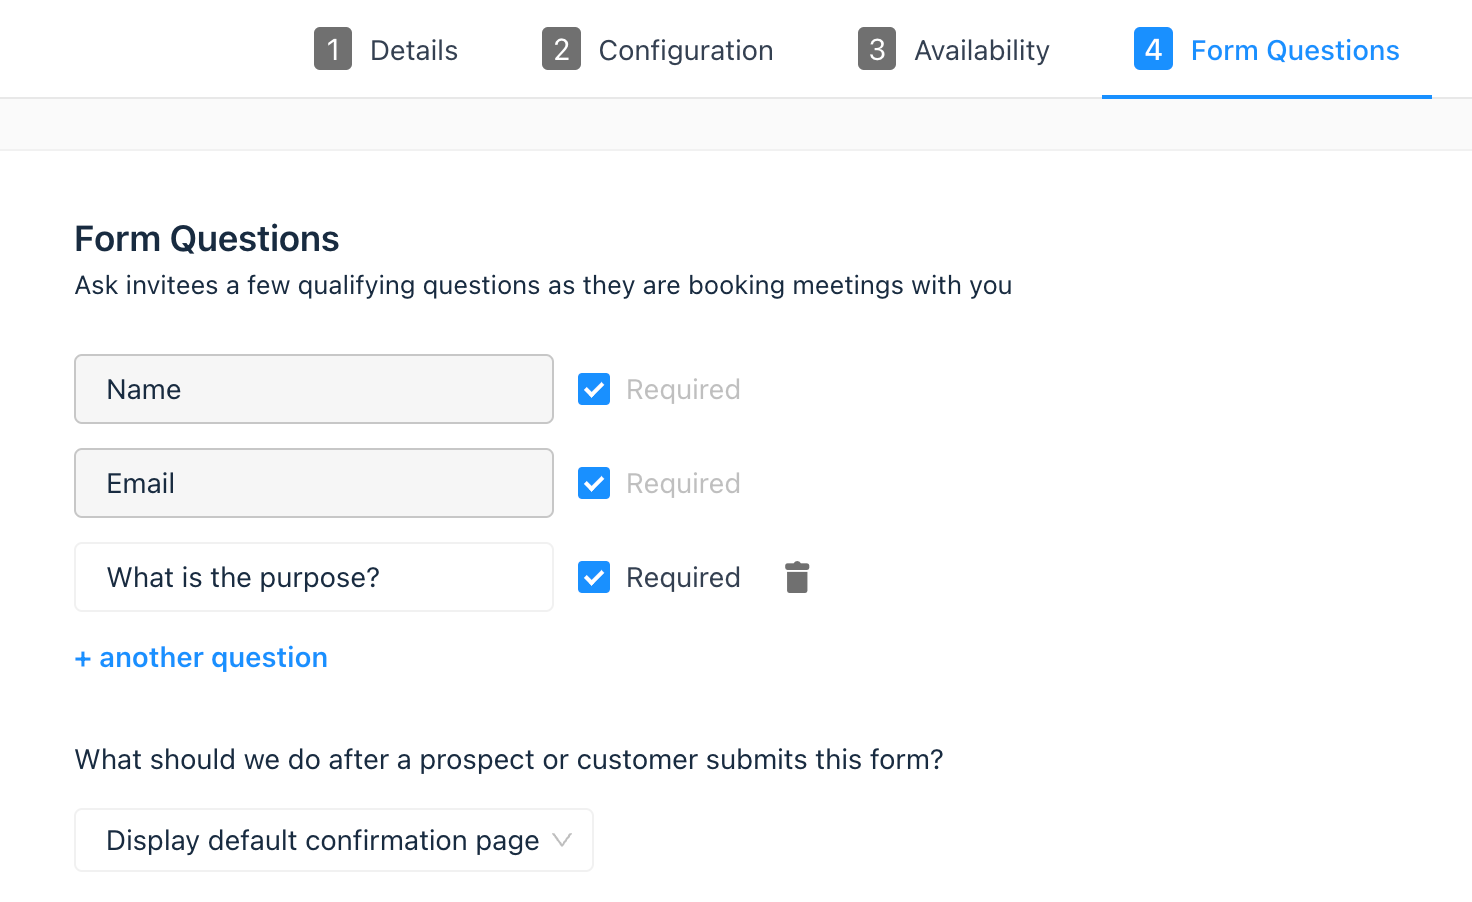
By default, Gist asks each invitee for their name and email address when they schedule with you. These are always required so meeting details can be shared automatically. You can also add additional questions to collect more information. Invitee answers will be saved to the meeting details and added to notifications by default.

You can now share a meeting link with your contacts so they can access the scheduling page and book time with you.
Need Help?
If you have any further questions, please start a Live Chat. Just "Click" on the Chat Icon in the lower right corner to talk with our support team.


